
In this tutorial, I will show you the easiest and the fastest way on how to make 3D printed QR codes.
This tutorial is perfect for those who just wants to print a simple QR code tag, keychain or whatever and don’t feel the need to invest that extra time and effort to make it super fancy.
So without further ado, let’s get right into it!
Table of Contents
What is a QR Code?
QR code, or Quick Response Code is a 2D barcode that you can scan e.g. with your smartphone to decode certain information and perform a certain action.
The other type of conventional barcode you see almost everywhere, is the 1D linear barcode, which only contain a set of numbers.

Unlike the 1D barcode, you can do so much more with a 2D or a QR code. You can use the printed QR code to direct someone to your website, share your social media profiles, or you can even use it to share Wi-fi network info to your friends, how cool is that? The possibilities are endless!
For this tutorial, Let’s create a QR code that directs users to my YouTube channel’s URL.
Of course, you could achieve the same the same thing by just printing out the QR code on a piece of paper, but where’s the fun in that?
Step 1: Generating the QR Code
To create a QR Code of your own, you need to use an online QR generator. There are a lot of popular websites you can visit like:
- QR Code Generator (you need to sign up in order to get the code)
- QRCode Moneky (free to use, and you have a lot of options to customize your code)
- QRcode2STL (free to use, automatically generates a 3D STL file)
There are some websites that only generate a picture of a QR code for you.
The problem is, you then need to convert that picture your QR code to an SVG-type format file, which you then need to open in a CAD program like Fusion 360, Solidworks or whatever so you could edit your QR code and save it as an STL file.
That’s a lot of steps!
The one i recommend is the third one on the list, QRcode2STL.
Although you can’t upload your own picture or logo to incorporate it into your QR code, you do get a lot of other options to customize your QR code like adding icons, text, keychain holes and etc.
Their QR code generator even creates an STL file of your QR code so you literally just need download it, send it to your slicer software and print.
The website is very intuitive and easy to navigate. Let’s start with typing in the URL for my YouTube channel in the tab Text/URL.
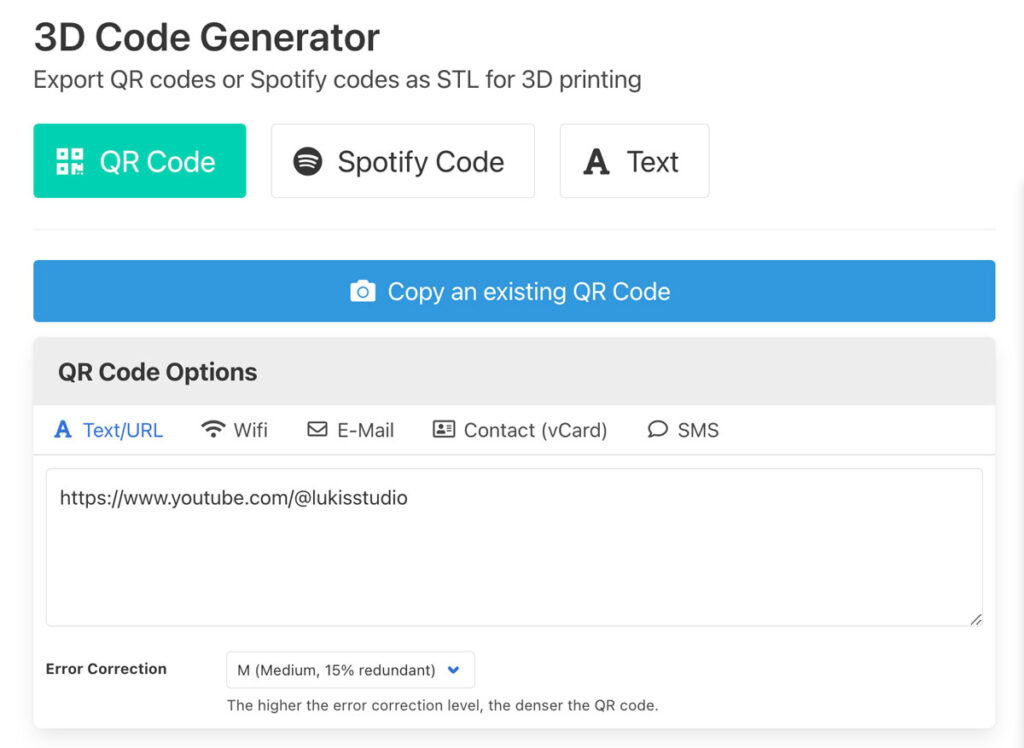
I want my QR code tag to be 50 mm wide, rounded and 2 mm thick for the base. I’ll just leave the rest as is.

Then hit Generate 3D model and wait for a few seconds. Preview your generated 3D model of your QR code in the preview window and make sure to use your phone to scan it to make sure that it’s working!

You can even add text to your QR code, e.g. “Subscribe” below the code. The downside is, you can’t change the font style so your options are kinda limited.

There are other fun things you can do like adding keychain holes or a recess for RFID chip so make sure to check that out!
Step 2: Download the STL file
The next step is to download the STL file. For the STL file type, choose binary. Why binary? Binary STL files are generally smaller in size, they can be read faster, they’re more accurate and are more widely supported by 3D printing softwares.
Then choose no for the option separate parts and click Save as STL and it will get downloaded automatically to your computer.
Step 3: Open STL in a slicer software
Once you have download the STL file, open it in your favorite slicer software. In this case, I’ll be using Bambu Studio to slice, to edit the color and to print my QR code tag.
You can also just click-and-drag the file onto the active plate in Bambu Studio.
Step 4: Adjust print settings
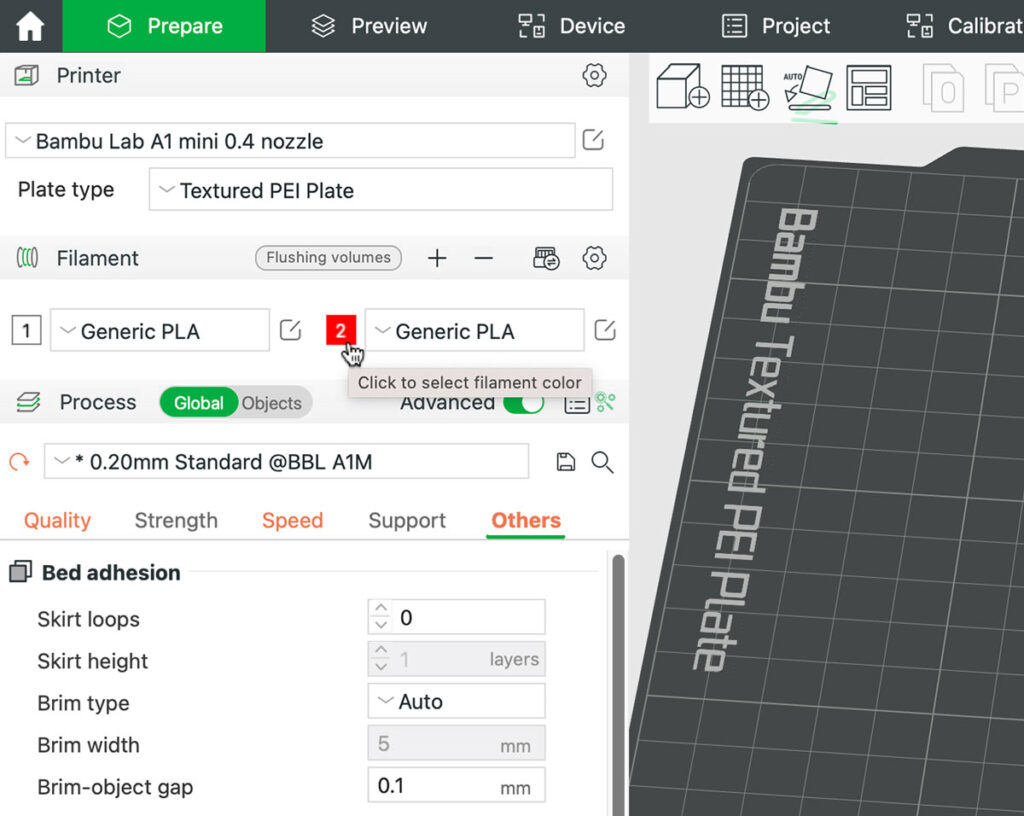
Before we start slicing, let’s adjust some print settings. I’ll be using my A1 Mini printer to print the QR code. I’ll also be using the standard 0.4 nozzle that comes with the printer so make sure the System Preset is set to Bambu Lab A1 Mini 0.4 nozzle.

Let’s use textured PEI plate and set the global layer height to 0.20 mm Standard. You can go even lower, like 0.12 mm if you want less visible layers, but I find 0.20 mm to be perfectly fine.
Now since we’re printing small details, there’s only so much that we can do to improve the printing quality. One thing you can do is to enlarge the model so you don’t lose the details too much.
However, we can still change some settings to further improve the printing quality. Let’s activate the Advanced print settings menu by toggling the button next to it.
Head over to Quality and change Wall generator from Classic to Arachne and bring down the Mininum wall width to 15%.

In some cases, turning on Arachne will help improve your printing quality especially if you’re printing fine lines. Look at these sharingan eyes i printed. The left one was printed with Classic wall generator and the right one with Arachne.

We also want to slow down the print speed on the top surface, so hover to the Speed tab, and reduce the Top surface speed to 50 mm/s.
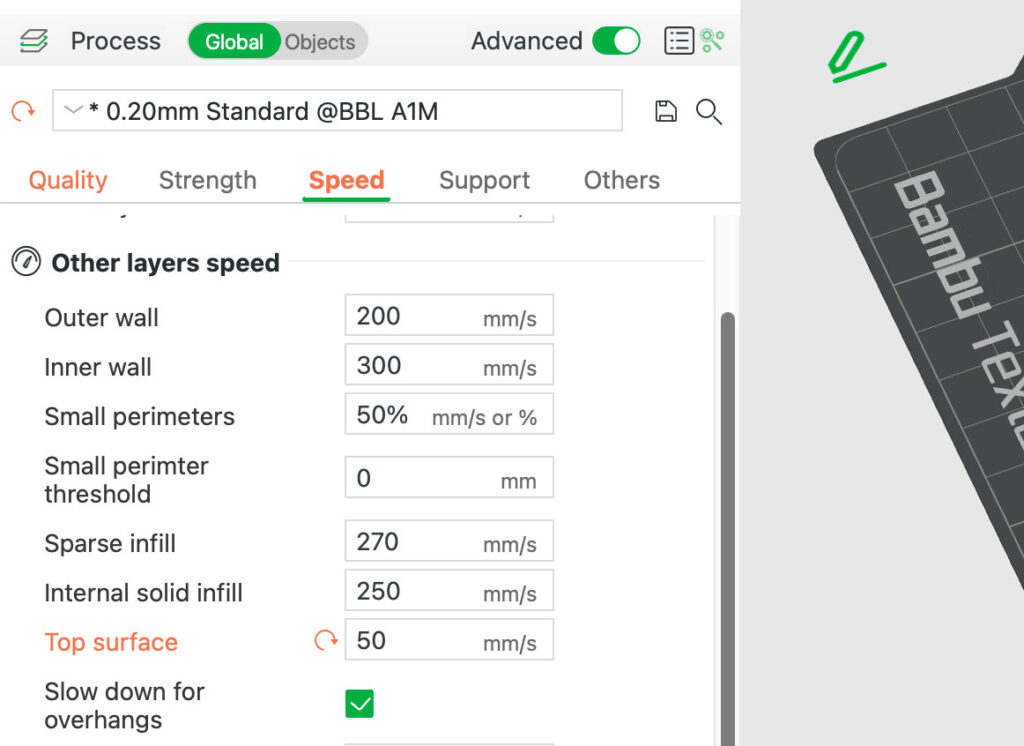
Keep in mind that it’s going to take longer to print though. You can risk it and set the printing speed to default. It might not affect the scannability of your QR Code that much. I’ve actually printed the QR code both at reduced speed and at default speed and both codes work.
Leave the rest of the settings as is.
Step 4: Painting the model
Now let’s use the paint tool to paint the 3D model of our QR code! The generated STL file doesn’t contain any information about the colors of your model so when you open it in the slicer, that’s why it’s basically just in one color.
So you need set the color manually in the slicer. Of course, if you don’t own a printer that supports multicolor printing, you can skip this step altogether.
The paint tool won’t show up if you only have 1 filament. It only shows up when you have more than one, so let’s add a new filament by clicking the plus symbol, and set its color.

We’re only going to be needing 2 colors here which is black and white. Of course you can get creative and print your QR code in other different colors, but keep in mind that it might affect the readability and scannability of your code.
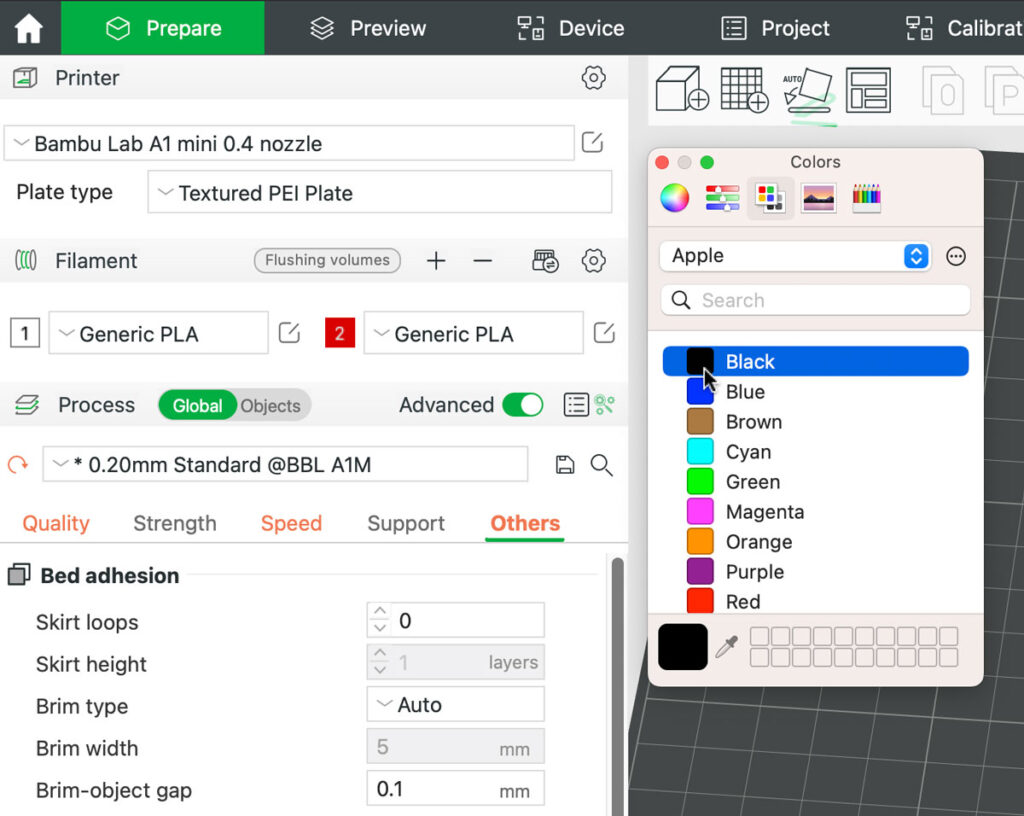
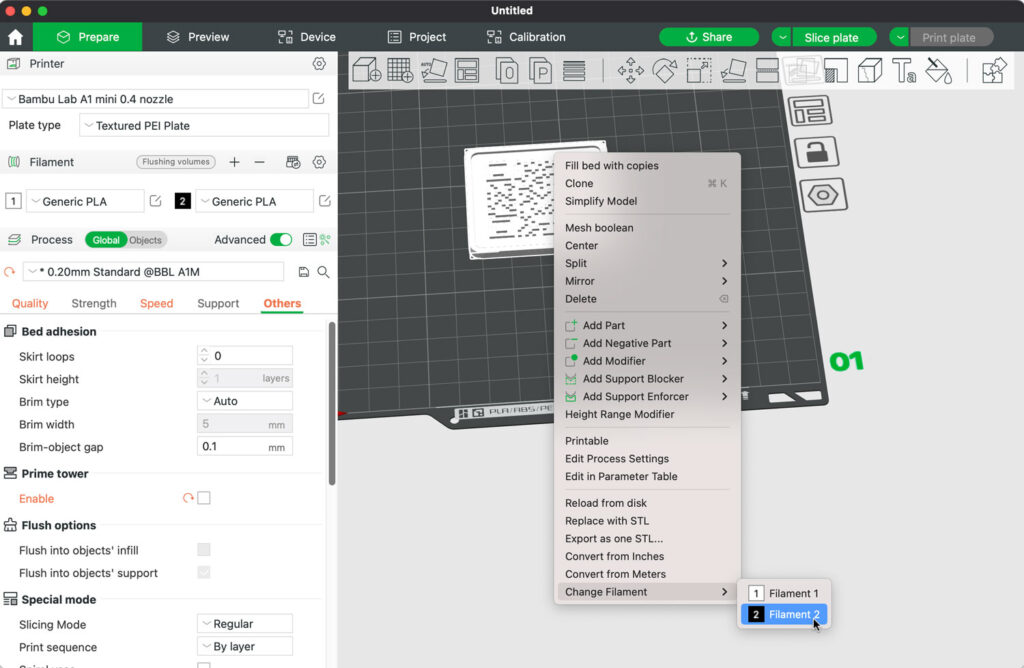
To paint your model faster, you want your model to be black first. If it’s not already black, right click on it and scroll down to Change filament and select the color black.
Then hover to the top bar, and click the paint tool. Select the white filament and use the fill tool and paint the base white by just clicking on the flat area of the base.

You also want to paint the bottom and the sides (2 mm) white. Leave the code (squares) and the border of the code black.
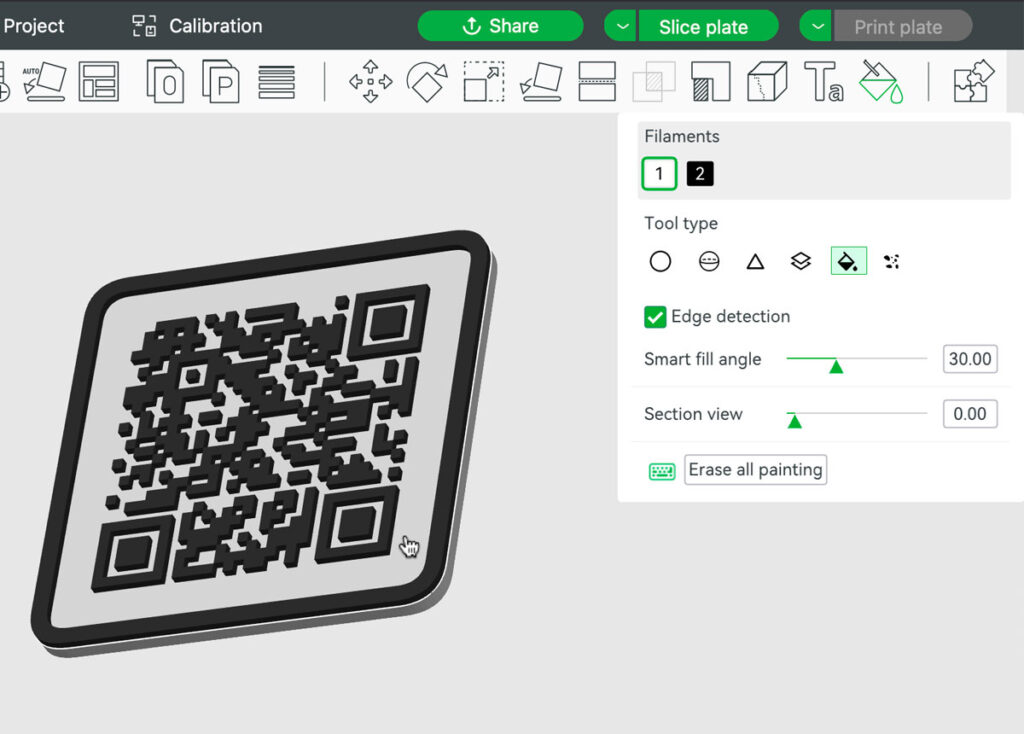

When you’re done, double check to see if the code is working using your smartphone.
Step 5: Slice
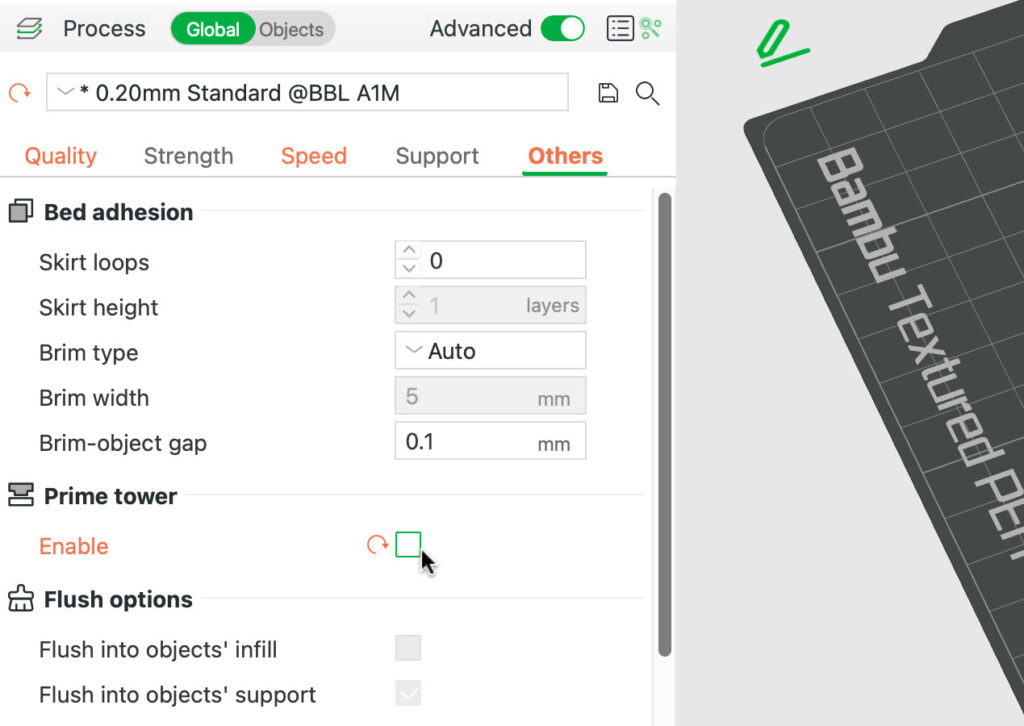
Next, let’s slice our plate. Hover to the top bar and click Slice plate. Pay no attention to the blocky figure on the plate. This is a prime tower that our slicer generated. Not to be confused with the purge tower though.

The purge tower is necessary when our printer needs to go through the purging process when it changes from one filament to another. This process also produces a lot of purge waste, which is usually called poop in the 3D printing community.
Since we’re printing the first 2 mm layers in white, then the rest in black, our printer only needs to change the filament once. So the poop problem is not really something that we have to worry about here.
On the other hand, prime tower‘s purpose is to prime the nozzle and ensures consistent flow and pressure. You can turn this off by going to Others, uncheck Enable under the Prime tower option to disable it.
If you change any of the settings, make sure to slice your QR code again.
Step 6: Print
If you have a 3D printer that doesn’t do multicolor printing, you might need to pause your print at a certain height and change out the filament manually.
On the other hand, if you have the AMS (Automatic Material Management System) or the AMS lite, printing the QR code is going to be super easy. You just need choose the correct spools and then hit print.
You even get an overview of how many grams of filament will be used and how long the print will take. Neat, isn’t it?

Click Send to start printing your QR code.

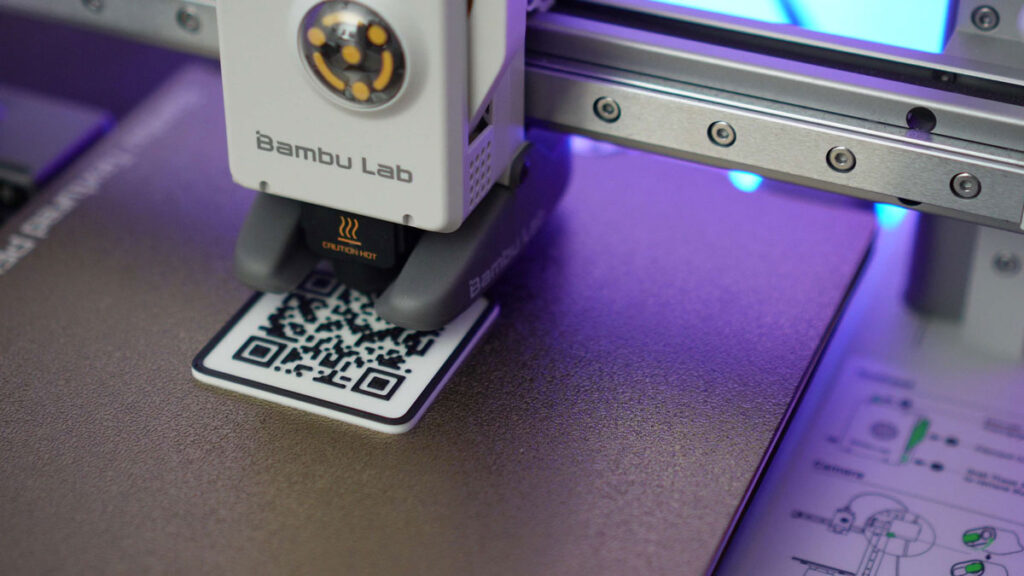
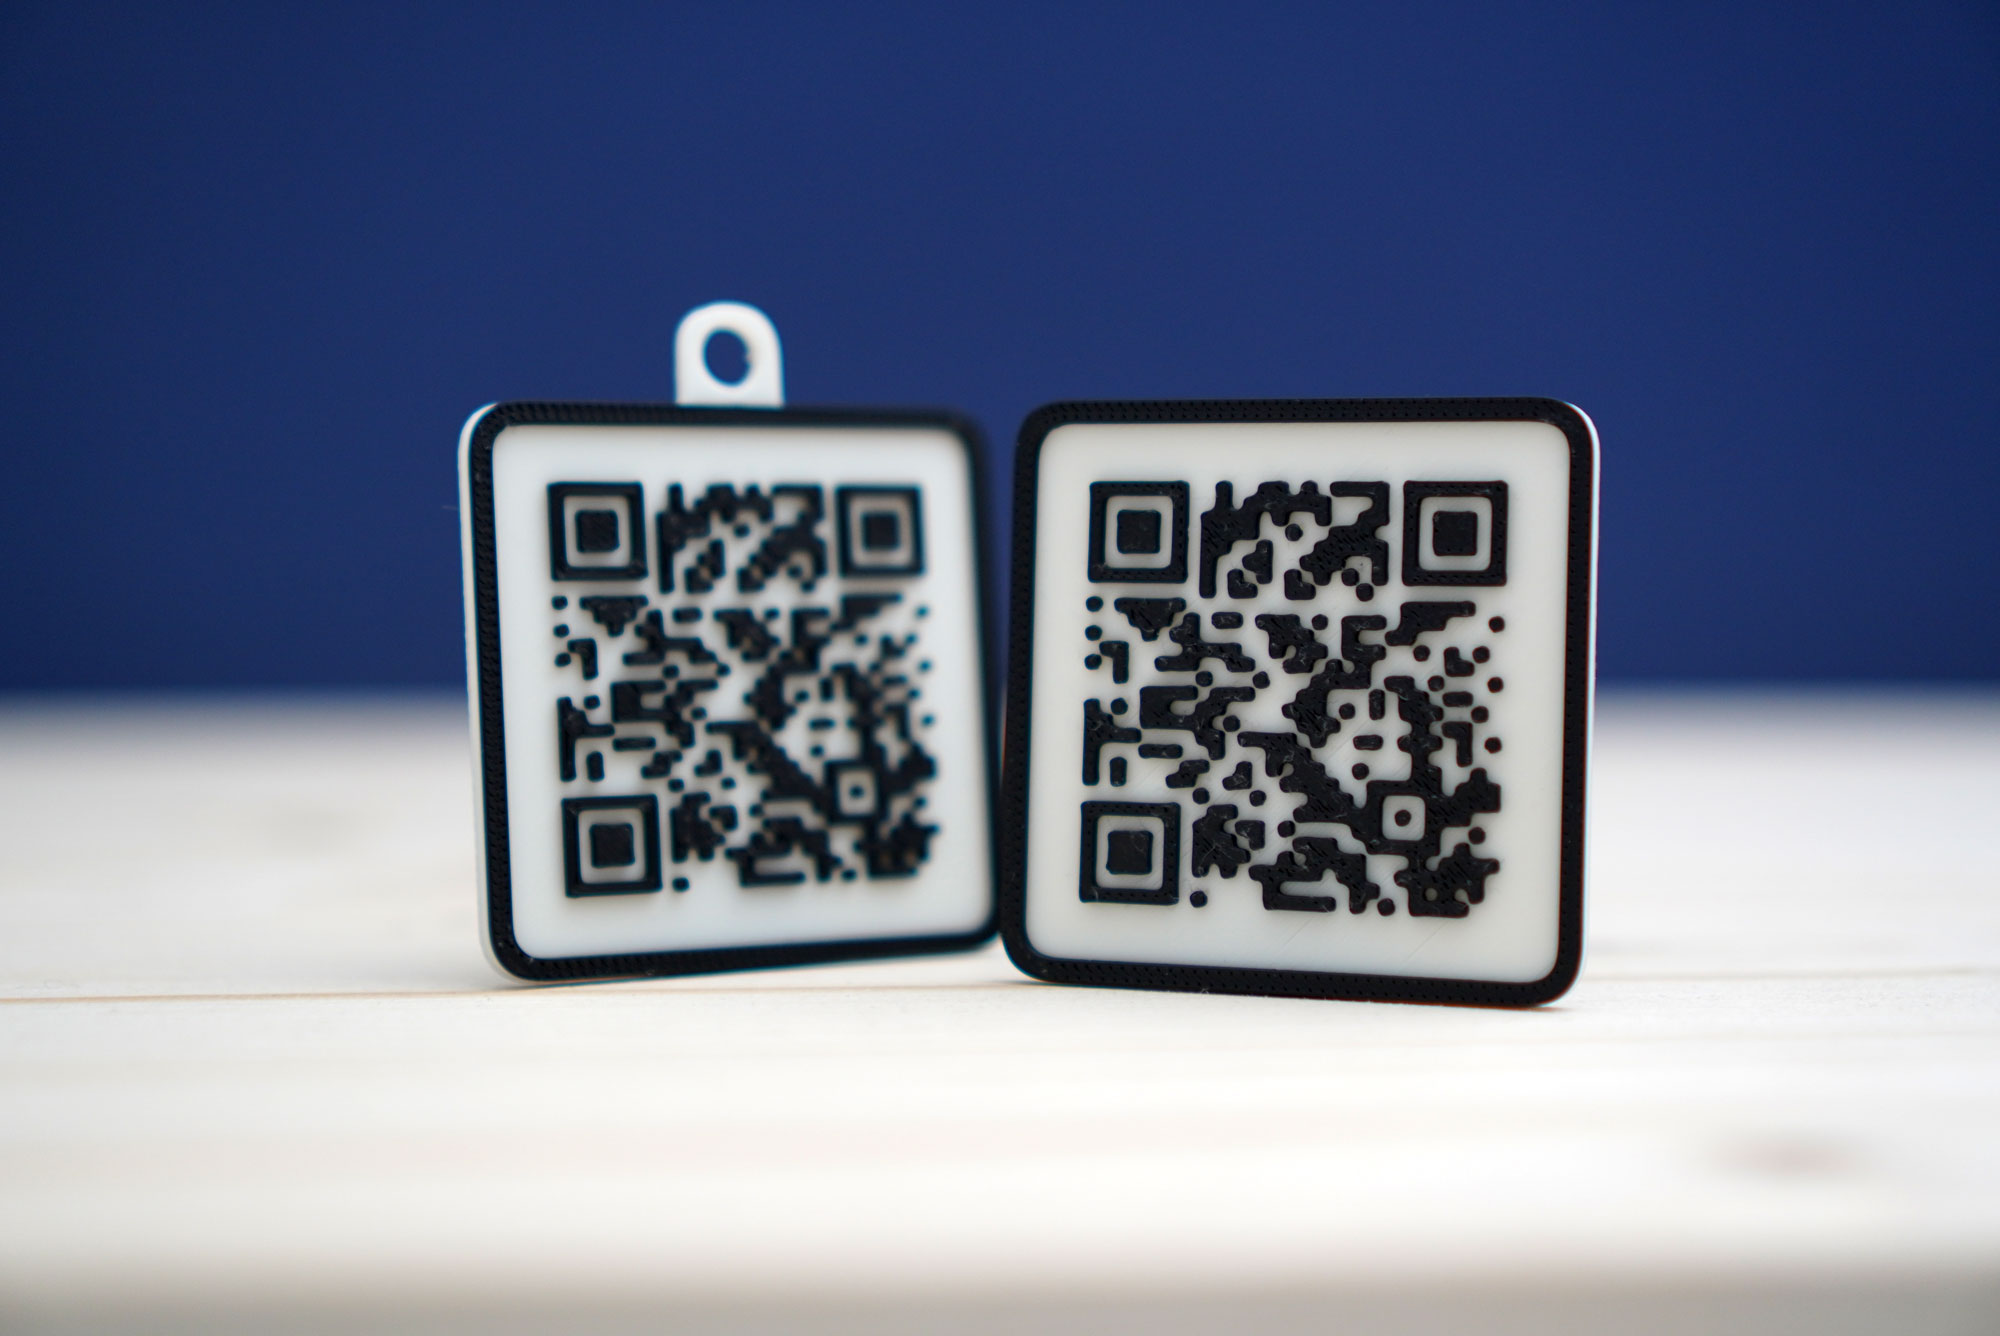
So here’s how my QR code tags turned out:

You can do so much more with a QR code, so here are some ideas of 3D printed QR code that you can make:
- Luggage tag
- Share Wi-fi sign
- Business card
- Sliding puzzle
- QR code cube
If you want to spice things up a little, you can make this really cool-looking QR code city tag!


Wan’t to know how i did it? Here’s a tutorial video on how to do it (tutorial starts at 04:30).

