
This post contains affiliate links. When you purchase through links on our site, we may earn an affiliate commission. Learn more about it here.
In this post, i will show you how to make a timelapse video with the A1 Mini, and it’s even better than the one that A1 Mini makes!
Sure, the timelapses made by the A1 Mini aren’t all that bad. It is certainly simple to set up. You just activate the timelapse feature in Bambu Studio and the printer will do everything for you.
But what if you want to have the options to vary the angle of your shot, or shoot your timelapses in 4K? Or even in different resolution and frame rates?
There are surely a lot of ways you can do it, but this method is probably the cheapest and the easiest method in my opinion, and it works perfectly for me.
Table of Contents
So before we start, here are the things that you’ll need:
- a camera (alternatively, a smartphone)
- a wireless shutter release remote for your camera (or smartphone)
- super glue
- double sided tape / any tape
Here are the parts that you need to print:
- the mount itself, which consists of 3 parts
- studs in various heights
- optional: mini guide frame
Camera & Remote
To make a timelapse video of your 3D print, you need to take a picture of each printed layer. You will then need combine all of those pictures taken and convert them into a short video.
So to take those pictures, just use any camera you have, it can either be a DSLR or a mirrorless one. You can even use a digital camera if you feel like it. The only thing’s that important is to get a wireless remote that works for that specific camera.
If you don’t have any, use your smartphone instead.
I have this old DSLR Canon EOS 550D camera (US: Canon Rebel T2i) that’s just laying around collecting dust, so I decided to use it to shoot my 3D printing timelapses.
I first thought of using a micro switch to sort of trigger the shutter and it seemed like a great plan. I actually had it all mapped out. I knew exactly how i would set it up.
The problem is, I would need to get the switch, the soldering iron, the wires etc. because I don’t have any of those and it would cost me around 50$ to 60$ to get them.
I mean, I wouldn’t mind investing in those equipments, but I also happen to have this infrared shuttter release RC6 remote for my Canon camera, so I put the idea of using the micro switch on hold and try to make use of the remote instead.

Mounting option
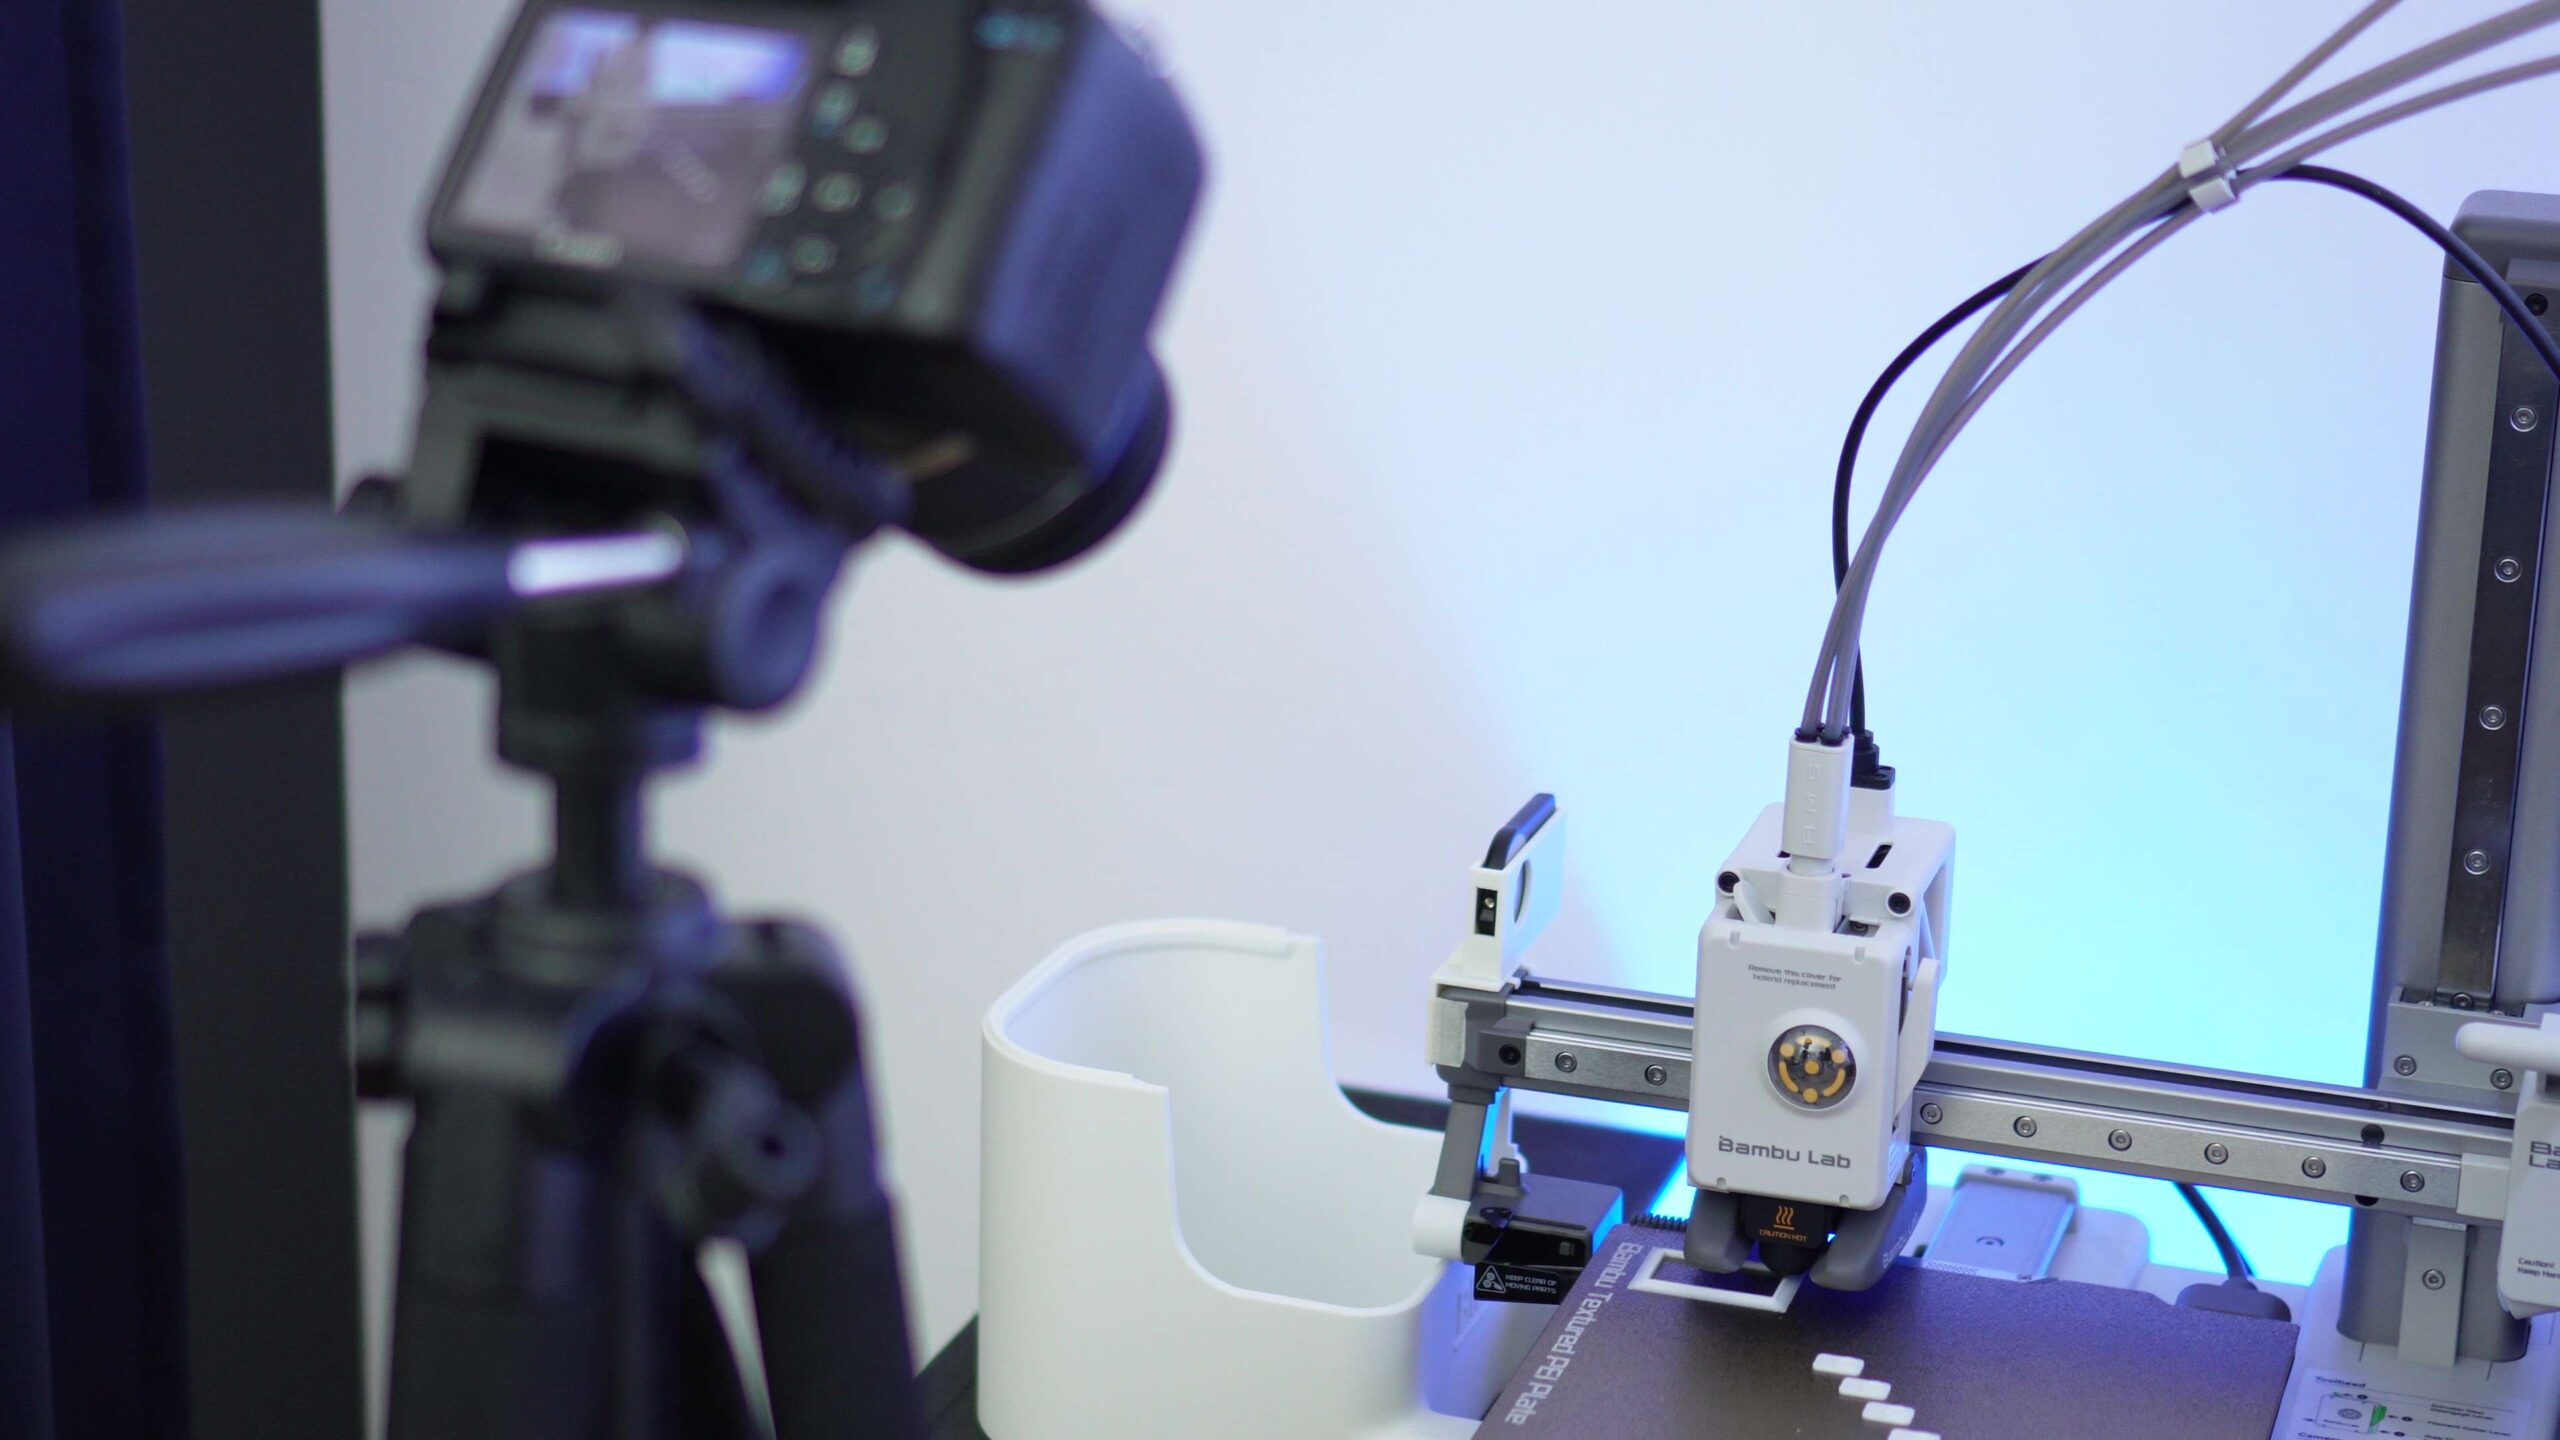
The next thing to do is to mount the remote somewhere on the printer. The most convinient and the most reasonable place to mount the remote is on top of the X-Axis cover.
If you activate the timelapse feature on Bambu Studio, the print head will slide all the way to the left after printing each layer of your model, taking a photo with its camera while at it. Now we are going to use that to our advantage.
What we only need to do is to figure out how to mount the remote on the A1 Mini. Sure, you can just super glue the remote on the top cover of the X-Axis and you’re good to go, but what if you want to change the remote in the future?
We don’t want the mount to be permanent. It needs to be easily removable and replaceable.
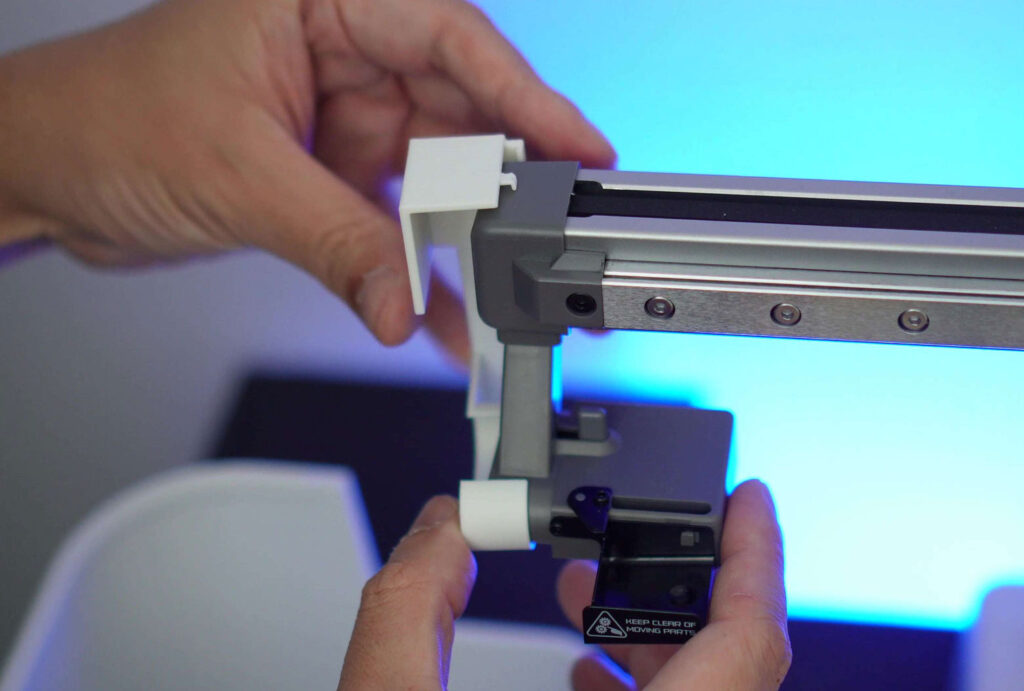
So in order to do that, I came up with this design:
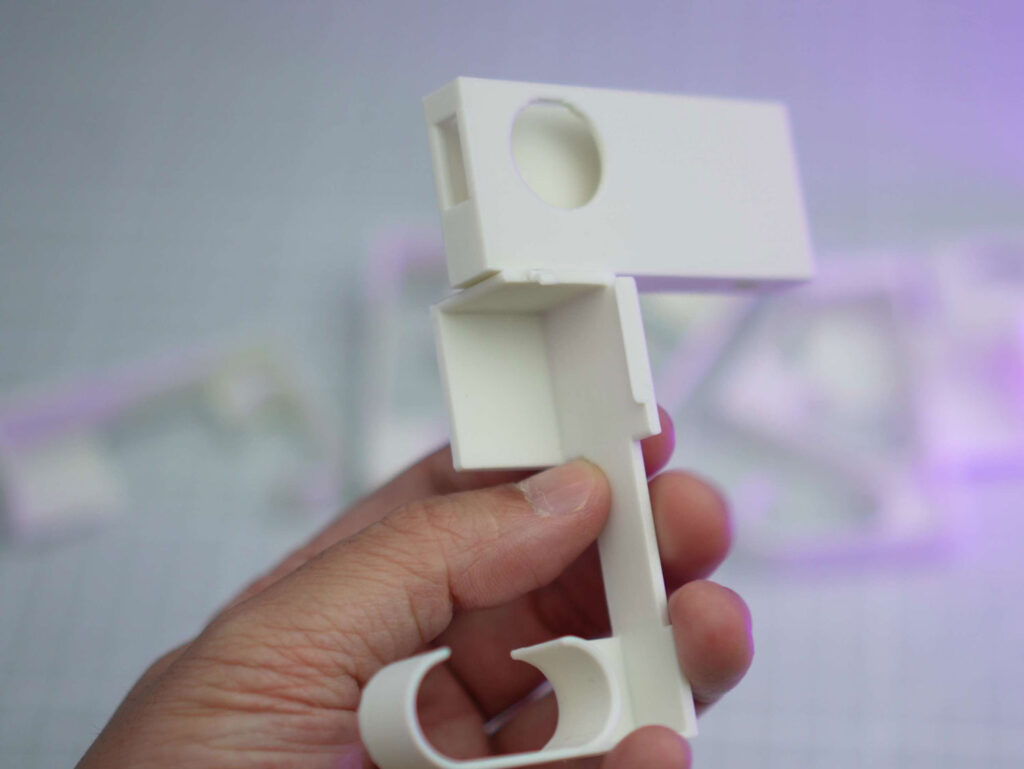
It is super easy to mount and dismount, and you can even change the holder of your remote control if you ever change the type of remote you have.
Maybe you want to use this Bluetooth shutter release remote for your smartphone and make the timelapses on smartphone instead. You can surely make it work!

The mount
Printing the mount
So how to set it up? First, lets print the mount which consists of 3 parts:

The lower part which attaches to the purge wiper;
the upper part which attaches to the top cover of the X-Axis;

the remote holder
Now you can even print the mount as one whole part if you want but I’ve tried it so many times and failed, so that’s why I decided to print them separately and just assemble them with super glue.
If you print them seperately, make sure to turn the support on. I like to use the tree support. You can also download the print profile for the mount here.
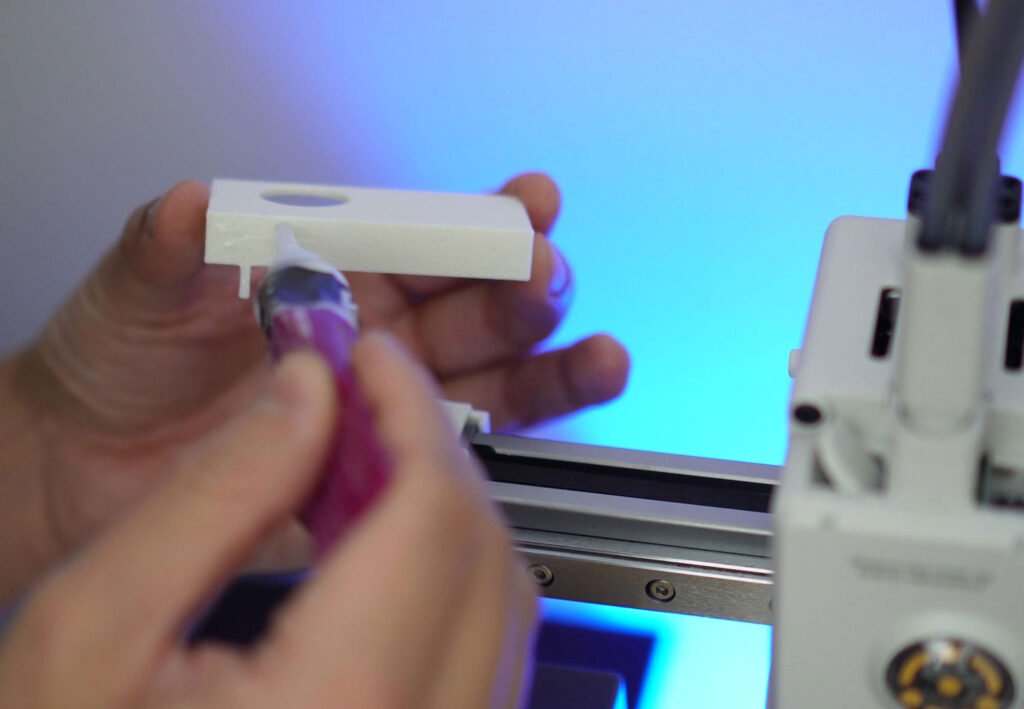
Printing the studs
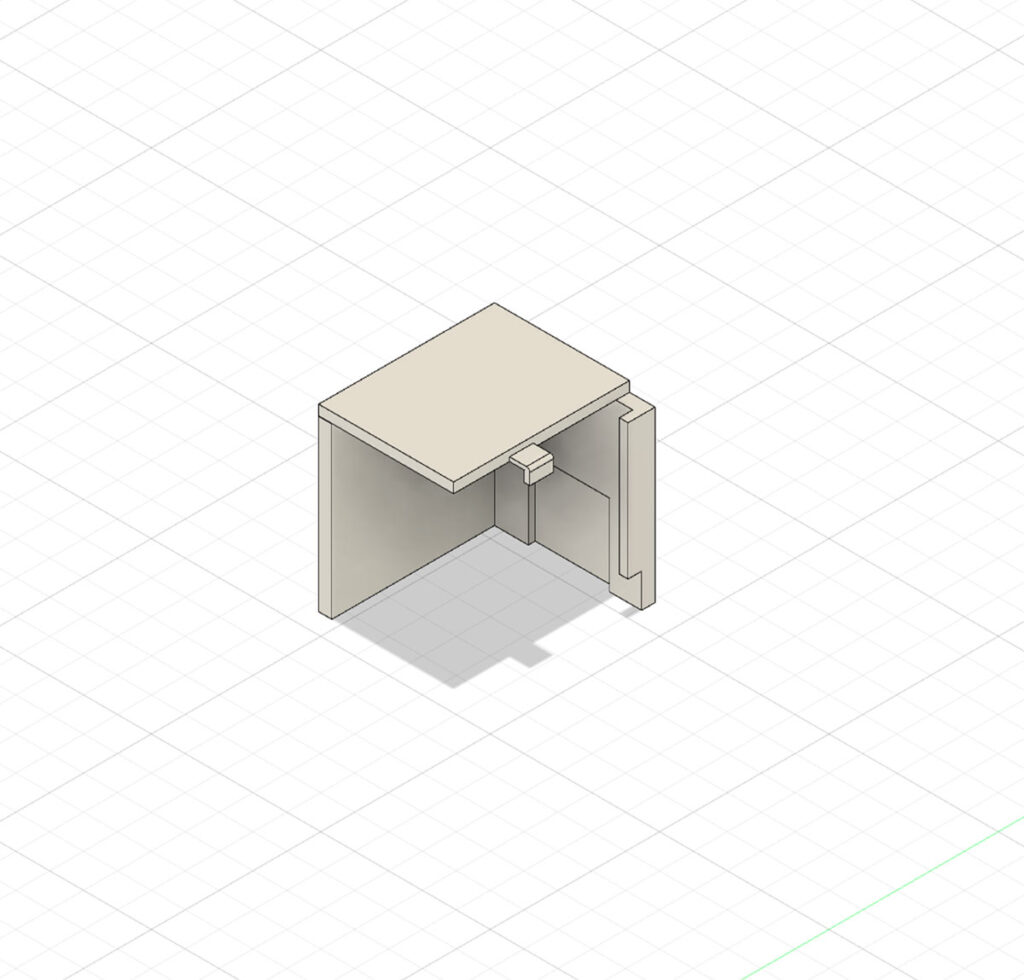
Next, you want to print this small piece of this stud and mount this on the print head. This stud will be the one pushing the button on the remote.

Since my setup might be a little different than yours, you might need a stud of different height. So i provided studs of various different heights in the same download file as above, so just print any that you would need and delete the rest.
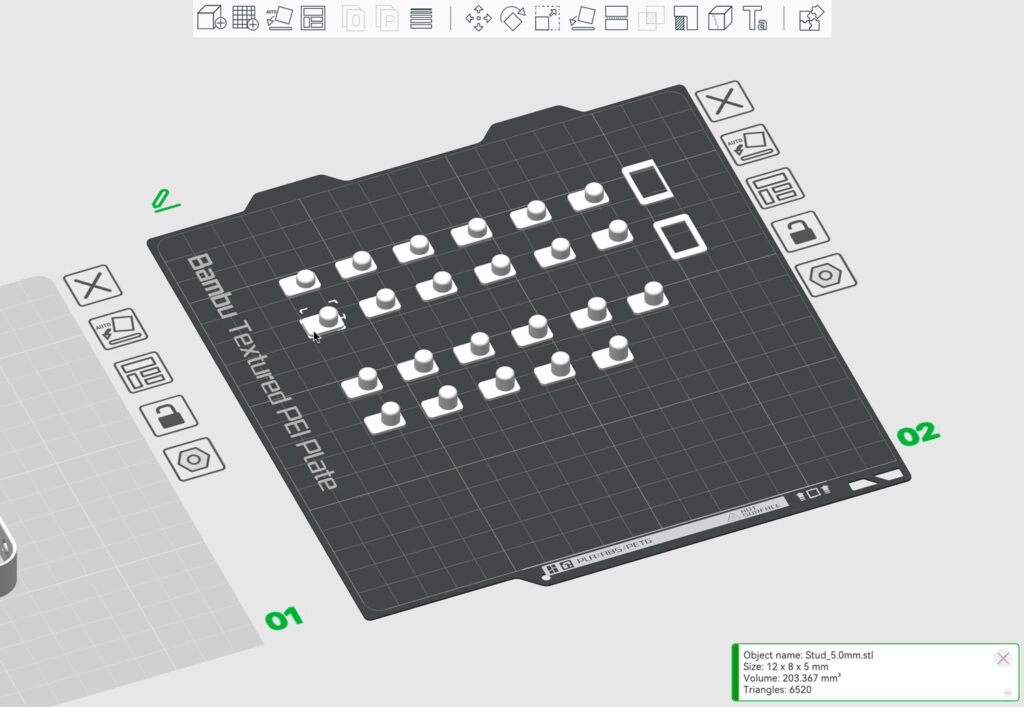
I would start off with printing the 4.5 mm, 5.0 mm, 5.5 mm and 6.0 mm studs and try out each one of them. You can always do the fine-tuning later.
Assembly
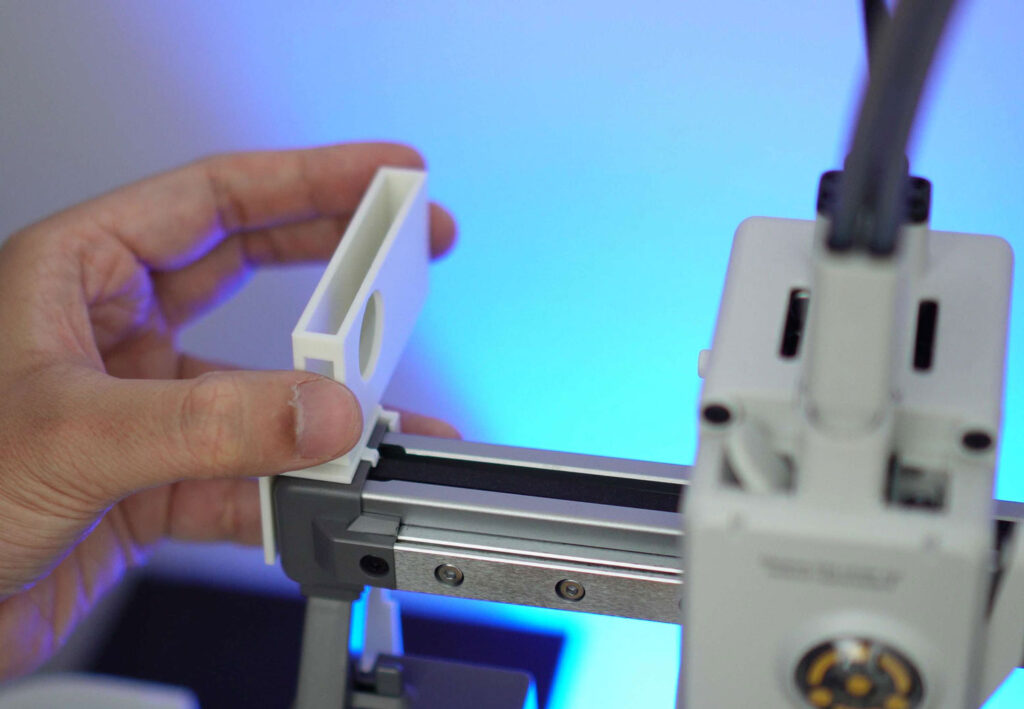
First, let’s assemble the mount. Glue the lower part to the upper part.

Wait for the glue to fully dry, and carefully slide the lower part of the mount into the purge wiper and the upper part of the mount into the cover the X-Axis. It will just kinda snap into place.

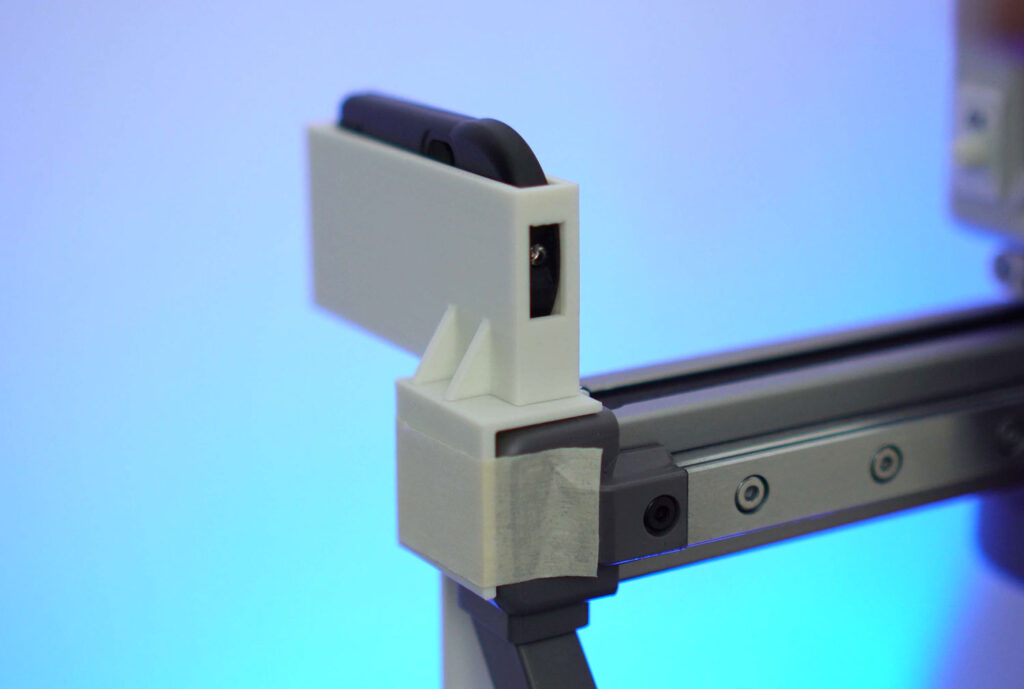
Now you need to figure out where to place the remote holder.
The stud will push the button on the remote, so you want the center of that push button to be in a perfect alignment with the center of the stud.It does take a bit of eyeballing, guessing and some trials and errors to know where exactly to place it.

Once you have that all figured out, super glue the holder onto the top part of the mount.
To stick the stud onto the print head, you can use a double-sided tape, but what I like to use is this small piece of blue tack. It sticks really well and I can easily remove it when I don’t need it.

The stud needs to push the button when you slide the print head all the way to the left, so start with the shortest one then work your way up. The stud that i use for my setup is somewhere between 5.3 mm and 5.5 mm in height.

Now you probably won’t need the small frame which you can see in the picture above. It’s supposed to be a guide that I stuck on there so If I ever want to replace the stud, I just remove the one that’s already on there and place the new one easily inside the frame.
The only thing that I haven’t quite solved is to stop the mount from sliding back and forth. The easiest solution for me right now is to use a tape. I mean it’s not the prettiest solution, but it works!

Activate Timelapse in Bambu Studio
Now open your project in Bambu Studio and set the timelapse to Smooth. This also means that your A1 Mini will automatically print a prime tower. You can deactivate it, but I recommend that you leave it on.

Then set up your camera, make sure to activate the timelapse by clicking the checkbox Timelapse and send it to your printer to start printing. Wait until it finishes printing the nozzle load lines, then insert your remote into the mount immediately.
If your project takes hours and hours to print, you should definitely get a dummy battery for your camera. And if you’re feeling fancy, attach a mini fan on your camera to prevent it from overheating.
Create timelapse from still pictures
On Mac, it is super easy to convert your pictures to a timelapse. Simply open Quicktime Player and select Open Image Sequence from the File menu. Select all the pictures, set the video quality and hit Open.
It will then generate a timelapse video for you. Save it on your computer and now you have a timelapse video of your 3d print and ready to be edited in your favourite video editing software!
Caveat
One thing to note is, if you use an infrared wireless remote, you can’t just place your camera anywhere you like. The infrared signal needs a direct line of sight between the remote and the sensor of the camera for it to work.
The remote won’t trigger the shutter if I place my camera on the right side of the printer, since the print head will be in the way. So in order to solve this, I mount my camera upside down so the infrared sensor won’t be blocked completely by the print head.
So I hope tutorial will give you an inspiration on how to make timelapses with your A1 Mini 3D printer. Just let me know in the comments if you have any questions and happy printing!
