
This post contains affiliate links. When you purchase through links on our site, we may earn an affiliate commission. Learn more about it here.
What’s the best camera for shooting overhead videos? I know that choosing the right camera can be a challenging task since there are a lot of great cameras out there to choose from.
I’ve spent so much time learning about cameras and trust me, it can be overwhelming. When I first started posting videos on my channel, I got a second-hand digital camera which I got from ebay and I filmed most of my videos with it. It wasn’t a bad camera; I mean it got the job done.
This is how my old setup with a Canon Powershot 300 HS looks like:

I’ve been wanting to invest in a better camera that can deliver the best quality for my content without breaking the bank. At one point of time, I bought 2 cameras which I thought would be a better replacement for my old camera, but I wasn’t happy with their performance.
I’ve been doing a lot of research and I’ve to say, it wasn’t easy. Most camera reviews out there are catered to photographers or content creators that vlog. There aren’t many reviews that cover contents that we artists create.
I mean we don’t care for bokeh effect, we don’t care for in-body stabilisation, we don’t care for cinematic shots. These are not essential features when it comes to shooting overhead drawing videos.
Table of Contents
So what are the features of a camera what we should look for?
1. Sharpness
One of the important features of a camera is the ability to film crisp, super sharp videos. As i mentioned earlier, I bought 2 cameras; Sony a6000 & Canon Powershot G7X.
These cameras were Full HD cameras. I’ve spent alot of time changing the settings on those cameras to the point that I was getting so frustrated because i just couldn’t get it right.
Please don’t get me wrong, the videos weren’t bad. Afterall, they were Full High-Definition 1080p videos.
What I was going for though, was to film super sharp videos – so sharp that you could even see the texture of the paper. And trust me, if this is what you’re going for, a Full HD camera just wouldn’t cut it.
What you would need is a camera that can shoot in 4K. It makes a huge difference, i swear by it! After all, a 4K camera shoots in a much higher resolution than a Full HD Camera.
And you don’t have to break the bank by getting an expensive 4K camera. A budget 4K camera would do just fine. Mind you, we are shooting overhead drawing videos here, we’re not trying to shoot cinematic travel videos.
Most current 4k camera models come with kit lenses. Although they’re generally not that bad, if you have some more money to spend, you should definitely invest in a good lens. Read more about my recommended lens below.
2. Mirrorless
The most popular type of camera that is widely used by content creators is a mirrorless type camera, though some creators still use DSLR cameras.
You could go on an endless debate about which one is better, but here’s one thing that you should consider: All camera manufacturers with big names switched their focus to mirrorless technology and are slowly abandoning their DSLR cameras.
In fact, we hardly see any new DSLR camera releases nowadays. Mirrorless cameras are the future.
Aside having newer and better technology, one other thing that’s worthy of mentioning is that mirrorless cameras are generally smaller and lighter than DSLR cameras.
But which kind of mirrorless cameras you should get? There are 2 different types of mirrorless cameras: APSC and Full-frame.
Full-Frame cameras are the best out of the two, but they are also more expensive and are bulkier, thus heavier. Having a compact, lightweight camera is necessary when shooting overhead videos.
You don’t want to mount a heavy camera on an overhead setup for obvious reasons. Unless you have a sturdy setup, you should pick up an APSC camera.
3. Focus
One thing that’s important for artists like us while shooting an overhead video is that we want the camera to focus on our drawings without switching focus to other subjects. An auto-focus feature is not a priority and, in most cases, unwanted.
Imagine if your camera continuously goes in and out of focus because it tries to focus on your hand instead of your drawing. It would distract the viewers and make them go insane!
What you want is a camera that can focus on a subject and won’t switch focus on its own. Your camera lets you do this by setting it to manual focus.
Some camera models let you manually adjust the focus by rotating the ring on the lens or, if you have a Sony Camera like I do, you could just tap on the screen and it will lock focus on whatever you want it to focus on, automatically.
It’s a very neat feature especially if you like shooting your videos in different angles, you won’t have to constantly rotate the ring on your lens every single time.
4. Recording time limit
Unlike vloggers, we record long sessions i.e. we record our videos for an extended period of time in one sitting. On average, i would need an hour to finish a drawing and one thing that annoyed me the most when i was using my old camera was the recording time limit.
It could only record for 10 minutes. And you know what that means: I had to keep tab on the time and had to hit the record button every 10 minutes, constantly!
You definitely want to invest in a camera that has no recording time limit. You’ll want to shoot your videos without ever having to worry about your camera stops recording on its own.
So now you think to yourself, a camera with no recording time limit is probably useless if the battery keeps dying, right? I’ll have that question answered in the next section below.
5. Battery life
Even if your camera has no recoding time limit, you can only record so much before your battery dies. If it dies on you, your camera stops recording that means you will lose your footage and need to start over.
So does that mean that you should get a camera with great battery life? I’m going to tell you that you don’t have to!
We aren’t vloggers so portability and mobility aren’t that important. If you’re shooting drawing videos, chances are, that you have a permanent camera mount setup.
The solution is rather simple: dummy battery. This way, your camera will always have juice to keep it running. An original dummy battery from the same manufacturer as your camera’s manufacturer is your safest bet, but the no-name ones work just fine.
What you should worry about is the overheating issue. An overheated camera may turn off on its own.
My camera doesn’t have any overheating issues yet (knock on wood), but in case that it might, there are several ways you can prevent it. I’ll cover that in the later section of this post.
6. Flip screen
To see what you’re actually recording, a flip screen is absolutely necessary!
Of course, you can invest in an external monitor, but if you’re just starting out, you’ll want to go for a simpler all-in-one setup.
There are a lot of camera models out there with flip screens, but what you want to look for is a camera with a flip screen that’s mounted on a swivel, where you can flip the screen away from the camera body, which then lets you rotate it 360 degrees.
And why is that important? You want to have the option to mount your camera at odd positions, but still have that ability to angle the screen towards you. Best thing is, if you want to shoot vertical videos for your TikTok, Instagram Reels, you can totally make it work!
Here’s how flexible my Sony camera is:

Conclusion and Recommendation
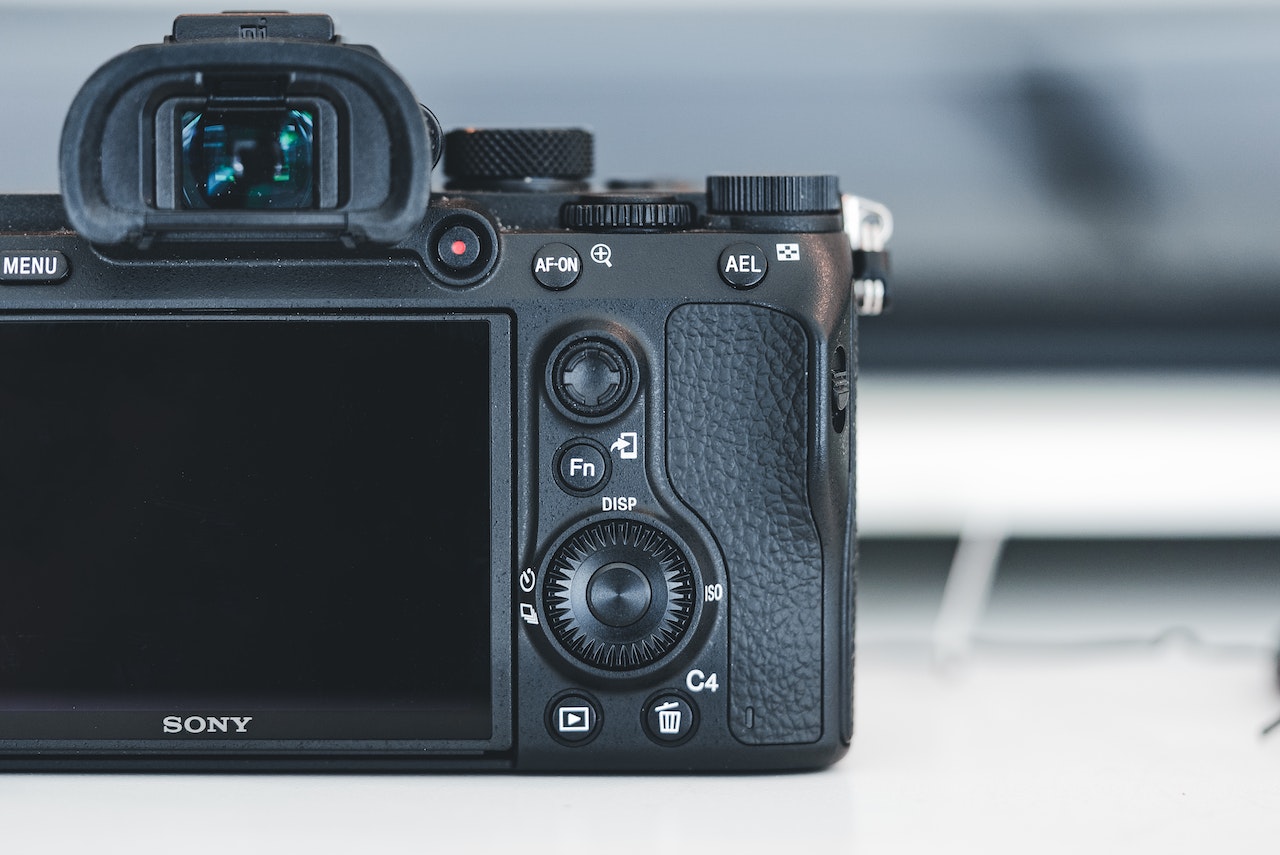
So why did I get the Sony ZVE-10 camera? If you’ve read this far and went through every single point I’ve written above, the Sony ZVE-10 camera is a camera that fulfils all the criteria that I was looking for. Here’s a summary of what it can do:
- It can record in 4K
- It is a mirrorless APSC camera, a future-proof camera
- It is relatively lightweight and compact
- It can manually focus on a subject quickly with just a tap of a finger
- It has no recording time limit, as long as the memory card permits it
- It can be used with a dummy battery
- It can record 1+ hour videos without overheating
- It has a flip screen that can rotate 360°
- It is a budget-friendly camera
Do I recommend this camera for artists that are just starting out on Youtube or any other platforms? Absolutely yes!
Sony Alpha ZV-E10 APSC Mirrorless Vlogging Camera
This is the best camera to get if you’re planning to start your own art channel.
- Kit lens: 16-50mm f3.5 (the lens are interchangable)
- 1x Optical zoom
- 24.2 Megapixel sensor
- Comes in black and white body
- Vari-angle LCD screen

Additional gears you can get:
1. Memory card
Picking a memory card can be overwhelming. You type in “Memory Card” on Amazon and you’ll get thousands of search results. You now have no idea which one to get. It can get really technical quickly if you try to understand the differences between memory card types or their writing/reading speed.
I could write a whole blog post about it, but let’s save that for another day. The best way to pick a right memory for your camera is to look for your camera’s manufacturer recommendation on their official webpage. For Sony ZVE-10, you can look for it here.
I record my video in XAVC S 4K 60Mbs so Sony recommends a SDHV/SDXC memory card Class 10/U1 so I just stick to that recommendation. You can go with practically any brand, but I went with SanDisk since I’ve been using memory cards from them for years and never ran into any issues.
Which memory card capacity you should get is also up to you. You can record a 4K footage of up to 3 to 4 hours with a 128GB memory card so that’s more than enough.
You could also get two 64GB memory cards and keep switching them. Or two 128Gb memory cards if you so will, why not?
Here’s the memory card that I use:


2. Prime lens
I never had to worry about the exposure settings on my camera or took extra steps to set it up. I turned the camera on, hit the record button and that was it. And the videos turned out great. They were neither overexposed nor underexposed. Until they weren’t.
It all changed after i moved in into a new apartment.
I quickly realised that my videos i shot in my new apartment were nowhere as good as my previous ones.
That said, my previous apartment had huge windows so i’ve got plenty of natural light during the day. Natural lighting, is hands down, the best lighting you could ever ask for when shooting drawing videos. The downside is, you could only shoot during the day.
My new apartment is kinda dark so that was problem number 1, and due to my busy schedule i couldn’t shoot during the day, that was problem number 2.
I had 2 problems that i needed sorted out. I thought getting new lights would solve my problem, but it didn’t. The lights were great, the problem was getting the ideal exposure setting on my camera.
Too much light, your videos will end up over-exposed. Too little light, your videos will end up under-exposed. My older cameras could never get it right somehow.
I later understood that i what i needed was a lens with a bigger aperture. The bigger the aperture, the more lights can your camera let in. And that’s what you want.
Keep the amount of lights to a minimum, while cranking up the lens aperture. Once you found that sweet spot, you can shoot your videos anytime without ever having to tweak the settings.
Want to know which settings I use for my camera? Read about it here.
Which lens should you get? You’ll want a sharp lens with a big aperture. So that means you’ll want a prime lens with an aperture somewhere between f1.8-f1.4. You could get a zoom lens, but a prime lens is generally sharper than a zoom lens.
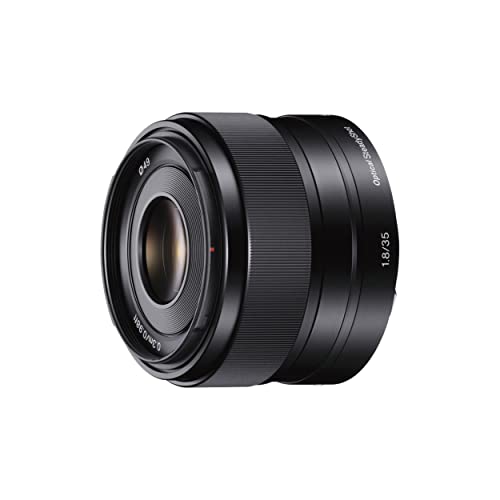
I currently own a Sony 35mm f1.8 lens and a Sigma 16mm f1.4 lens. Both lenses serve different purposes, but for my drawing videos I use my Sigma lens.
Sony SEL35F18 35mm f/1.8 Prime Fixed Lens
A more budget-friendly lens with an OSS (Optical SteadyShot) feature, which is also great for that creamy bokeh effect, if needed.
Sigma 16mm f/1.4 DC DN Contemporary Lens Sony E
My all-time favourite prime lense, ever. I use this lense for almost everything, from filming drawing videos to filming other types of videos like my 3D printing projects or vlogs. Auto focus is super fast, it’s even faster than my Sony lens, in my opinion!

Sigma lenses are super sharp lenses, so I would recommend getting either the Sigma 16mm f1.4 or the Sigma 30mm f1.4. They are different in focal lengths, so you want to pick the right one based on the distance between your camera and your drawing.
Please keep in mind that you can’t zoom in and out with prime lenses. You’ll want a zoom lens for that. So if you’re okay sacrificing sharpness for flexibility, you could go for a zoom lens with a big aperture, something like this:

3. Mini Fans
Cameras can overheat when it’s recording continuously. That’s going to become a problem because we are trying to record drawing videos for a long period of time here.
My old Sony camera in fact, overheats in 30 minutes then shuts itself off. The recording? Gone forever. It’s an absolute nightmare!
So how do we prevent our cameras from overheating? The most expensive solution is to get a camera with internal cooling fans.
I’ve been eyeing the Sony FX30 camera for quite some time now since its release but am hesitant to upgrade because of its steep price.
That said, my cheaper camera doesn’t have overheating issues and i’ve recorded a lot of 1-hour long videos without it ever dying on me. Of course, i had to tweak the camera setting to bypass this, which you can see here in my other blog post.
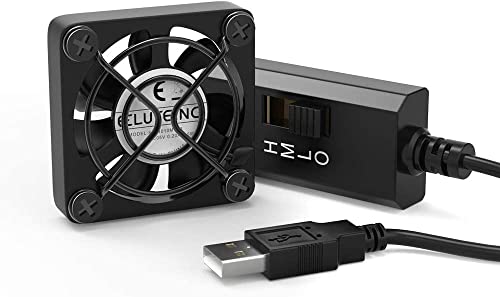
One other way you can help your camera to disperse the heat better is to get a mini fan, something like the Ulanzi cooling fans.
If you want a cleaner setup, they’re certainly a great option. The downside is, they’re not that cheap.
You can save money and make your own fans using PC fans if you have all the necessary tools, or get something like this:
Microphone
Audio isn’t a crucial component when it comes to producing drawing videos. Chances are, you speed up your videos, turn off the sound and edit some music in. If you listen to music when you record yourself drawing, you WANT to turn off the sound post-production.
The one thing you absolutely do not want is to have copyrighted music in your videos even if it’s playing in the background. You’ll just run into troubles.
In some cases, where you want to record the sound (e.g. for ASMR drawing videos), you should definitely get a good quality microphone because the microphone on the camera just won’t cut it.
There are several types of microphone to choose from but if you’re doing ASMR videos, you want a sensitive microphone that can pick up every pencil strokes and produce that crisp, clear sound.
What you want to look for is a condenser microphone. A shotgun condenser microphone is a great solution if you want something’s that compact and can be mounted on your camera.
I didn’t get a shotgun microphone because I wanted a budget-friendly microphone but if you’d like a shotgun microphone and are willing to pay for more, you can get something like the Rode NT5 shotgun microphones.
So which microphone did I get? After doing some research, I decided to get the RODE VideoMic GO II shotgun microphone.

It is certainly not a budget microphone per se, but it is relatively cheaper compared to other ASMR microphones out there.
Some of the best shotgun microphones has a 3-pin type XLR connection, which means that you’ll need an audio interface or additional gears to connect your microphone to your camera or to your computer.
That means: more money to spend, more cables, and more complicated setups. So that’s a no-no for me.
With Rode VideoMic GO II, you simply connect it to you camera and that’s it. It delivers great, crisp sound and if you’re creating AMSR drawing videos, this microphone is perfect for it.

Also, if there are background noises, like the humming or hissing background noises which is sometimes unavoidable, you want to make sure to remove them post production. Wan’t to know to do it? You can read more about it here.
