This post contains affiliate links. When you purchase through links on our site, we may earn an affiliate commission. Learn more about it here.
So you are looking for the best video settings for Sony ZVE-10 for shooting overhead videos? I’m going to show you how to dial the settings on your Sony camera to get the best video quality for your Youtube channel.
These settings are the best settings for an overhead camera setup. So if you’re recording yourself drawing, unboxing or cooking, these settings are just perfect for you!
My Sony ZVE-10 camera is equipped with a Sigma 16 mm f1.4 lens. If you have a kit lens or any other type of lens, you can use these settings too, but you might need to tweak a thing or two.
Table of Contents
1. Getting Started
Before jumping right in, there are 3 steps you need to take to set your camera to the right mode.
Step 1: Shooting mode
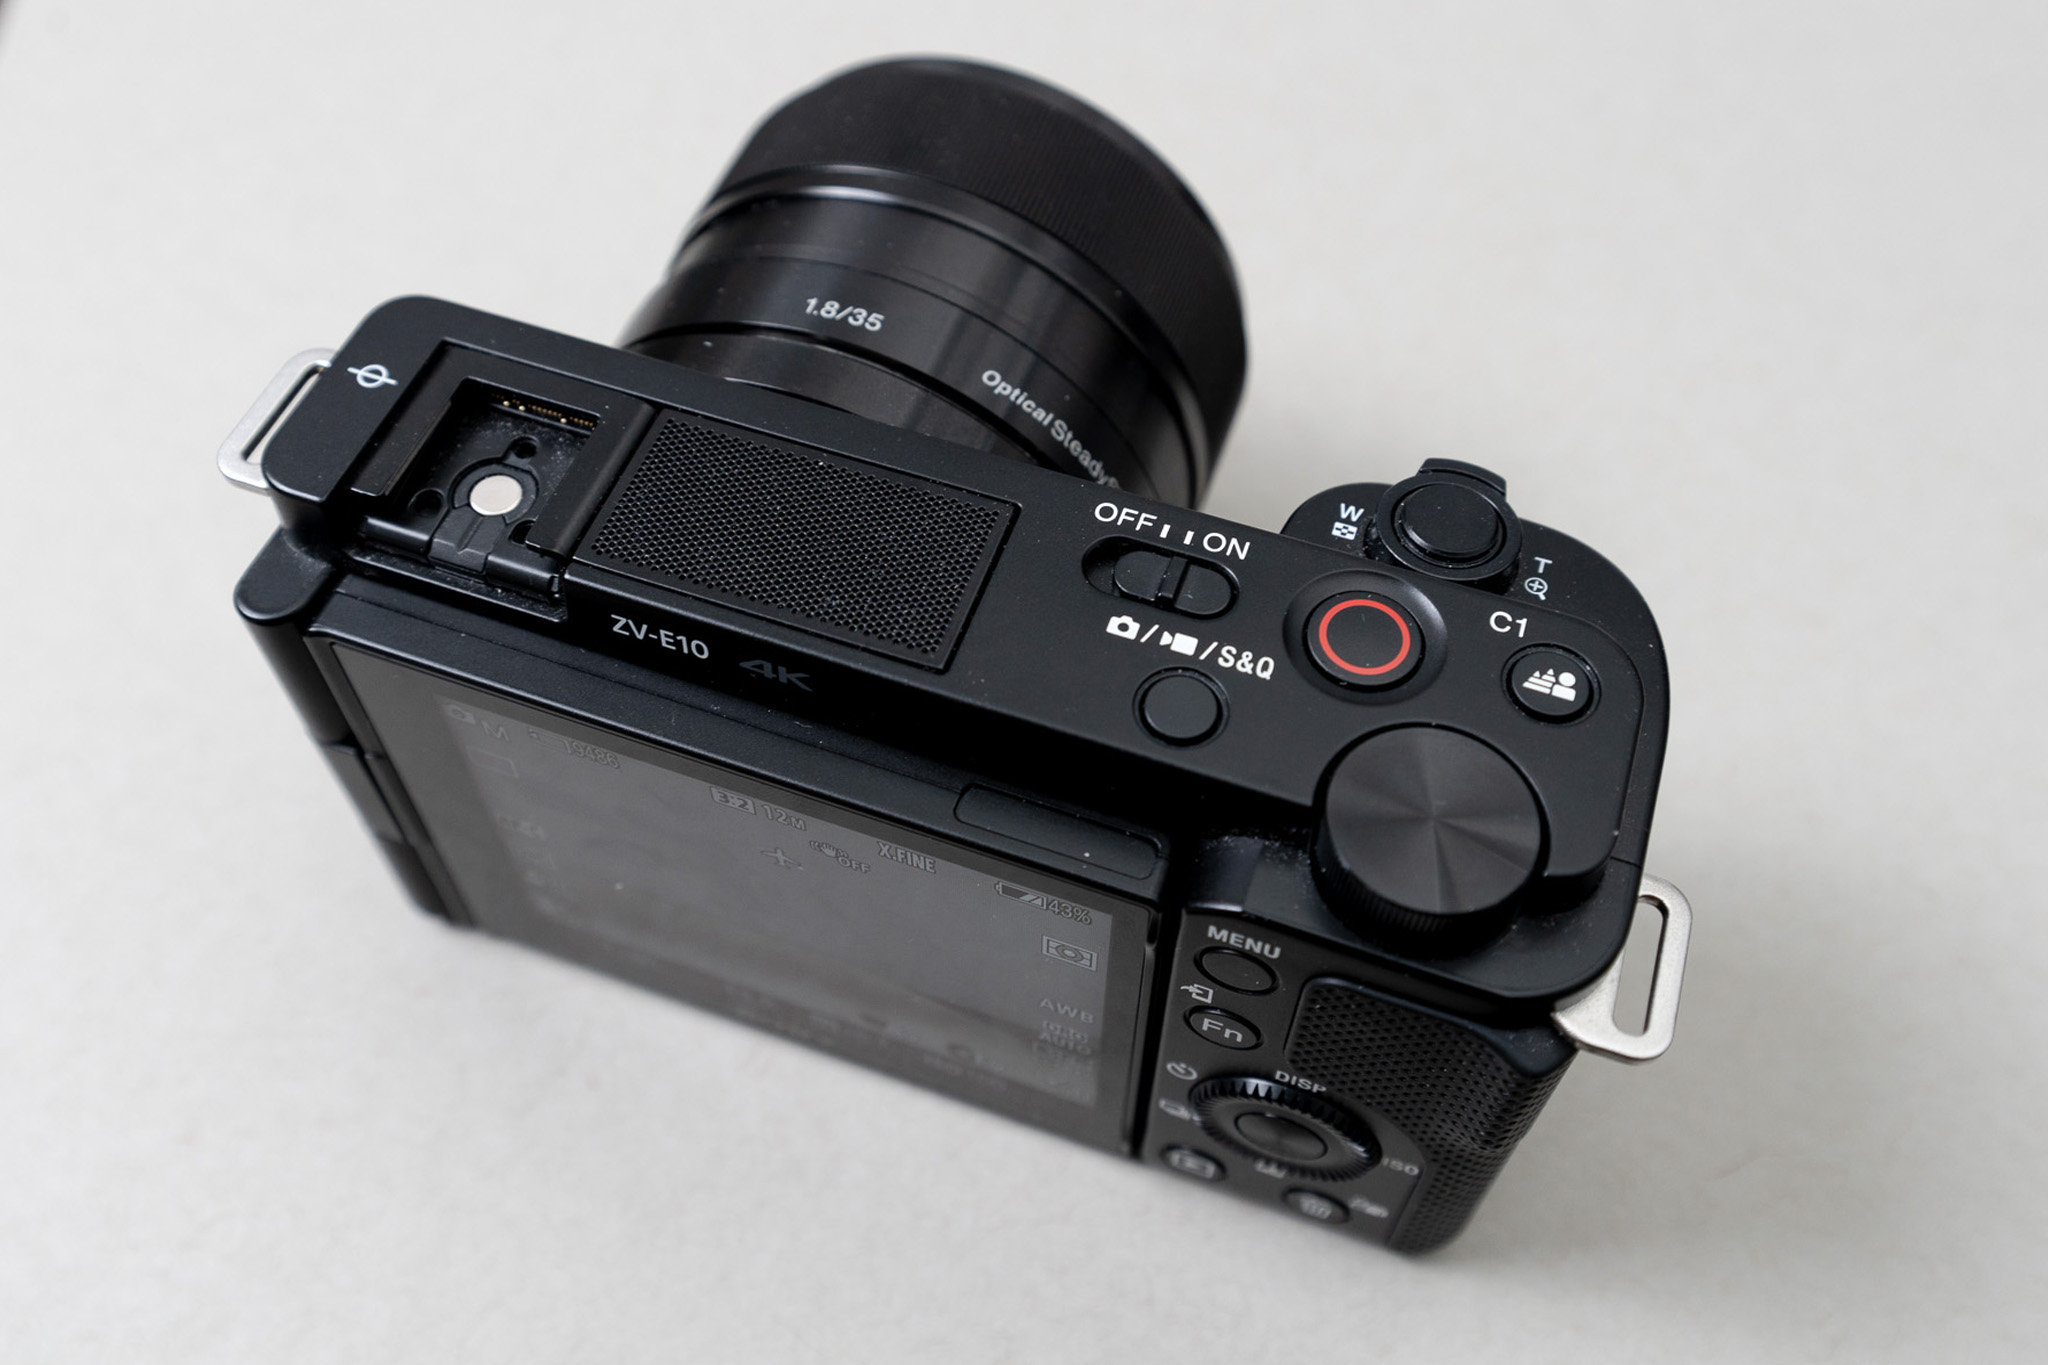
Sony ZVE-10 has 3 shooting modes: picture mode,video mode and S&Q mode. You want to press the button until your camera is in video mode. You’ll know that your camera is in video mode if it shows that video camera icon on the most upperleft corner of your LCD screen.

Step 2: Exposure setting
You’ll want to turn off the intelligent mode and switch it to manual exposure. The way you can do this is to press the menu button, move over to the Movie1 setting (second tab) and choose Manual Exposure.

In this mode, we have that flexibility to manually set our aperture and shutter speed settings. We don’t want the camera to make the decisions for us. If you spent a lot of money on a great lens, you want to explore and utilize its potential so you can get the most out of it.
Step 3: Video format standards
Sony ZVE-10 can shoot either in NTSC or PAL format. NTSC is a format that’s used in North American region, while PAL is used everywhere else. For this tutorial, i’m going to set my camera to NTSC.
You can do this by pressing the menu button, move over to the Setup2 setting (5th tab) and scroll to the second page. If your camera isn’t in NTSC mode already, change it to NTSC.

The reason why i chose NTSC is due to the frame rate settings. If you choose NTSC, you’ll have the option to shoot in 24fps and 30fps. These are the frame rates that i use for editing my videos.
Of course, if you would like to record your videos in 25fps, 50fps and 100fps, you can set your camera to shoot in PAL mode.
Now that our camera is set, let’s go on to the first menu and change the settings from there.
2. Camera Settings 1 Menu
Camera settings 1 menu is the menu on the first tab. It’s the red tab that shows a camera and a video camera icons with a “1” next to it.
Focus Mode
Scroll to the 4th page where you can choose Focus Mode. For shooting drawing videos or cooking, you want to choose Manual Focus. You don’t want your camera to switch focus everytime you move your hand around.
For unboxing videos, i could imagine that Continuous Autofocus would be a better option.
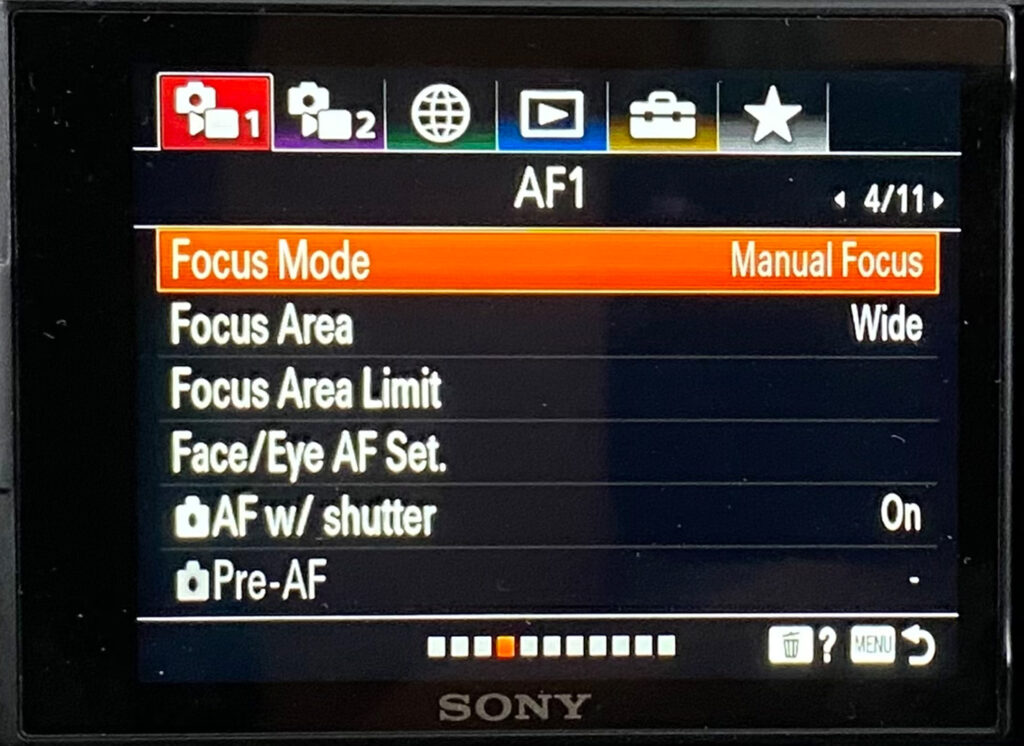

You could also change focus mode even during shooting! Just add a shortcut icon to your function button and you can toggle between Autofocus and Manual Focus easily. More about it in the later section of this post.
Focus Area
On the same page, scroll down to Focus Area. Choose the option Wide.

ISO Setting
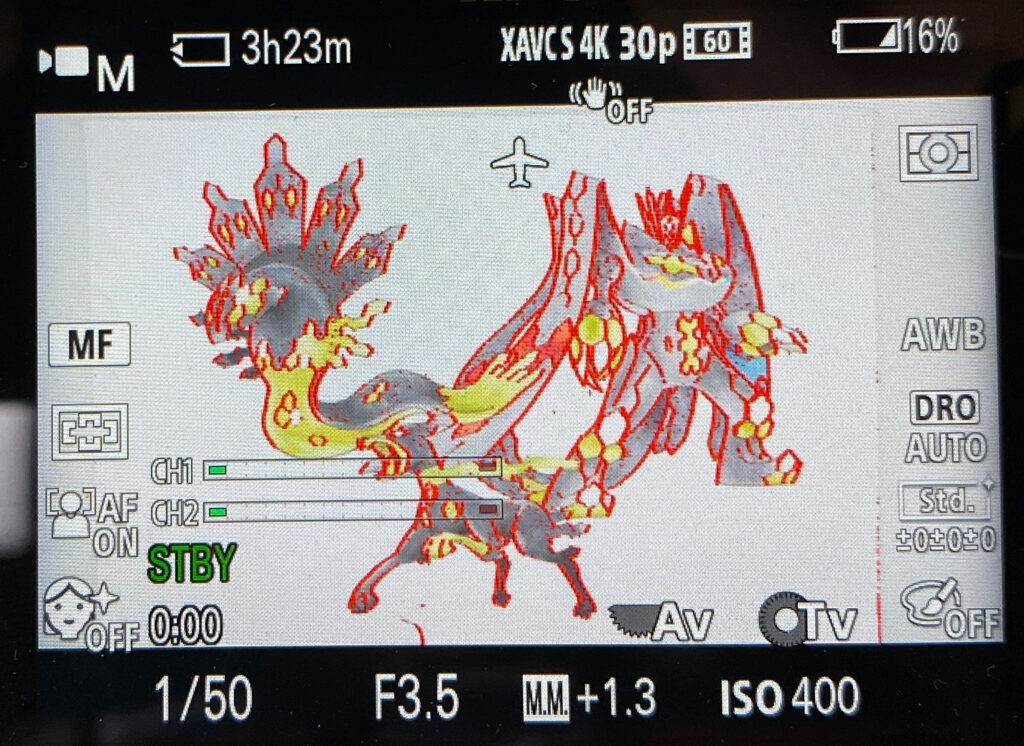
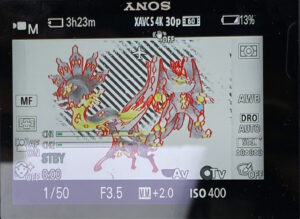
Scroll to the 6th page to find the ISO setting. The key is to set the ISO so your video won’t be too overexposed or too underexposed. You need to find that balance. If your lighting setup is similar to mine, set it to 400.

Metering Mode
On the same page, scroll down to Metering Mode and choose Multi.

White Balance
On the 8th page, set White Balance to Auto.

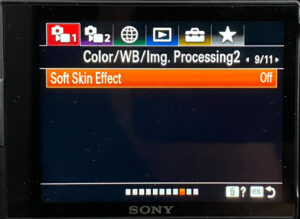
Soft Skin Effect
Unless you’re shooting vlogs, you can turn off the Soft Skin Effect. You can find the setting on the 9th page.
Peaking Setting
On the 10th page, scroll down to Peaking Setting and turn on Peaking Display, setting its level to High and its color to Red.


This setting basically shows you how focused your object is. The more grains it shows on the screen, the more focused your object is.

Product Showcase
Turn off Product Showcase Set since we’re not going to be needing this feature if we’re shooting overhead videos.

3. Camera Settings 2 Menu
Camera settings 2 menu is the menu on the second tab. It’s the purple tab that shows a camera and a video camera icons with a “2” next to it.
File Format
It goes without saying, but to get the best video quality, you want to shoot your videos in 4K. So let’s choose XACV S 4K in the File Format setting.

Record Setting
Since our camera is set to NTSC, you have the option to shoot in 24fps and 30fps. 24fps is common for shooting cinematic videos. 30fps videos look more realistic, but it actually doesn’t really matter which one you choose.
If you’re using your phone or a second camera to shoot videos from other angles and you want combine those videos into one single video, make sure they’re all set to the same fps.
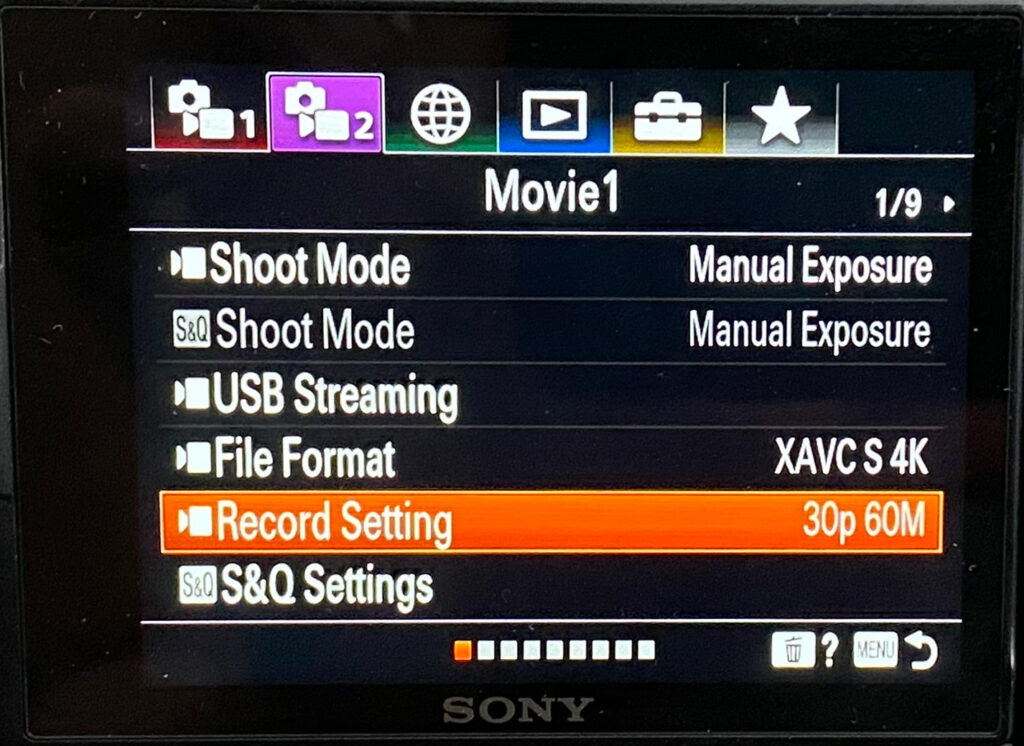

For the best quality, you can choose 24fps 100M or 30fps 100M. I chose 30p (30fps) because my phone shoots in 30fps. I also didnt go for 100M (100Mbps) here because i usually speed up my videos so 60Mbps is more than enough for me.
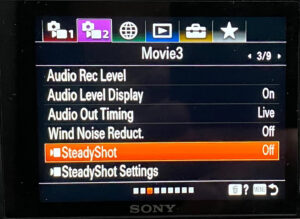
Steady Shot
On the 3rd page, scroll down to SteadyShot option and turn it off. Turning on SteadyShot will make your camera crop your videos to stabilise it. Since we’re not moving our camera around, this feature is not needed.
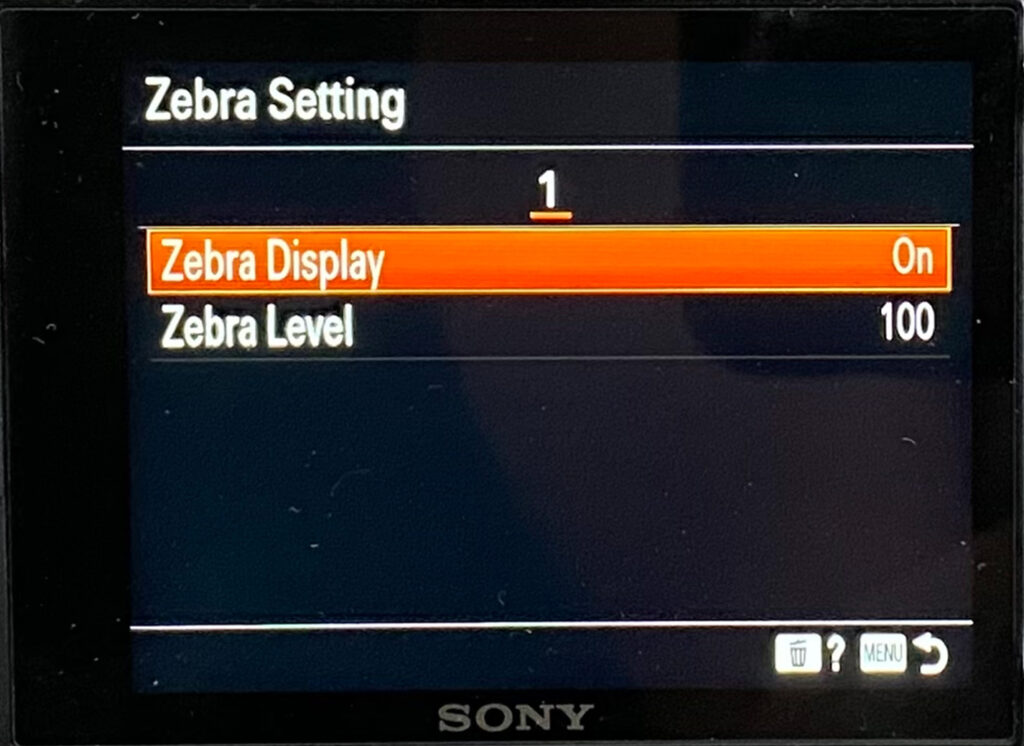
Zebra Setting
Lets move on to the 7th page. Scroll down to Zebra Setting. Turn Zebra Display on and set Zebra level to 100.
This is a helpful feature to have to gauge if your recoding is too overexposed or not.

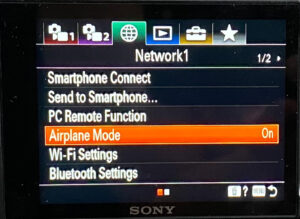
4. Network Menu
Network menu is the menu on the third tab. It’s the green tab that shows a globe icon.
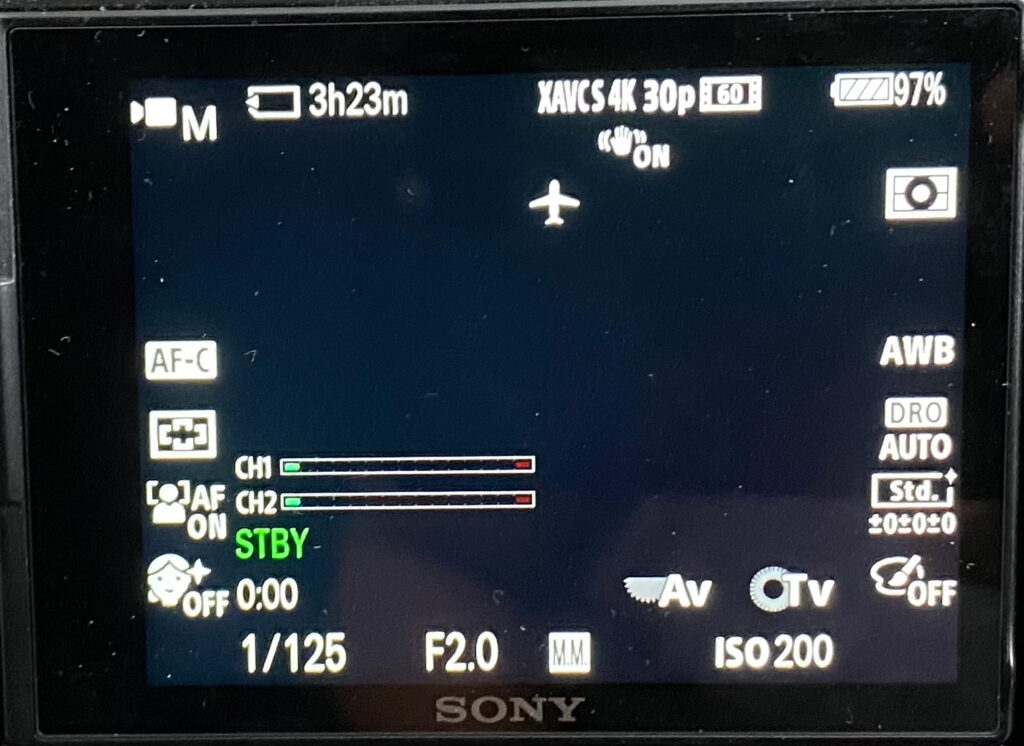
Airplane Mode
If you don’t plan to connect your camera with other gadgets wirelessly, you can turn on Airplane Mode.
5. Setup Menu
Setup menu is the menu on the fifth tab. It’s the yellow tab that shows a briefcase icon.
Power Setting Option
On the first page, scroll down to Power Setting Option and click on it. Set Auto Power OFF Temp to High. This will prevent your camera to turn itself off too early when it overheats.
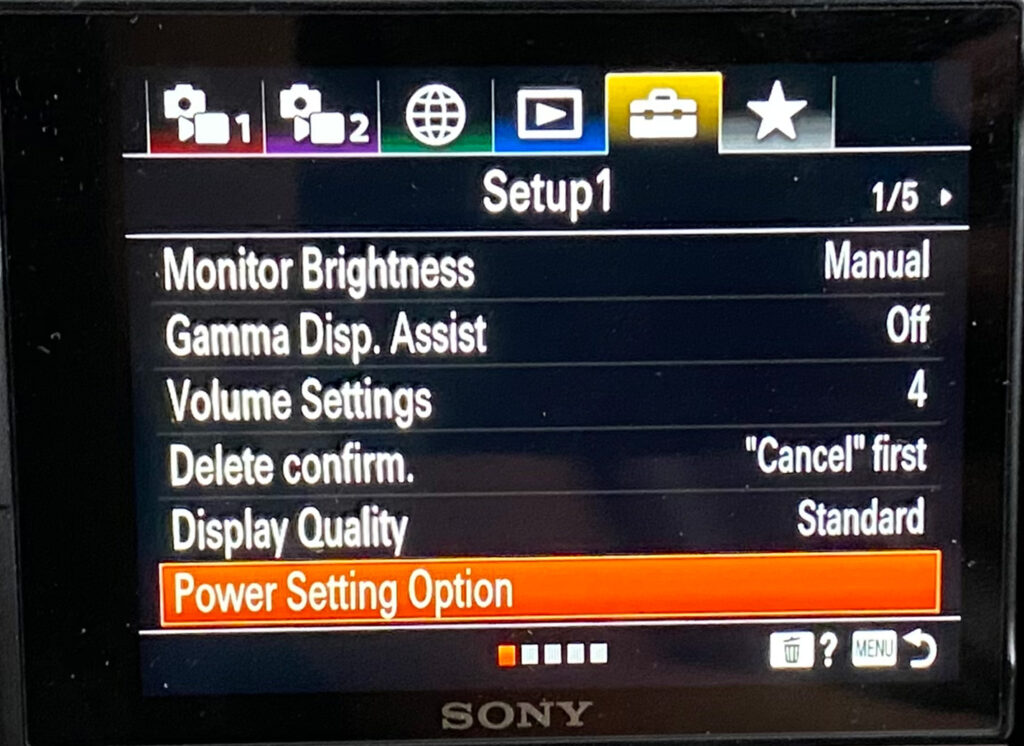

This is the best setting to have if you’re shooting your videos for a long period of time.
6. Shutter Speed
To adjust the shutter speed, turn the control wheel clockwise or counter-clockwise.
Which shutter speed should you set it to? The rule of thumb is to multiply your frame rate by 2. If you’re recording in 24 fps, you should set your shutter speed to 50. If you’re recording in 30 fps, then set it to 60.

7. Aperture Setting
To adjust the aperture, turn the control dial clockwise or counter-clockwise.
If you’re using similar setup like mine, set the aperture to 3.5. If not, adjust it so you’re footage won’t be too overexposed or when the zebra lines stop showing up.

8. Function Menu (optional)
The function menu button is located just right above the control wheel, indicated by the symbol Fn.

You can create shortcuts and save them in the function menu button. It’s super helpful to have these shortcuts saved and have quick access to them.
To do this, go over to the Function Menu Set. in Camera Settings 2 menu (second tab) on 8th page.
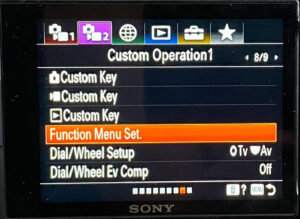
If you click on it, you can see 12 shortcuts set by your camera by default. Let’s change Profile Picture shortcut to Grid Line shortcut.


Just click on the Profile Picture shortcut icon and scroll to the 11th page to find the Grid Line shortcut. Choosing it will replace the Profile Picture shortcut with a Grid line shortcut.
To use the shortcut, just press the Fn button before shotting and choose the Grid Line icon. You can then easily pick one of the options in the Grid Line setting.
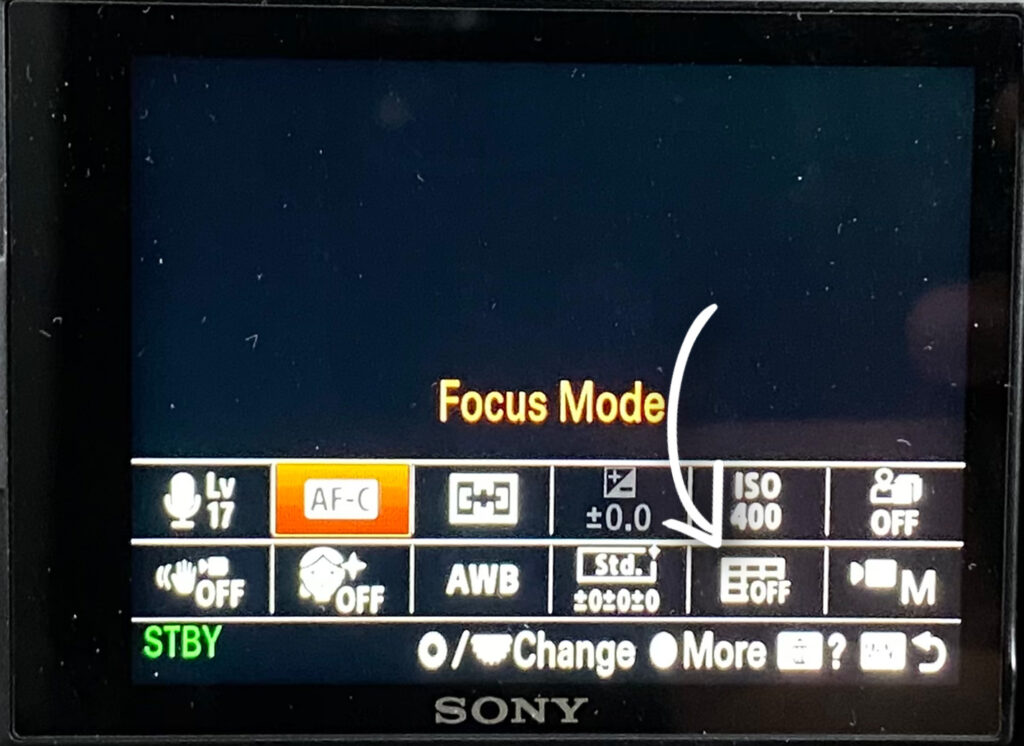

Some shortcuts even let you change the settings during recording, how insane is that! You have the option to save 45 different kinds of shortcuts. These include:
- Shoot Mode
- Focus Mode
- Focus Area
- Face/Eye Priority in AF
- Subject Detection
- Right/Left eye Select
- Face/Eye Frame Display
- Exposure Comp.
- ISO
- Metering Mode
- Face Priority in Multi Metering
- White Balance
- Priority Set in AWB
- DRO/Auto HDR
- Creative Style
- Picture Effect
- Picture Profile
- Soft Skin Effect
- Peaking Display
- Peaking Level
- Peaking Color
- Product Showcase Set
- Frame Rate
- AF Transition Speed
- AF Subj. Shift Sens.
- Audio Rec Level
- Audio Level Display
- SteadyShot
- SteadyShot Adjust.
- Focal Length
- Marker Display
- Zoom Speed STBY
- Zoom Speed REC
- Fixed Speed STBY
- Fixed Speed REC
- Fixed Speed STBY
- Fixed Speed REC
- Zebra Display
- Zebra Level
- Grid Line
- Audio Signals
- Gamma Disp. Assist
- Touch Operation
- Not Set
- Follow Function Menu