This post contains affiliate links. When you purchase through links on our site, we may earn an affiliate commission. Learn more about it here.
So why do you need to create your own label for Copic Ciao markers? If you own Copic Ciao markers, you know that the caps don’t have color numbers printed on them, unlike Copic Sketch, Copic Classic and Copic Wide markers.
Having color numbers on the caps are super helpful especially if you have a huge collection of Copic Ciao markers.
Sure, you can just take a sharpie and write the color numbers on the caps. The thing is, the caps have just a little surface area on top that you could write the color numbers on and they’re not even flat!
Table of Contents
Budget-Friendly Method
So I’m going to show you how to create your own label for Copic Ciao markers in 4 easy steps. But first of all, you’re going to need the following:
- a text editing software
- a piece of paper
- a printer
- a pair of scissors
- a hole puncher
- all-purpose glue
Step 1: Type in all color numbers manually
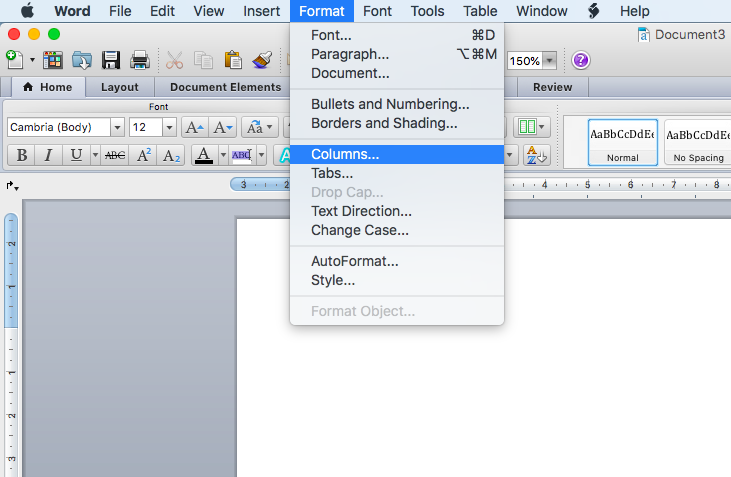
You’re going to type in all the color numbers of Copic Ciao makers that you own using any type of text editing software. In this example, I’m going to be using Microsoft Word. Of course you can use any type of software like the Microsoft Excel, or even Pages!
My Microsoft Word software might look different than yours, but basically what you want to do is to add columns. You can find where to add columns in the format setting. You can add as many as columns as you want, but I’m going to add 8 columns in this example.
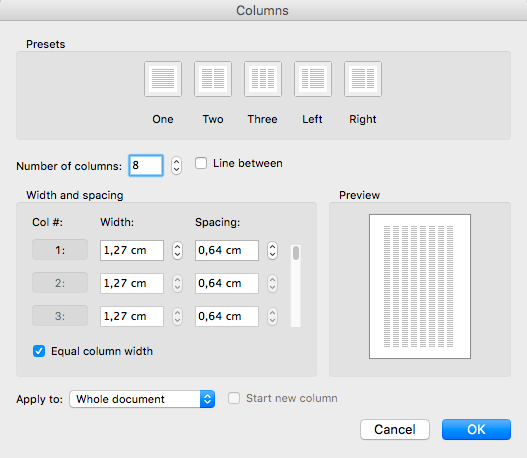
You want to make sure to type in each color twice, because you need to label both caps of each marker. I chose Calibri for the font. Set the font size to 7. If the color number is a 5-digit color number e.g. YR000, set the font size to 6. Depending on the font style, you may have to tweak the font sizes a few times.
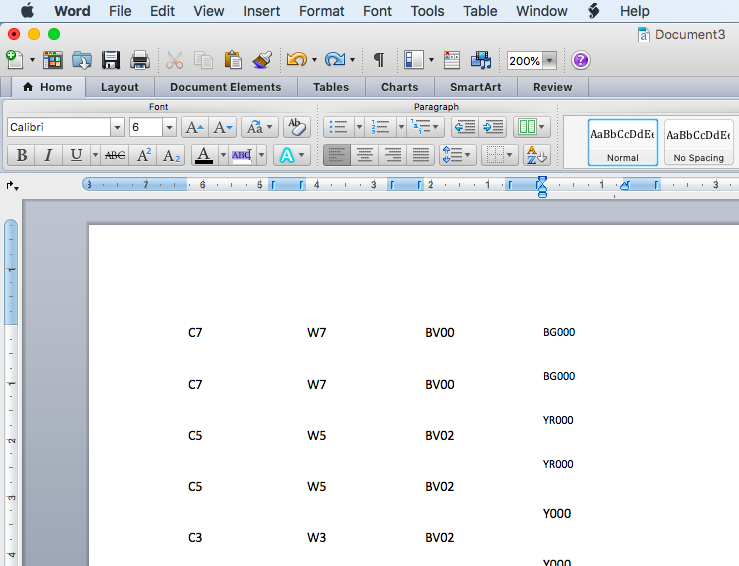
Print the document on an 80 gsm office paper with a printer.
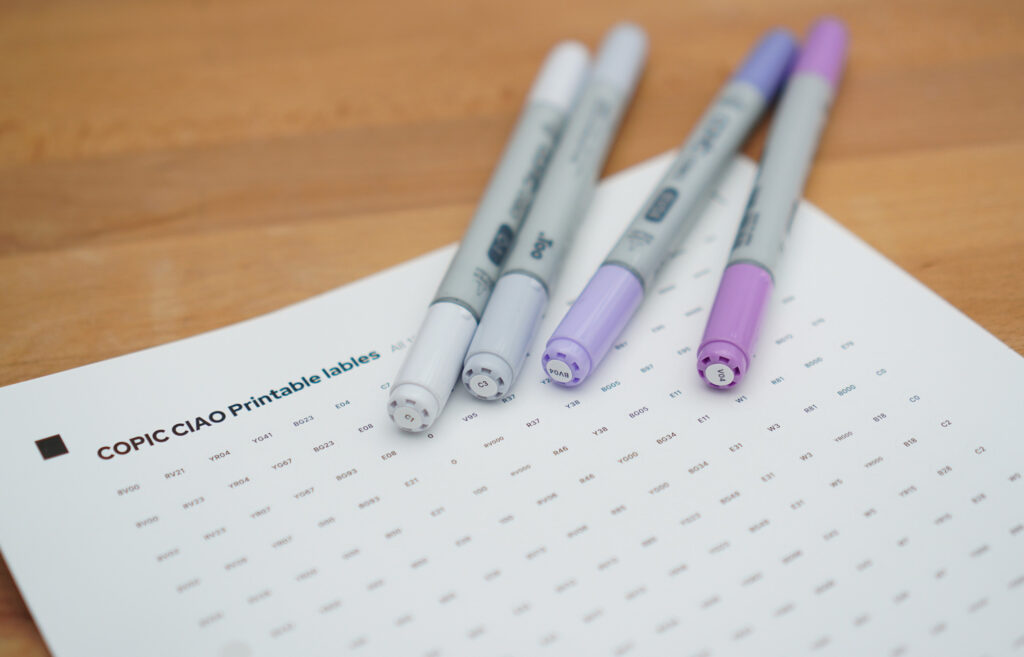
If you don’t want to go through all that trouble, you can get these printable labels which I already made here:

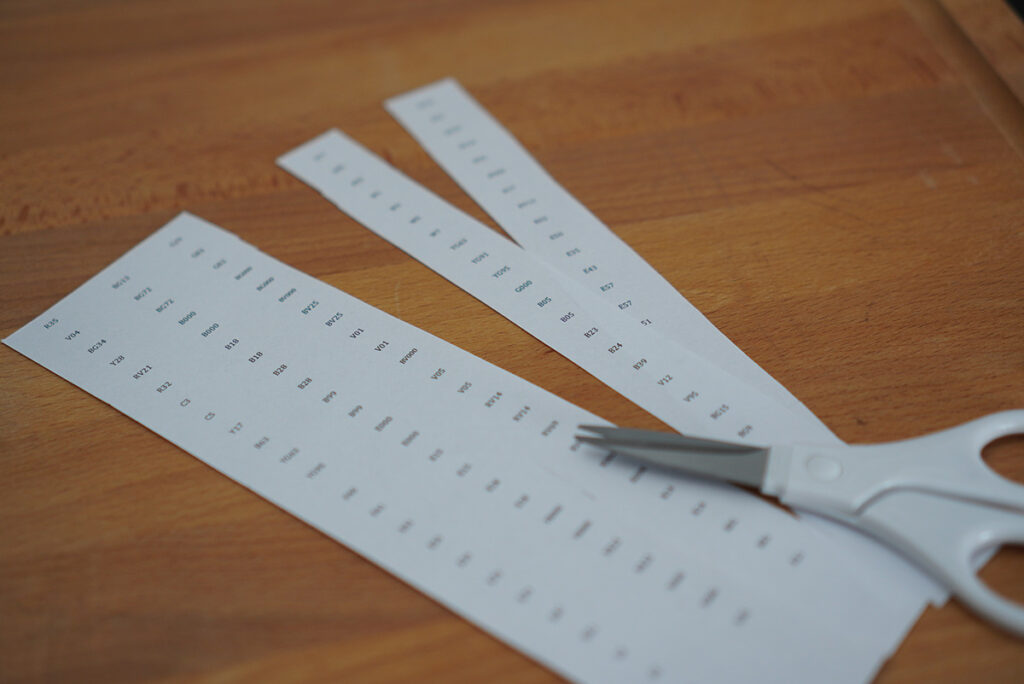
Step 2: Cutting the paper
Take a pair of scissors and cut each column lengthwise, but make sure not to cut too close to the color numbers. This makes it easier for us to punch out the labels later.
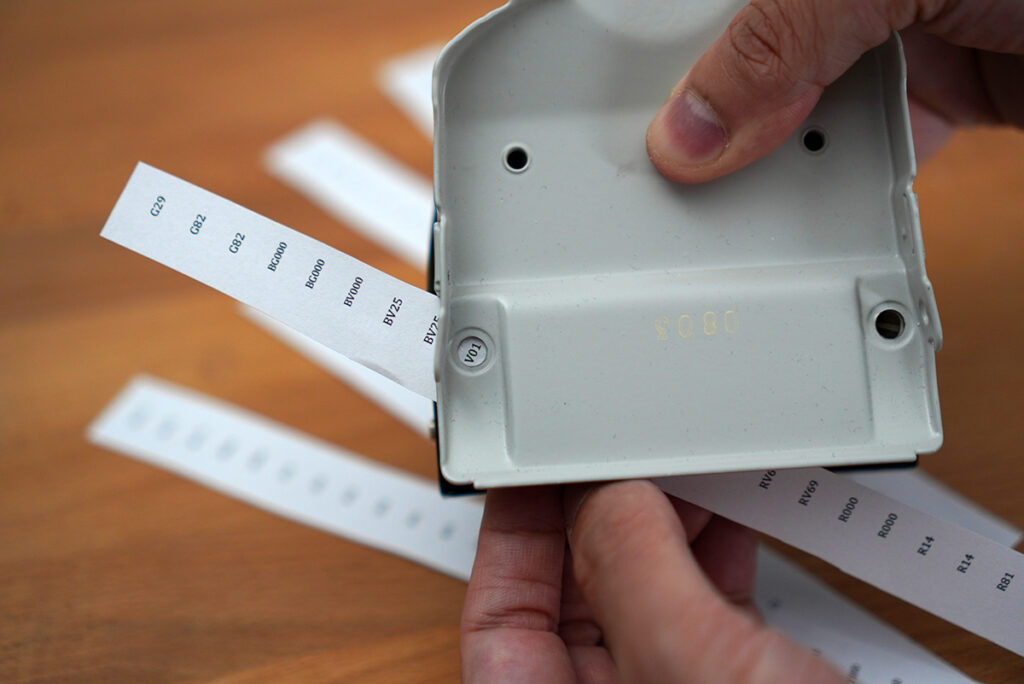
Step 3: Punching holes
A single hole puncher works the best for this, but if you have a hole puncher like mine, it will work just fine. Just make sure that the hole puncher punches 6 mm (1/4″) holes.
Hold the hole puncher upside down so that the hole is facing towards you. Just slide the paper in between and position the label so that you could see it through the hole and press.
Just a word of advice: make sure to punch out the labels slowly and carefully. Else, the labels would fly off in all sorts of directions! And believe me, you don’t want to spend your time crouching under the table searching for them.
Step 4: Sticking the label
The last step is to stick our punched-out labels on the caps with glue. You can use super glue if you want (or if you can handle the mess!). I’m just using the gel-based UHU all-purpose glue here.
Let them dry and you’re done!
Alternative method
Sticking these small labels on small caps takes patience and time. Although it’s an inexpensive way to label your markers, it is not the most convenient one.
If you have an access to a cutting machine, it is possible to create readily-made sticker labels for your Copic Ciao markers. What you need is the following:
- Cutting machine
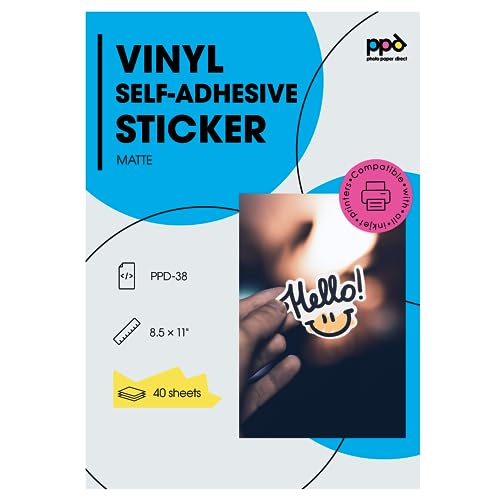
- Printable matte vinyl sticker paper
- Printer
- Weeding tool (optional)
Step 1: Designing the labels in Silhouette Studio
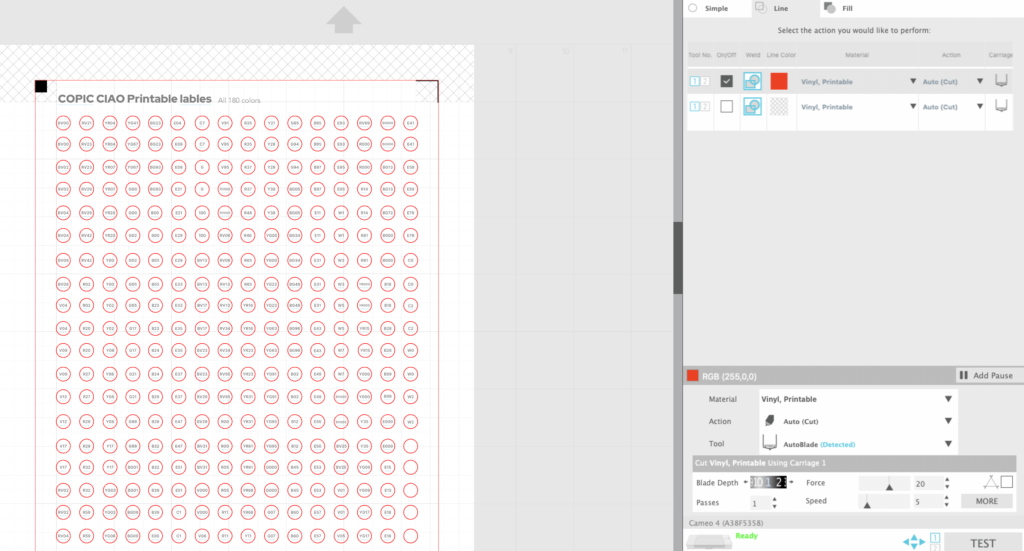
The first step is to create the labels. I’ll be using Silhouette Studio in this example. If you have a cricut cutting machine, you can probably do the same thing on Cricut Design Space.
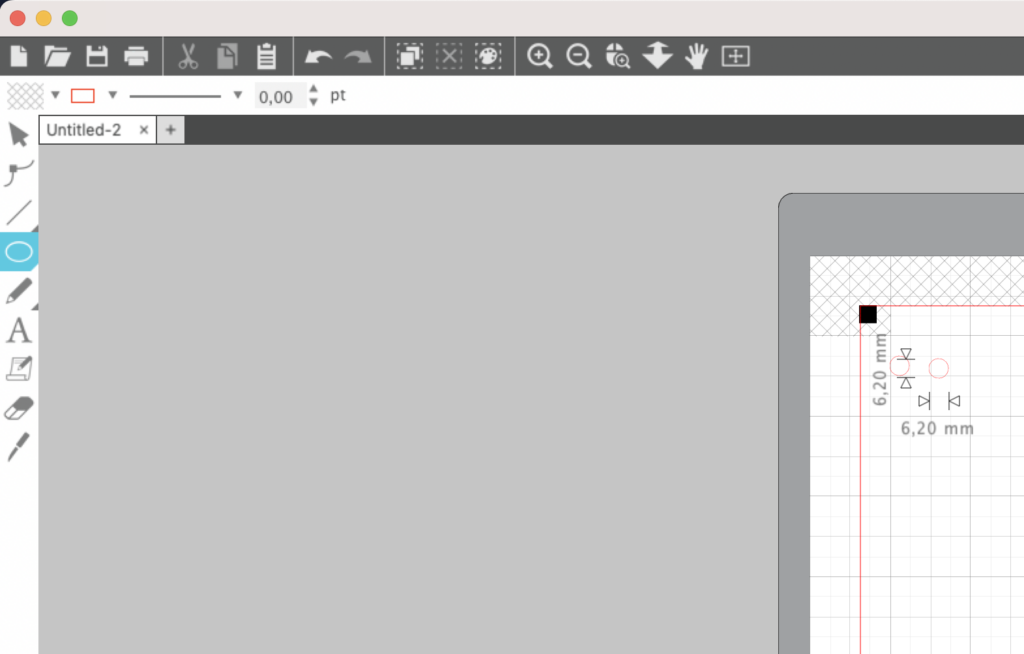
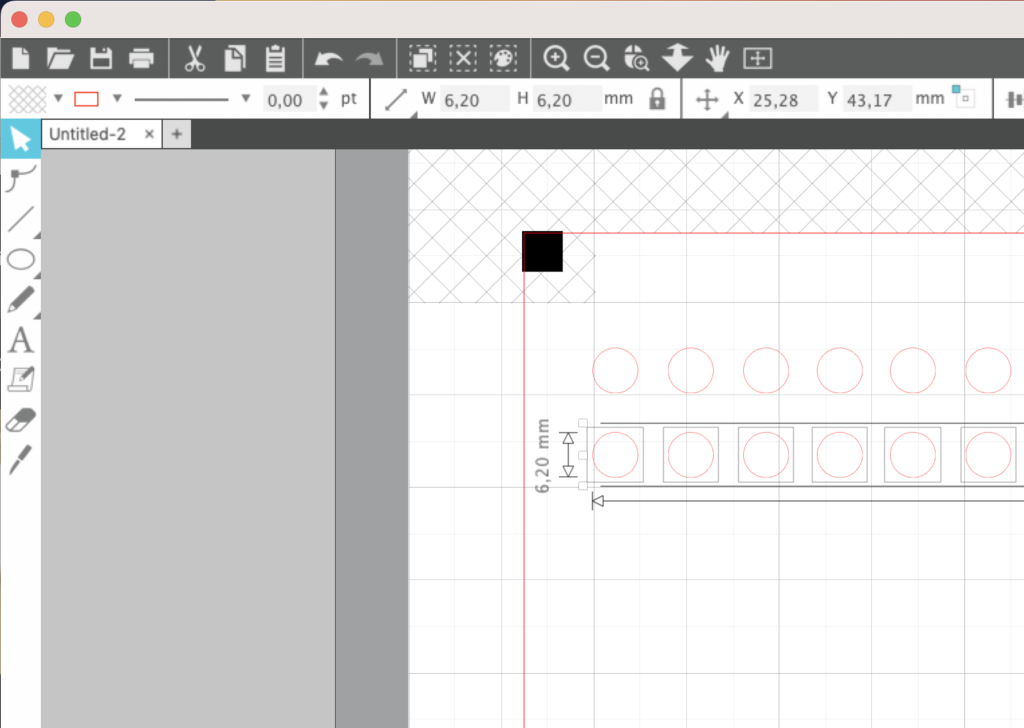
In your cutting machine’s software, use shape tools to create 6 mm (1/4″) diameter circles. These circles will be the kiss-cut outlines of your labels.
Step 2: Typing in the color numbers
Use the text tool to type in the color numbers. When you first type in the text, the text will be transparent on default. You can still see it though due to the red cut lines. So in order for it to be printed, you need to fill it with solid color like black, which is what i did here.
Make sure the color numbers are positioned inside the circles. To have the color numbers aligned exactly in the center of the circle, select both the numbers and the circle. Then, hover to the menu, click Object, select Align and click Align Center-Middle.

If that’s too much of a hassle, you could also buy this file i created here.
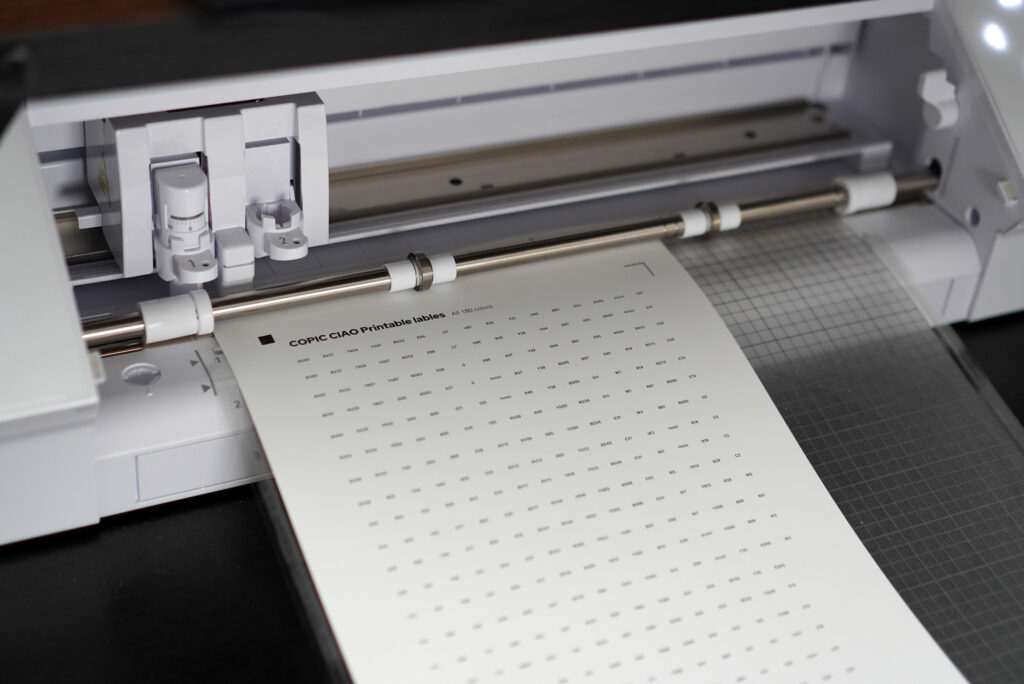
Step 3: Printing the label
Print the document on a printable matte vinyl sticker paper via your cutting machine software. There are a lot of printable vinyl stickers to choose from but the most famous ones are the ones from Online labels and HTVront. In Europe, you can get the one from PPD.


Step 4: Sending your label to be cut
You want to tell your cutting machine to only cut the circles. Set the force and speed so that your cutting machine would kiss-cut those circles.
Start cutting!
In case you’re interested, this is the cutting machine that i use:
Silhouette Cameo 4 White Edition
One of the most popular cutting machines to make stickers and other types of projects that requires cutting precision
- Bluetooth connectivity
- 12″x12″ cutting mat is included
- 1 Autoblade is included

Step 5: Sticking the label
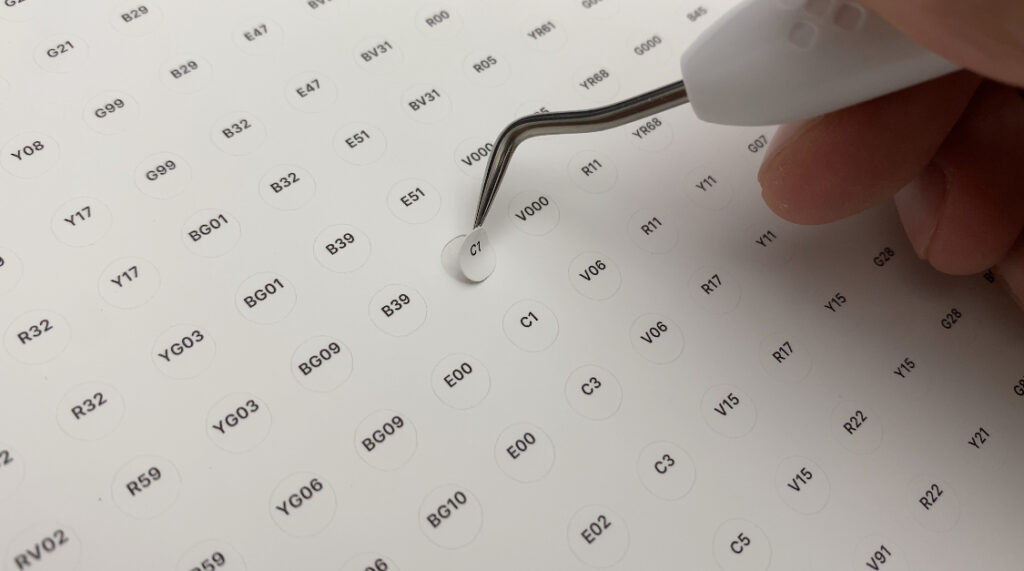
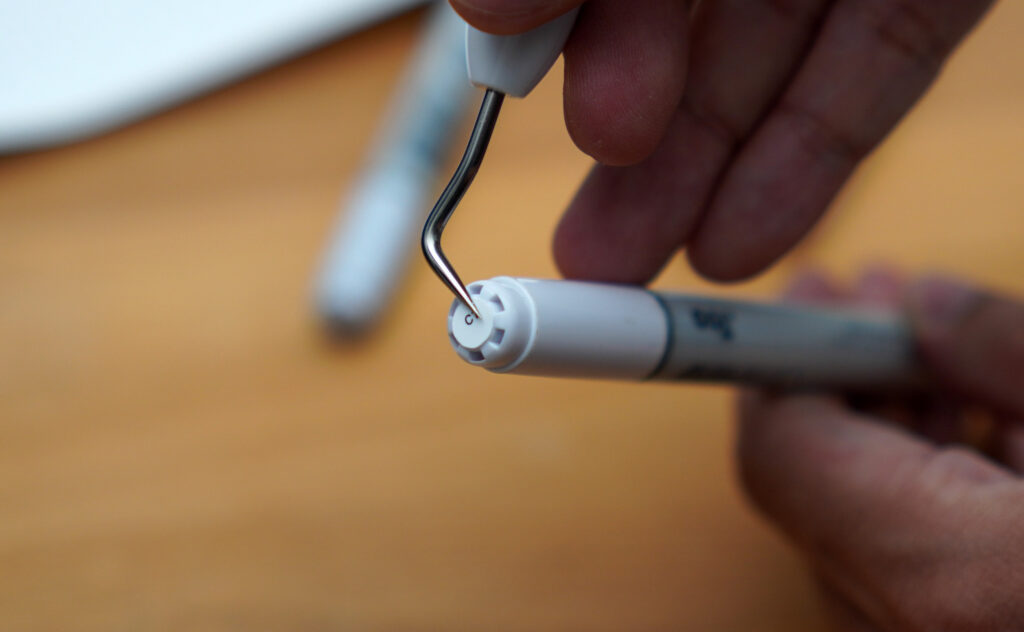
Peel off the labels carefully. If you have a weeder, you can use it to “weed” out the labels. Of course, you need to stick the labels onto both caps on each marker.
And just like that, you’re done!