

In this tutorial i will cover the easiest way to add a white outline in Procreate app. Procreate app is a great app to create digital art. I’ve been using it to create prints, emojis, T-shirt designs and even stickers!
Drawing in Procreate is so intuitive and it’s super easy to use. But when it comes to adding a white outline to your drawing, you just don’t know where to start. On other programs like Adobe Photoshop for instance, it’s super easy and kinda straight forward to do it.
Want to know how to add white outlines in Photoshop? Click here
In Procreate it’s not as easy but definitely doable using a few workarounds. There are so many workarounds on how to do it but I’m going to show you the quickest and the easiest way one.
Table of Contents
Step 1: Start with an image with a transparent background
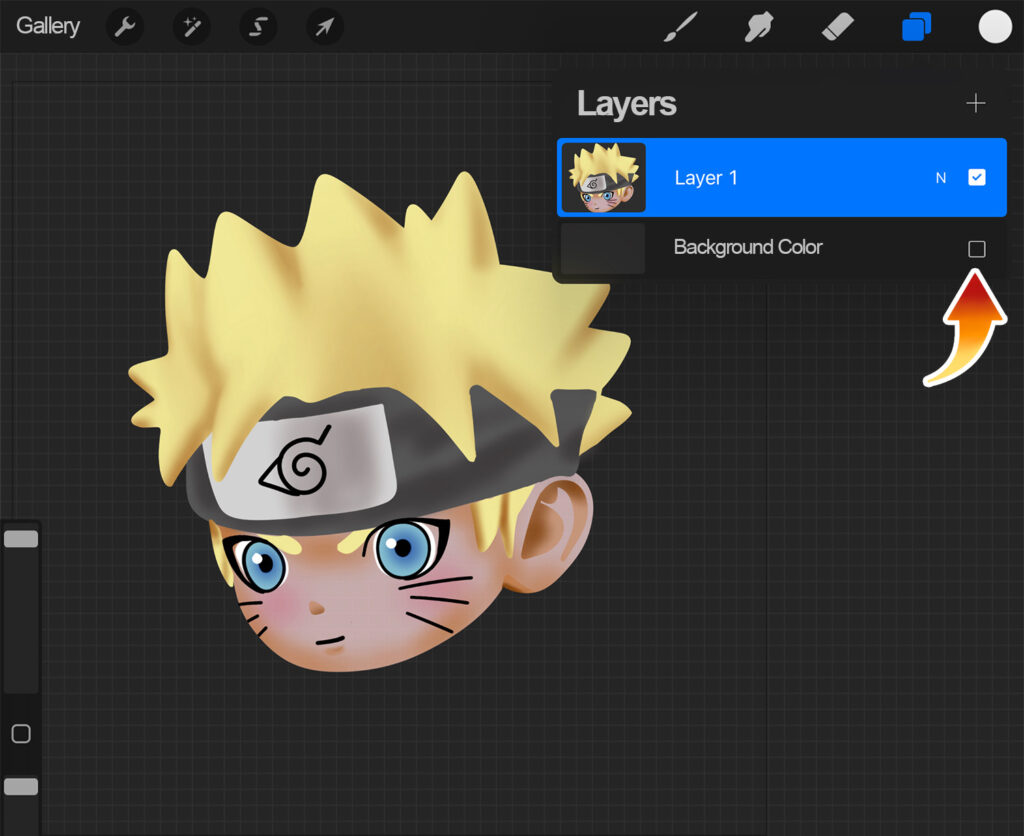
For this tutorial, I am going to assume that the image that you’re trying to add a white outline to is a PNG format image with a transparent background. Or, if the image is drawn in Procreate, make sure that the final image is in one layer.
To do this, you need to merge all layers together (without the background) by pinching the first and the last layer.
If you’re starting off with a JPEG image with a white background (for example), removing the background is rather easy. Open your Photo app on the iPad and tap on the image to open it.
Then tap on the image again and hold for a few seconds. A few options will pop up. Tap Share and send it to the Procreate app. Your image, now without a background, will be imported automatically to the app.
Step 2: Selecting the white color
Next, you want to set your active color in the color panel to white. I like to do this right at the start, so I don’t have to worry about it later.

Step 3: Duplicate your image
Next, you want to duplicate your image. If you have a white background, it might help to deactivate it beforehand so it’s easier to see what we’re working on. The outline is after all, going to be white.
You can deactivate the background by unchecking the small box on the right-hand side of the background layer.
If we’re going to save our image as PNG, we won’t be needing the background layer anyway so it’s better to do it now.
To duplicate your image, tap on the layer and swipe to the left. Tap Duplicate.


Step 4: Selecting your image
Once your image is duplicated, tap the lower one with two fingers and hold for a few seconds. Alternatively, you can do the same thing by tapping the lower layer with one finger and by choosing “Select”.


What that does is, it will select your entire image. If you have multiple images in one layer, those other images will be selected as well.
You will notice that the squiggly icon on the top of the screen will be highlighted, and a panel pops up from the bottom of the screen as you do it. This means that you just activated the Selection Tool.
Step 5: Filling the image with color white
Once the Selection tool is activated, make sure that Freehand is selected. You want to tap on Color Fill or the bucket icon which you can find in the bottom panel.
This will fill your entire image with the color white. You won’t be seeing this though, since this layer is hidden underneath your copied image. If you were to open the Layers tool, you would see it, but please don’t tap on it! After tapping Color Fill, proceed directly to Step 5.


Step 6: Feathering
After tapping Color Fill, you want to tap Feather next. Slide the slider to the left or the the right to change the amount of the feathering. I would set it to anywhere from 7% to 10%.
If you’ve done it correctly, you’ll notice that there’s a soft white glow surrounding your image.

Now you want to tap on the squiggly icon in the top menu bar to exit the Quick Selection menu.
Step 7: Creating the white outline
Naturally, we want the outline to be a solid white stroke and not a white glow. So to create the white outline, tap on the squiggly icon again to re-enter the Quick Selection menu. Tap Automatic in the upper section of the selection tool. Now tap your image (Don’t tap the background!).

You will now see a thin, solid white outline surrounding your image. At this point, you are basically done. But if you want to change the thickness of the outline, which I think you want to, tap on your image again. Without releasing your finger, slide your finger (or pen) slowly to the right or to the left.
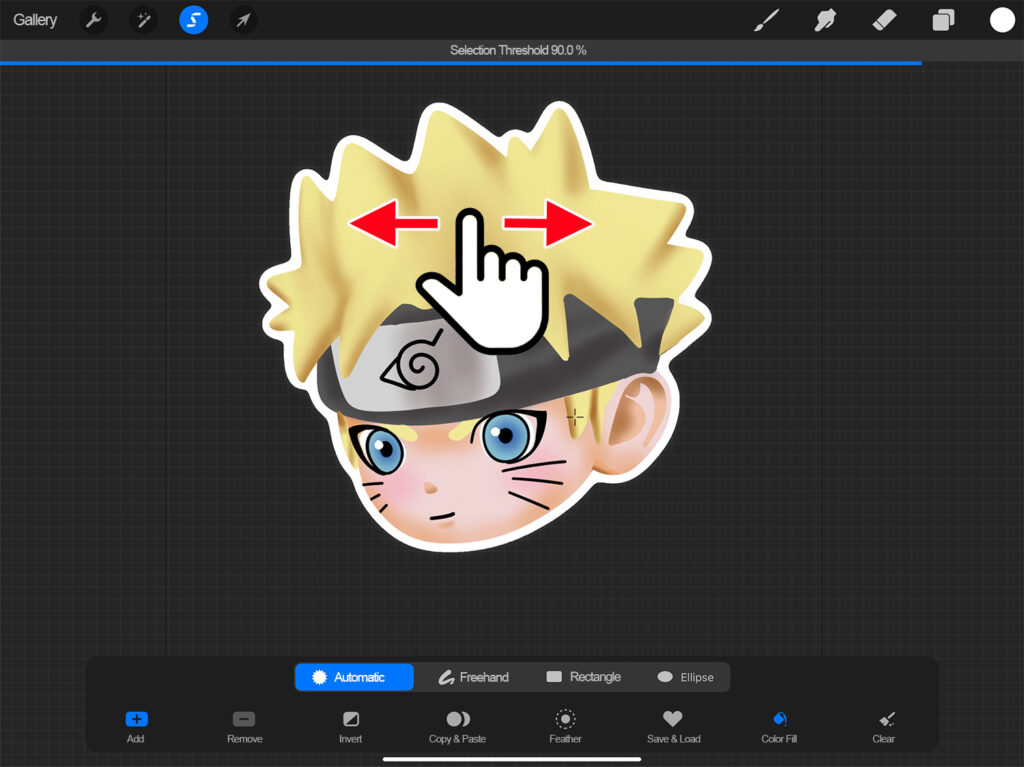
In the top of the screen, you can see how Selection Threshold changes as you slide to the right or to the left. Sliding your finger to the right will increase the thickness of the white outline; sliding your finger to the left will decrease it.
Let’s set our Selection Threshold to 90%, but you can basically set the thickness of your outline however you want it.
And you are done! You are now ready to export your image. This method is super easy to follow and you could even use the same method to create white outlines for texts!
If you find this tutorial helpful, just let me know in the comments below.

this was straight forward and simple. it was easier to follow than some videos I watched. Thanks much!
Your welcome! Glad it helped