In this tutorial I’m going to show you how to create a simple YouTube intro in Procreate, so you don’t need to spend any money on expensive templates.
You don’t even need to hire an animator; you don’t need any animation and drawing skills; all you need is an iPad and the Procreate app and you can do it your own! I’m going to show you how easy it is to do it.
At the end of this tutorial, you will learn how to create an intro like this:
I’m going to walk you through the entire process step-by-step.
Table of Contents
Step 1: Creating a new canvas
The first thing you want to do is to create a new canvas. Tap the plus sign at the top bar, then tap the folder icon. The Aspect ratio of a standard YouTube video is 16:9 so if you plan to upload 4K videos, your canvas size should be set to 3840 x 2160 pixels.


If your videos are going to be in Full HD, you can set it to 1920 x 1080 pixels. Let’s go with the 3840 x 2160 pixels for now. Tap Create.
You don’t have worry about DPI for now . DPI or Dots Per Inch is only important when you’re trying to print your artwork. 300 DPI is the best resolution for that purpose. Mine is always set to 300 DPI because I don’t want to change it every time I start working on a new project.
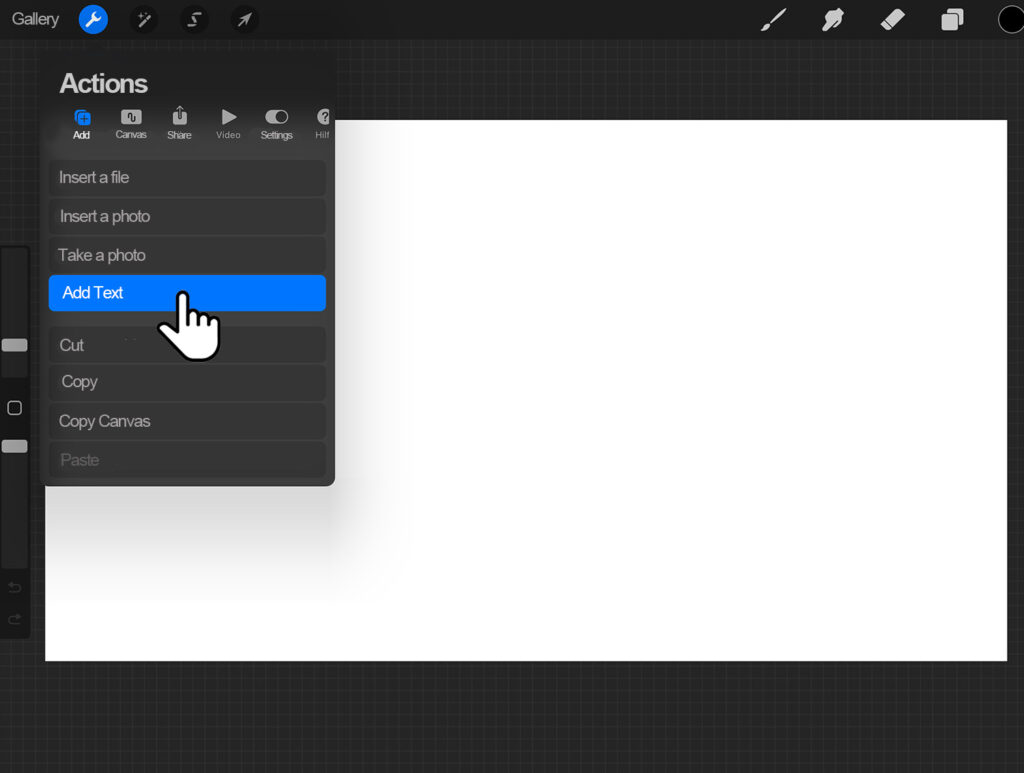
Step 2: Add text
Next, tap the wrench icon in the top bar. In the Actions menu, tap “Add text”. Type in the text for your intro video. It could be your YouTube channel name or maybe the title of your video.

We want our text to be black so it’s easier to see what we’re working on. Change the color to black if it isn’t already and change the font style of your text. I suggest to get the type that’s quite dense and very bold but that’s entirely up to you.
What if you don’t like any of the font that’s on Procreate and don’t want to go through all that trouble of installing a new font on your iPad? Try Google Fonts. There, type the text and take a picture of the previewed text style with your iPad. Import the picture into your project and resize if necessary.
In fact, you can even snap a photo and add it directly to your project. Just go to Settings, then tap Take a photo under Actions menu.
To resize your text (or the imported picture), tap the cursor icon in the top bar. Drag any of those little circles in the corners either inward or outward.

The move it around, tap the center of the text (or the picture), move it to the desired position and release you finger. Keep in mind that the text or the picture that we added just now won’t be showing up in our final intro video. It will serve just as a reference for our animation.
Step 3: Changing the opacity
Now change the opacity of our reference layer. Tap the Layers tool, then tap the letter N at the left side of the checkbox of our reference layer. Drag the slider to the left until the opacity is around 20%. You want it to be visible enough so you can trace it easily.

Step 4: Add a new layer
Next, tap the Layers tool and tap the plus sign to add a new layer.

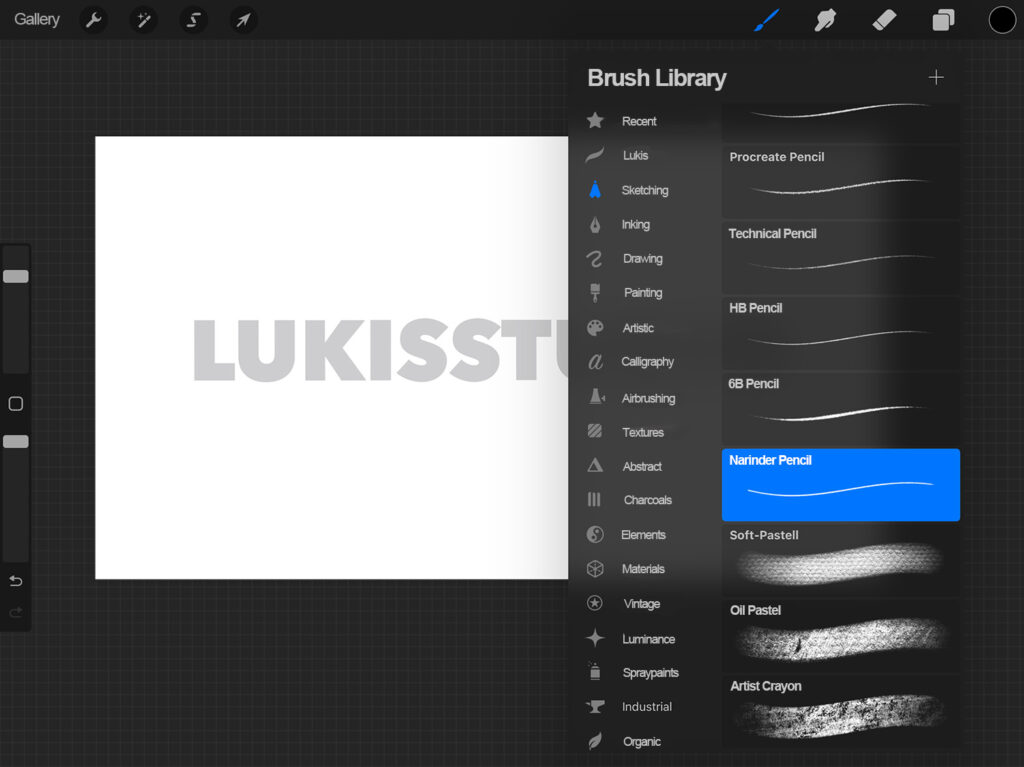
Step 5: Pick a brush
Let’s pick a new brush. You can pick any brush you like, but if you want your intro to look like mine, pick the Narinder Brush.
Step 6: Trace the reference layer
The next step is as easy as it can get. Just trace the text. If you want to give it more depth, try adding this 3D cool-looking effect like what I did here:


Don’t worry too much if you don’t have a steady hand. In fact, the little imperfections are what exactly what we want to create that hand-written effect.
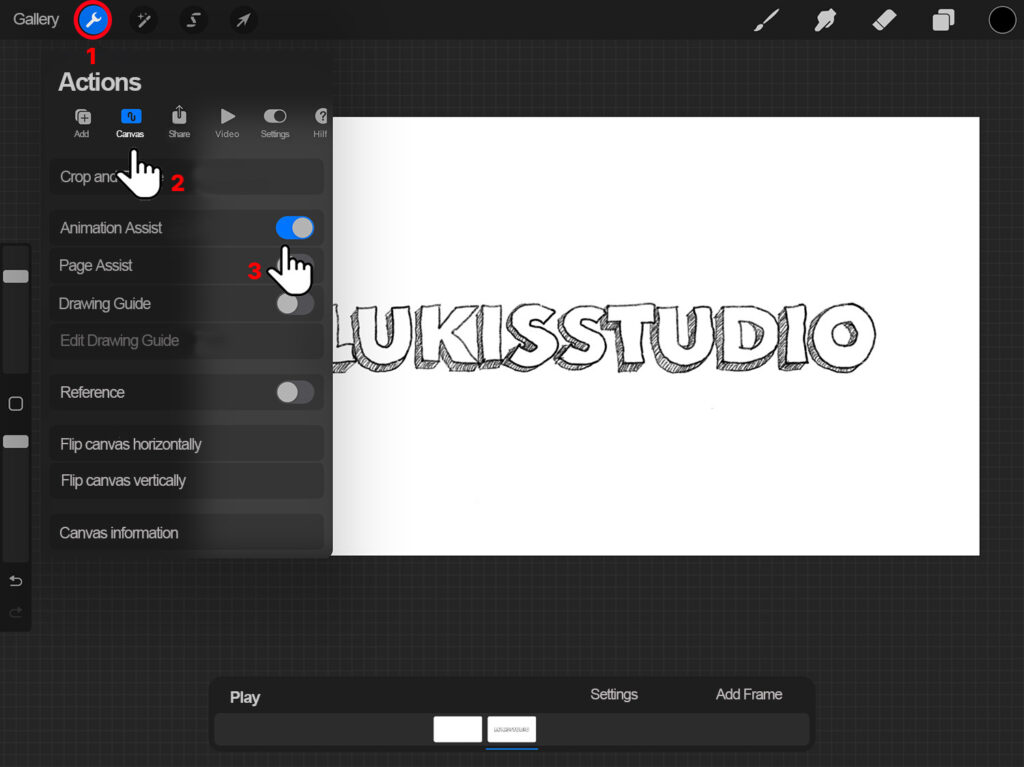
Step 7: Turning on the Animation Assist
Next, you want to go to the settings menu by tapping the wrench icon, then tap Canvas. Here, you want to turn on the Animation Assist option by simply tapping the toggle right next to it.
A new window will pop from the bottom of your screen. Your layers will then show up here as frames.
Step 8: Adding frames
Now tap Add Frame. This will create a new, blank frame. You will notice that the previous layer (or now frame) is vaguely visible. Use it as a reference to trace the letters again.


Now repeat the same process until you end up with 6 frames in total. You don’t need to add more than that. You could do 5 frames, but I find 6 frames to be the ideal amount.

Step 9: Choose Animation type
You’ll notice that there’s a blank frame and a text layer right at the start of our animation. We don’t want these frames to show up in our intro so let’s deactivate them.
Tap the Layers icon in the top bar. Uncheck the small checkboxes on the right side of those layers.

You can then choose how you want to animate your intro. Tap Settings in the Animation Assist panel. Let’s choose Ping-Pong.
Loop
Loop-type animation will play the first frame to the last frame, then back to the first frame where it will play to the last frame again. This will continue to repeat.
Ping-Pong
Ping-Pong type animation will play the first frame to the last frame, then from the last frame to the first. Likewise, this will continue to repeat.
One Shot
One-Shot type animation is exactly what it sounds like. It will play the first frame to the last frame without repeating.
You can set the speed of your animation by changing the amount of frames played per second. I would go with 7 frames per second, but set the speed to whatever looks good to you. If you would like to preview how the animation would look like, tap Play.

If you would like your intro to be longer, just duplicate those 6 frames several times. You don’t want your intro to be too long though. It’s better to keep it short and simple.
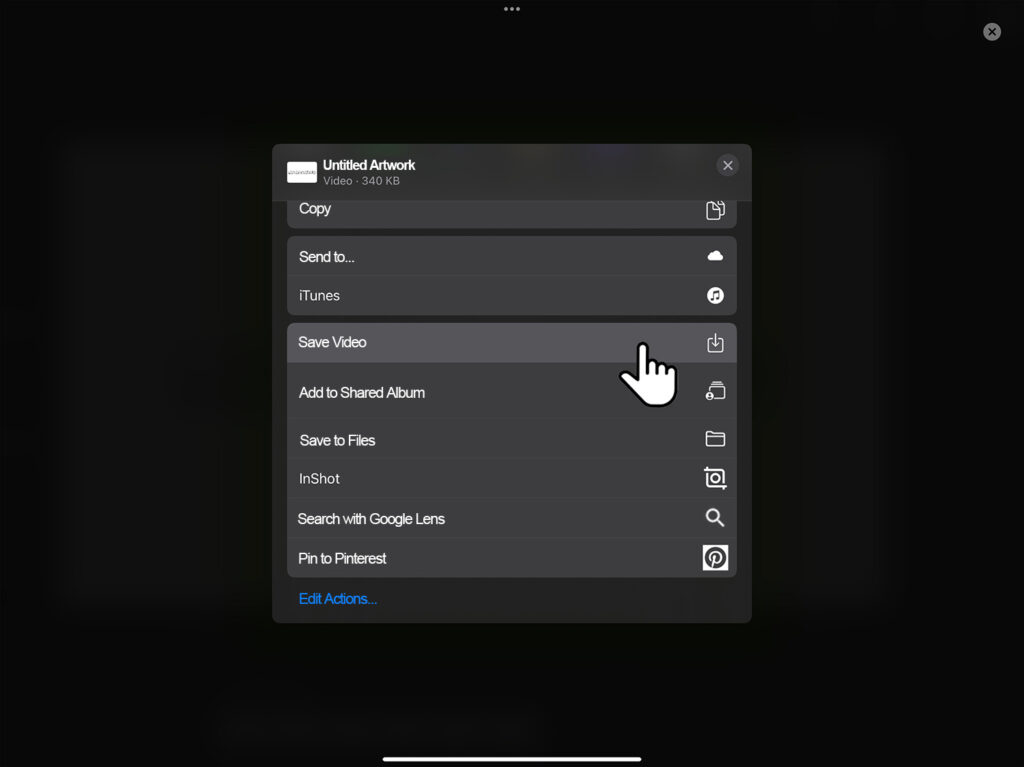
Step 10: Save as MP4
The final step is to save the animation as MP4. Tap Settings in the menu bar and tap the Share option. In the Share Layers option, tap Animated MP4.

In the next window, tap Export. Finally, tap Save Video. Now you have a minimalistic, self-made intro that you can use in your YouTube videos!

Now that you’ve learned how animation works in Procreate, you can add more elements in your intro to make it much more interesting.