This post contains affiliate links. When you purchase through links on our site, we may earn an affiliate commission. Learn more about it here.
In this tutorial, I’m going to show you how to DIY cheap marker storage for under 10 Dollars using foam core boards. This marker storage unit is a perfect solution to store your Copic (or other markers and stationaries) without having to spend so much money on expensive storage systems.
The best part is, you have the absolute freedom to make the unit as big or as small as you want.
Foam core board is a perfect material to use to make our own DIY marker storage. It is a robust material and it’s also easy to cut. You don’t even need any special tool to work with it.
You just need something like a box cutter to cut it and an all-purpose glue to join the parts together.
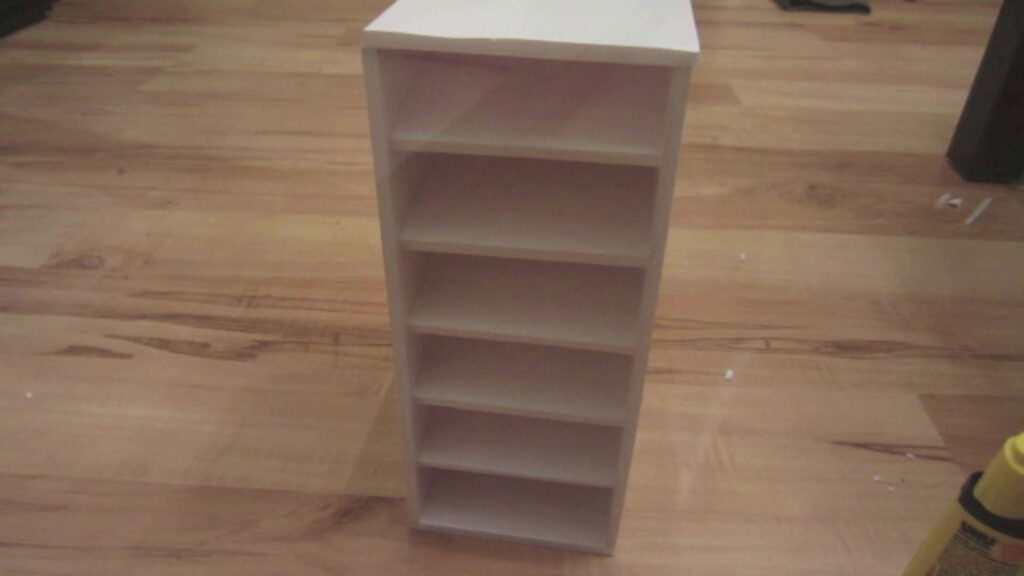
Table of Contents
You can make your storage unit in any size you want, but if you don’t know where to start, you can follow my tutorial below to recreate my Copic storage unit (which I like to call “Copic cubbie”).
It’s a small-sized storage unit which can house about 70 Copic Ciao markers at a time. So let’s get started!
Things you’ll need
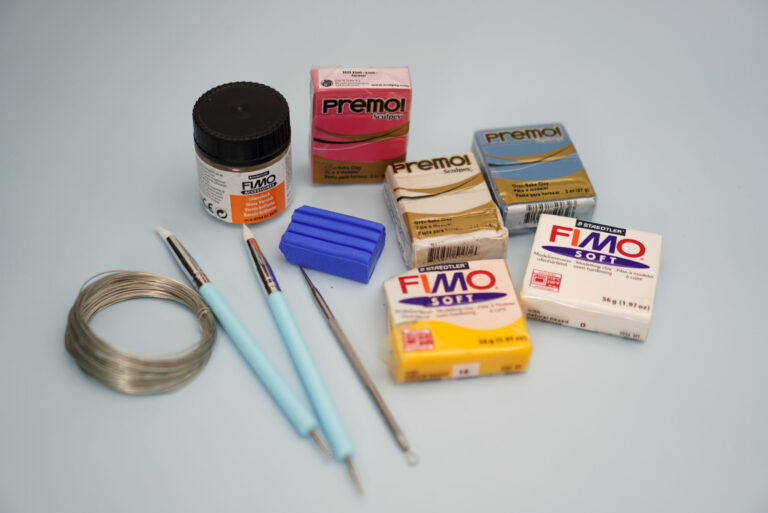
To make our storage unit, you’ll need following items and tools:
- Foam core board, 5 mm thick
- Box cutter
- Steel ruler
- Glue gun or all-purpose glue, preferably gel-based one like the UHU all-purpose glue
- Weights (you can use thick books as weights)
Step 1: Cut Boards to Size
To start off, we are going to use foam core board with a 5 mm thickness to make our storage unit. You can go even thicker if you want, but I wouldn’t use any board with a thickness of 4 mm and below.
You want your unit to be stable enough to hold its shape and strong enough to withstand the weight of at least 70 markers.
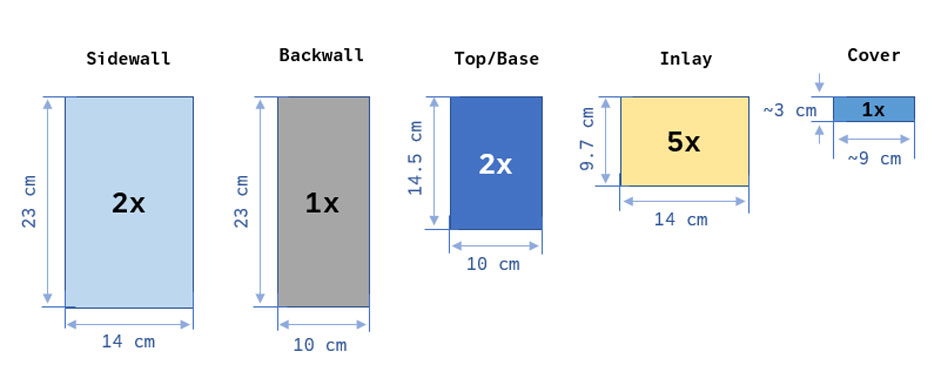
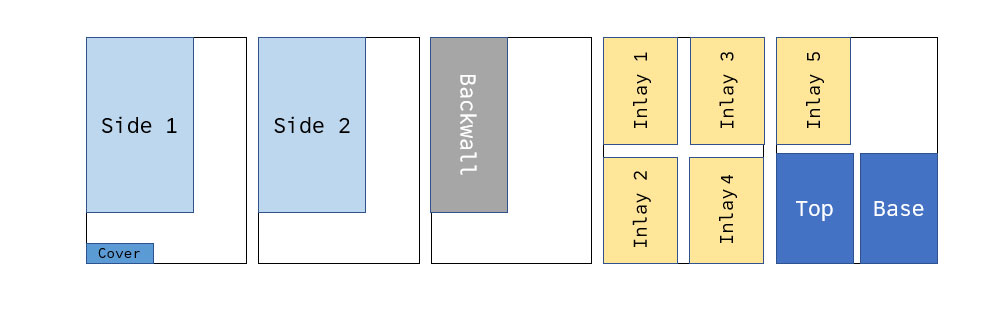
We need to cut 11 parts in total. You can find the dimensions of each part in mm in the drawing below (if you’re more comfortable with measurements in inches, you can use online converter to convert each of these dimensions to inches).

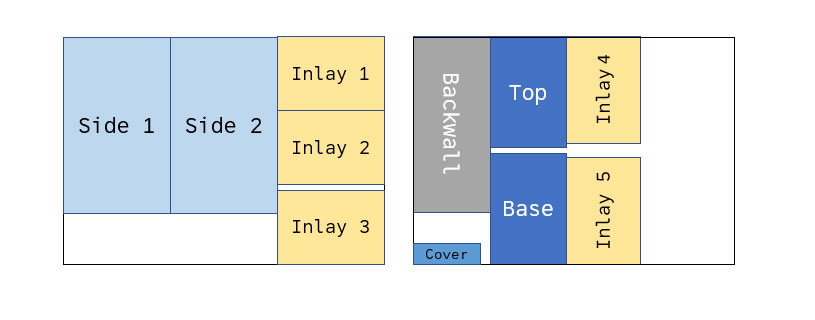
If you’re buying A3-sized (12” x 16,5”) foam core boards, you’ll need two of them. To avoid unnecessary wastage of core board material, here is how you should cut them (just a suggestion):
If you’re buying A4-sized (8”x12”) foam core boards, you’ll need five of them. Here’s how you should cut the parts:
As you can see, you’ll actually be paying more money if you buy A4-sized boards since you need 5 of them in total (which is equivalent to 2 ½ A3-sized boards). There’s also lot of leftover material so it’s better to get two A3-sized foam core boards instead of five A4-sized foam core boards.
Make sure to double check the dimensions, triple check, if necessary, before cutting the parts out.
You can protect your work surface by putting something under your foam core board. Use a self-healing cutting mat if you have that. But if you don’t, just use an old Amazon box or any sturdy cardboard like the back cover of your sketchpad.
Just a friendly reminder, NEVER cut your boards against a plastic ruler. You’ll just end up cutting your ruler and veer off the line. To cut a clean, straight line, use a steel ruler. You’ll thank me for it.
Step 2: Cutting the Grooves
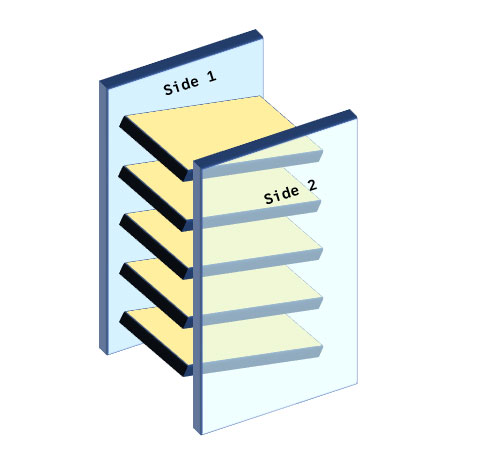
Now here comes the hard part. You need to cut 5 groves in the inside of each sidewall. Here’s how you should cut the grooves:
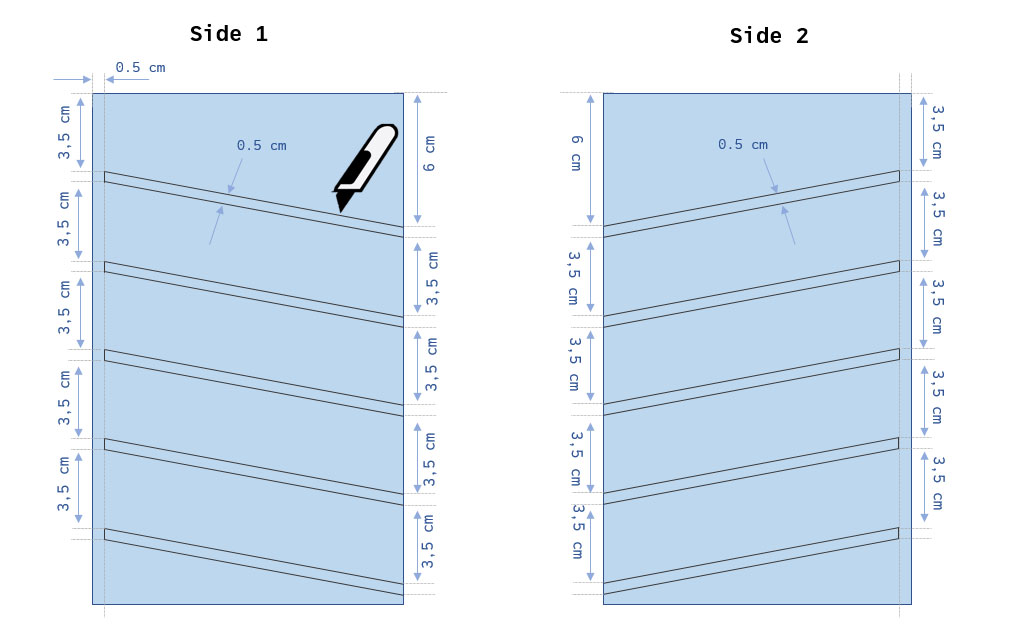
The grooves are angled because we need the inlays to be pointing slightly downwards towards the back. This will ensure that our markers will stay in place a bit better due to gravity that keeps pushing them down.
The thickness of the groove should be 0.5 cm (5 mm). If you paid attention, this is exactly the thickness of the foam core board that we are using. In case you’re using 6 mm thick board, then the groove should be 6 mm thick.
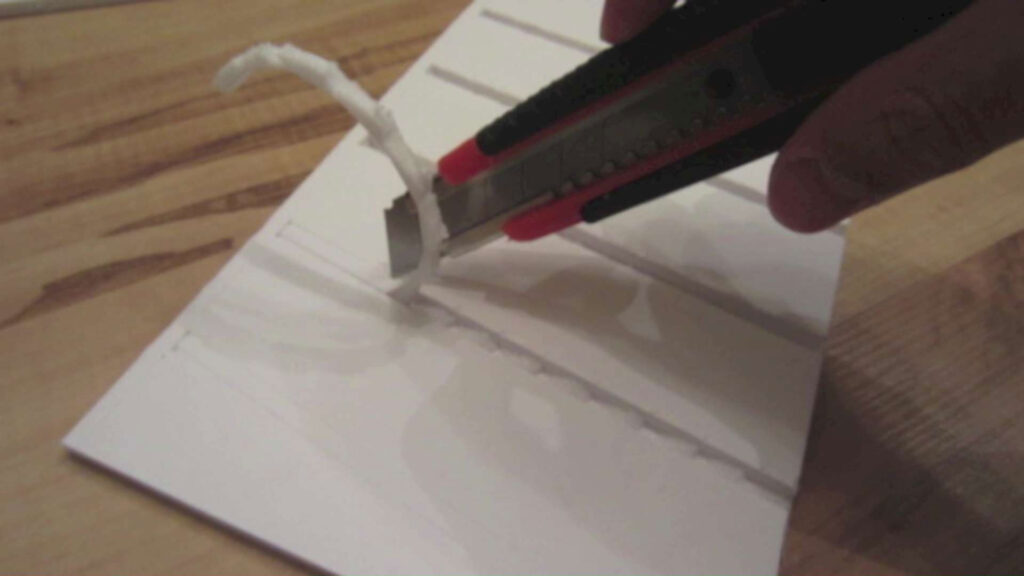
Make sure to not cut through the board. Cut it so that only the thin outer layer of the board (on the other side) won’t get cut. Then you need to carefully remove the foam that you just cut.
If you have special tools like a mini spatula or a sculpting tool it can certainly come in handy, but in case that you don’t, try to use the tip of your knife to carefully scoop out the cut foam.
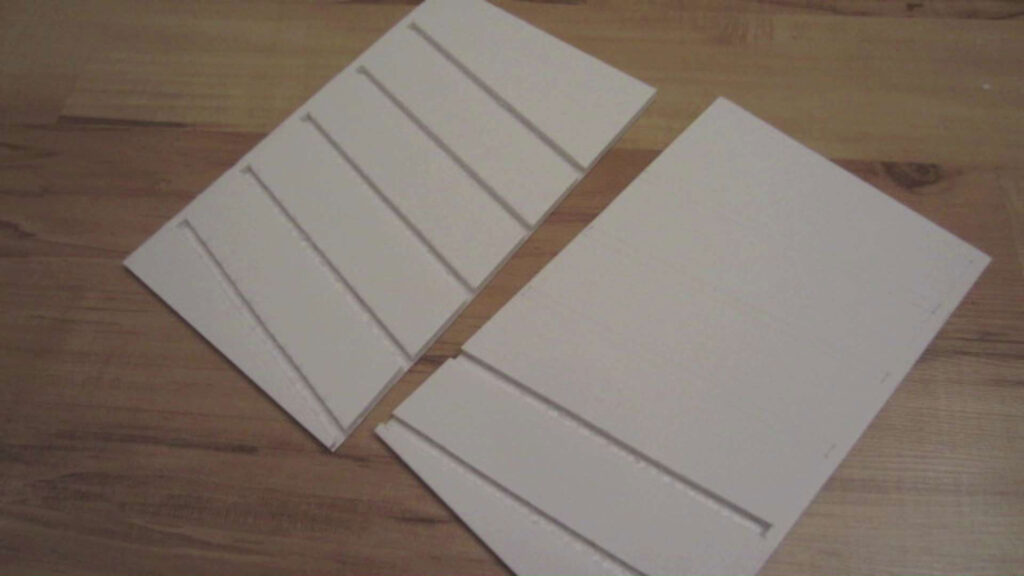
If you’ve done everything correctly, you’ll have 2 sidewalls with 5 grooves on each.
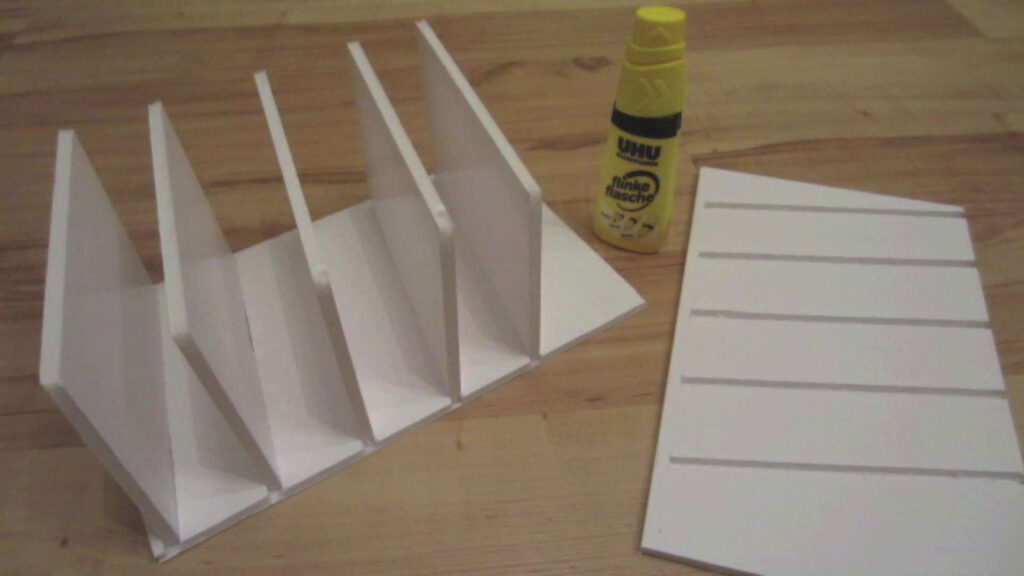
Step 3: Assembling the Inlays
Slide the inlays into the grooves. They should have a snug fit, but you can always use glue to help them hold better.
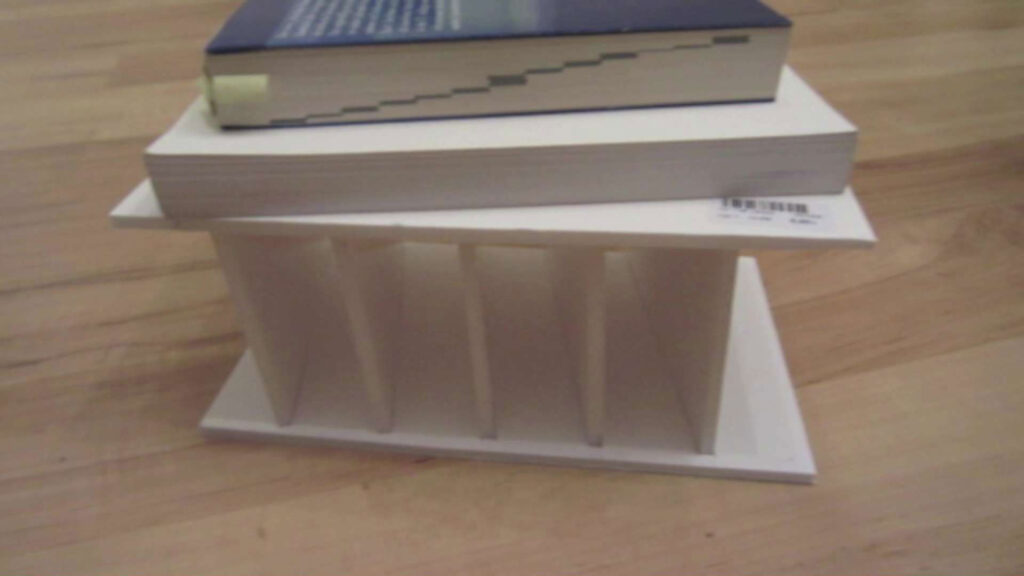
Use something heavy to hold everything together and let the glue dry. If you’re using something like the all-purpose glue, I would wait for at least 10 minutes before moving on to the next step. If you’re using a glue gun, there’s no need to wait that long though.
Step 4: Assembling the Back Wall
Now glue the assembled part from Step 3 to the back wall. Again, use weight and let the glue dry.
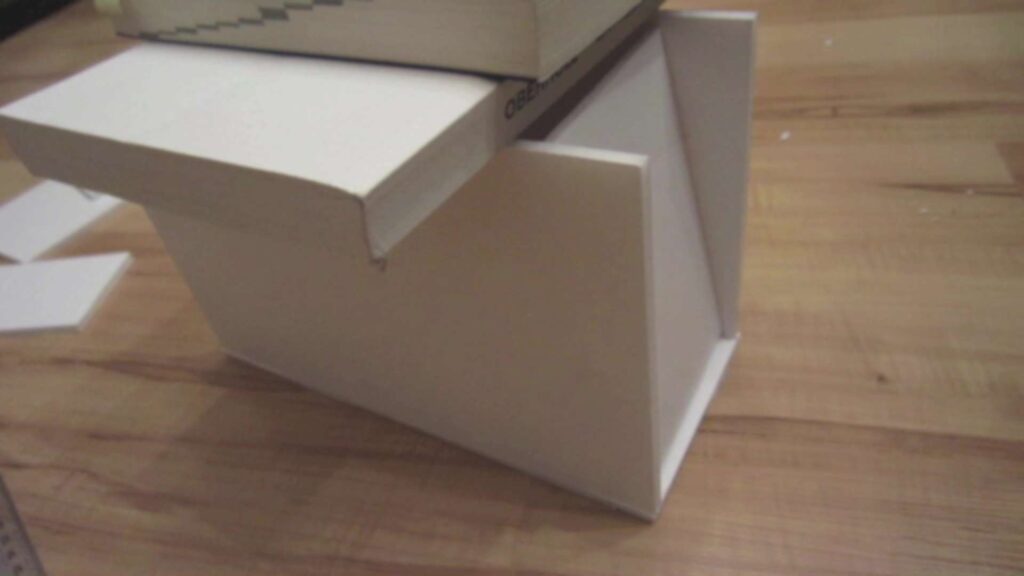
Step 5: Assembling Top & Base
Next, glue the top and the base. Since both parts are the same size, you don’t need to worry about mixing any parts up.
Step 6: Cover
At this point, after your storage unit is completely dried, you can use it right away to store your markers and stationaries. However, only the first 5 cubbyholes from the top can be used to store your markers.
You can always leave it as is and store your smaller items e.g. an eraser or a sharpener n the lowest cubbyhole but if you want a more finished, cleaner look, cut a small piece of foam board and cover the hole.
You can glue the cover to permanently close the hole.
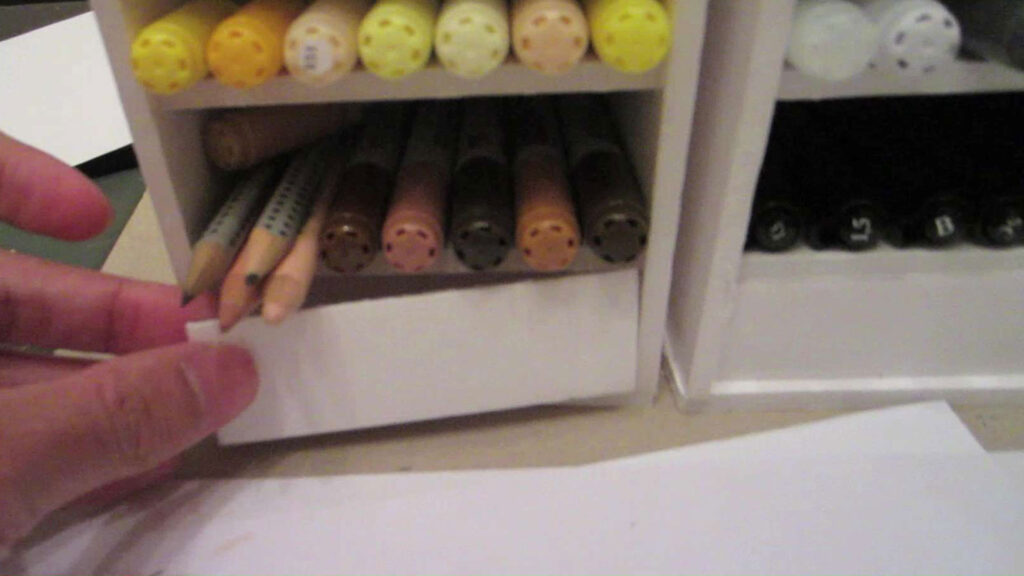
Our finished marker storage unit looks awesome, doesn’t it? With proper care, this storage unit can last for a really long time! My cubbies have been around for more than 10 years already and they’re still going strong.
If you prefer cool, sleek design, why not make a black cubbie using black foam core boards instead of the white one?
I hope you find this tutorial helpful in making your own DIY marker storage unit at home. Let me know if you have any questions!