This post contains affiliate links. When you purchase through links on our site, we may earn an affiliate commission. Learn more about it here.
So there are basically two types of vinyl. Adhesive vinyl and heat transfer vinyl (HTV). Which one you should get depends on what you’re trying to use it for and what you’re trying to achieve.
Are you trying to use it indoors only? Or maybe you wanna use it both indoors and outdoors? Does it need to be waterproof, does it need to be UV resistant? You might want to learn more about their properties so you won’t waste your money on a vinyl that just doesn’t work for you.
You can find all the recommended vinyl for different fields of application down below. Let’s start with adhesive vinyl.
Table of Contents
Adhesive Vinyl
Adhesive vinyl is a soft, flexible PVC film with adhesive coating on one side. The adhesive side, or the sticky side is normally backed up with a silicone coated paper which makes the vinyl easier to peel off and ensures easier weeding.
Adhesive vinyl is commonly used for making decals and stickers. It can be applied to almost any type of surfaces, though it sticks better to smooth, flat surfaces.
There are a lot of popular brands that sell adhesive vinyl like Siser, Cricut and HTVRont, but my most favorite vinyl is the one that Orafal makes.
Unicolor Adhesive Vinyl
You can get adhesive vinyl in all sorts of colors. There are even metallic and glitter ones! The most common adhesive vinyl you can get has either a matte or a glossy finish. They can either be suitable for both indoor and outdoor use or indoor use only.
Indoor and Outdoor Use
Glossy
Oracal 751 is the most versatile vinyl you can get. It can be applied on almost every type of surfaces and it adheres extremely well! You can use it both indoors and outdoors. The manufacturer guarantees the lifetime of 8 years if you use it outdoors, and since it’s UV resistant, you can even use it to make decals for your car!
Oracal 751 is a permanent glossy finish vinyl, though you can get the black and the white one in matte finish as well. It’s weird, I know.
Oracal 7510 is the neon version of the Oracal 751.
Matte
If you’re gonna make matte black or matte white decals, I’d go for Oracal 751. But if you want more options than just black and white, you could get the Oracal 651.
Oracal 651 is like the cheaper version of 751 and is available in both glossy and matte finish.
It’s also a permanent vinyl and UV resistant, but the manufacturer only guarantees the lifetime of 4-6 years if used outdoor.
The neon version of Oracal 651 is the Oracal 6510.
Indoor Use Only
Glossy
You know I’m a fan of the Oracal 751 right? Since this vinyl is such a versatile vinyl, you can use it for indoor use as well! You don’t need to buy an indoor-only vinyl. Just get this one and it saves you the trouble of getting two different types of vinyl.
If you know that you’re mostly gonna make indoor projects and you don’t need high-performance vinyl, go with the Oracal 651.
Matte
Oracal 631 is a removable vinyl in matte finish. If you prefer non-permanent vinyl then this is the perfect option for you. Since it’s removable, you can even use it to make wall art or wall tattoo.
It is UV resistant, and the manufacturer guarantees the lifetime of 3 years if used outdoors. However, it can be removed easily so it might not be a good idea to use it outdoors.
Transfer tape
Transfer tape is a sticky tape that lets you transfer your vinyl onto the surface of your project. You do it by first applying the transfer tape onto the (weeded) vinyl. You can then peel the backing, leaving the vinyl on your transfer tape.
Once the vinyl is on your transfer tape, you can line it up on the surface of your project and press it down. Smooth it out with a scraper, or a credit card if you don’t have one, to remove all the air bubbles and finally, peel off the transfer paper. You have now successfully transferred the vinyl onto the surface! It’s easy as that!
The transfer tape shouldn’t be so sticky that your vinyl just won’t transfer because it prefers to stay on the tape, but sticky enough that it could lift off the vinyl of its backing. You might need to try several transfer tapes until you find the one that’s best for you.
I’m using the Oratape MT72 and it works really well. I’ve zero problem with it so far. In fact, this is one of the tapes that Orafol recommends that’s suitable for Oracal 751, Oracal 651 and Oracal 631.

Transfer tape is one of items that’s absolutely necessary to have if you’re working with adhesive vinyl.
Printable Vinyl
Although it’s possible to create so many designs with unicolor adhesive vinyl, your options are kinda limited. You would also need to buy so many colors and even if you bought every color, you’re still limited to only using those colors.
If you want to be able to make any design you want, you want to get printable vinyl.
Indoor and Outdoor Use
The only ink that can come close to being UV-resistant is the type of ink that’s pigment-based. I don’t own a printer with pigmented inks, and I believe that most people don’t use this kind of ink in their home desktop printers.
It’s not really a good idea to buy a dedicated printer just so you can print stickers with pigment inks, since there are other ways to make UV-resistant stickers.
The best way to make UV-resistant, well almost UV-resistant stickers, is to laminate them with a clear UV-resistant vinyl, for example the Oraguard 236.
Eco-solvent Ink Inkjet Printer
If you have an eco-solvent printer, you can print your design on the Orajet 3164, then laminate with the Oraguard 236.
Dye-based Ink Inkjet Printer
Conventional inkjet printer uses dye-based inks. It’s the most popular printer for home use. So if you have one, this is probably your go-to method to make stickers.
If you have a printer that uses dye-based inks, which I presume you do, you can use the Orajet 1917.
Orajet 1917 is the printable vinyl that’s suitable for dye-based ink inkjet printers. Print your design on the Orajet 1917 and then laminate it with the Oraguard 236.
The manufacturer guarantees the lifetime of 1 year+ of UV protection if you’re using the Oraguard 236 to laminate your stickers, so it’s suitable for a short to medium-term outdoor application only.
Indoor Use Only
Eco-solvent Ink Inkjet Printer
If you don’t plan to use your stickers outdoors, you can still print your designs on the Orajet 3164. You wouldn’t be needing the Oraguard 236 laminate though, you can go with either the Oraguard 210 or the 215. More on it in the later section of this post.
Dye-based Ink Inkjet Printer
If you just want to make ordinary stickers for indoor use using your conventional inkjet desktop printer, you’re in luck! This method is the most common and the most popular method to make stickers, so you can find printable vinyl made for this type of printer almost everywhere.
There are so many options to choose from. You can get it either in matte or glossy finish. You can even get this fun, translucent vinyl stickers which I got from HTVRont:

Here are some of the best printable vinyl that you can get:
The most versatile: Orajet 1917 (you can apply the laminate to weather-seal it)
Thin vinyl: Cricut printable vinyl
Waterproof:
- AIVA Vinyl Sicker Paper Matte & Glossy
- PPD Inkjet Vinyl Self-Adhesive PPD-038 Matte & PPD-36 Glossy
PPD printable vinyl is kinda thick and is slightly more expensive, but it’s the best printable vinyl you can find if you’re located in Europe. And it’s waterproof too! If you don’t plan to laminate it, you don’t need to worry about the ink bleeding and smearing if your sticker ever comes in contact with water.
If you plan to laminate your vinyl, you could get the cheaper ones, and ideally, the one that’s not so thick. The laminate adds to the thickness, so you don’t want to end up with super thick vinyl stickers!
So how we do laminate the stickers? Keep on reading!
Transparent / clear adhesive vinyl
The traditional way to laminate is to use a laminator to chemically bond the laminating sheets onto a substrate by applying heat. That means you would need to spend extra money on a laminator, that runs on electricity. Nobody got time for that!
The best, easiest and the fastest way to laminate your printed vinyl is to cold laminate it. You can achieve this by applying a clear or a transparent adhesive vinyl to your printed vinyl, as simple as that!
Laminating your vinyl will protect the ink and make your stickers scratch resistant. You can literally scratch the vinyl off with your fingernails, so laminating your printable vinyl is highly recommendable!
My go-to clear vinyl is either the Oraguard 210 or the Oraguard 215. Oraguard 215 is slightly thicker and lasts a year longer than the Oraguard 210. Either one works. If you don’t your stickers to be too thick, go for 210.
Get the Oraguard 236 if you plan to weather-seal your stickers.
Want to give your stickers a cool holographic effect? Why don’t you try this clear vinyl broken-glass laminate?

So to sum it up, here are my adhesive vinyl recommendations for each field of application:
Unicolor Adhesive Vinyl
| Indoor & Outdoor use | Indoor & Outdoor use | Indoor Only | |
| Vinyl | Oracal 751 | Oracal 651 | Oracal 631 |
| Surface property | Glossy | Matte | Matte |
| Vinyl Type | permanent vinyl | permanent vinyl | removable vinyl |
| Thickness | 60 microns | 70 microns | 80 microns |
| Durability | 8 years | 4-6 years | 3 years |
| Key Features | UV Resistant Diswasher safe (top rack) | UV Resistant Diswasher safe (top rack) | suitable for painted drywall |
| Transfer tape | Oratape MT72 | Oratape MT72 | Oratape MT72 |
Printable Vinyl for Dye-Based Ink Inkjet Printers
| Indoor & outdoor use | Indoor Only | Indoor Only | |
| Vinyl | Orajet 1917* | Cricut printable vinyl* | PPD Self-Adhesive vinyl* |
| Surface property | Matte | Matte | Matte & Glossy |
| Thickness | 140 microns | 75 microns | 120 microns |
| Key features | Weatherproof if laminated with the Oraguard 236 | budget-friendly, thinner material | waterproof vinyl, thicker material |
Heat Transfer Vinyl (HTV)
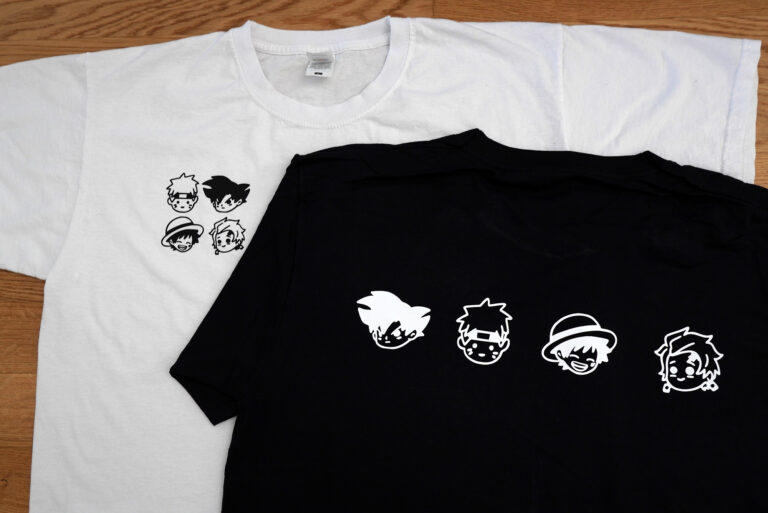
HTV is a polyester-based adhesive vinyl that can be heat applied directly onto surfaces, mostly onto textiles. It’s super stretchable and waterproof, so it’s the perfect type of vinyl to use to make your own custom T-shirt.
Unicolor HTV
Just like adhesive vinyl, HTV comes in so many colors. And you can get them so easily from any o of the big brands like Siser, Cricut, HTVRont etc. My favorite HTV is the one that Poli-Tape makes.
HTV is really straight forward to use. You don’t need to transfer it onto a transfer tape. Once you’ve finished weeding, you place the vinyl directly on your t-shirt. To apply the vinyl (on)to the shirt, you can use a heat press or a household iron.
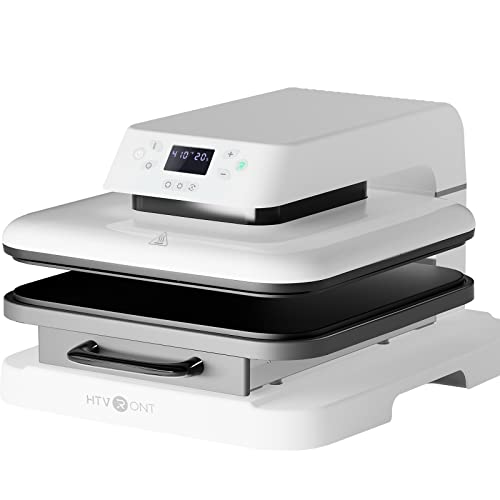
My favorite heat-press is this one here from HTVRont:
HTVRONT Auto Heat Press Machine
- Great for heat-transfer projects like sublimation, HTVs etc.
- Auto release function
- Easy to use
One thing to keep in mind is, you need to mirror your image before you send it to your cutting machine.
Each HTV has its own properties so you may want to refer the application instructions from the manufacturer. My favorite HTV, Poli-flex Turbo for an example, needs to be pressed for only 3 seconds. If you’re making a lot of t-shirts, you’ll saving so much time.
If you can’t find Poli-flex HTV in your area, try the Siser EasyWeed. You can also use flocked HTV or 3D puff HTV to add a more interesting texture to your t-shirts. Try the Siser StripFlock or the Siser Easy Puff.
Click here to see how to make your t-shirt using a household iron only!
Printable HTV
Although you can layer HTVs on top of each other to create multicolored designs on your t-shirts, your options are still limited. What if there’s a way to print your design on a vinyl, and apply it to your t-shirt? That will improve your workflow tremendously! Well there is and I’m going to tell you how.
Sublimation
You can use printable HTV which is specially made for sublimation ink to print your design on.
Siser EasySubli HTV is perfect for this job. It works best with a sublimation printer like the Sawgrass SG500 printer. If you’re using a converted Epson EcoTank sublimation printer, you might have the problem with the ink not drying completely.
If you have a Sawgrass printer, just print on the HTV directly, cut, weed, transfer it to a T.T.D Special transfer film, place the film on the surface of your project and heat-press.
If you’re using an Epson EcoTank printer, you can use this method instead:
Cut the offset of your image on the Siser EasySubli HTV with your cutting machine. Just print your design normally on a sublimation paper. Apply the HTV on the t-shirt first, then place your sublimation paper on top of the HTV and press. In a way, you are sublimating your design on the white vinyl.
Recommended sublimation inks:
- If you’re in the US: Hiipoo sublimation ink
- If you’re in Germany: Subliking ink
Eco-Solvent
If you’re already using an eco-solvent printer to print stickers, you can use your printer to make t-shirts too!
Print your design on a printable HTV that’s specifically made for eco-solvent inks and apply it to your t-shirt.
For this to work, you would need the Siser S-Print vinyl. You print your design on the vinyl then transfer it to the Siser T.T.D Easy transfer film. Place the transfer film (with your design on it) on the t-shirt and heat-press.
Since this method is kinda new in the home t-shirt printing industry, there are not a lot of HTV you can find that work. Aside from the HTV from Siser, there’s another HTV that is almost as good, which is the Politack 4038 H2O. If you’re going to use the Politack 4038 H2O, you would need the Politack 850 transfer film.
Eco-solvent printers are hard to come by. You could either get a ridiculously expensive eco-solvent printer like the Roland BN-20 or you could convert a normal printer to an eco-solvent printer yourself, which is probably your best bet if you’re just starting.
You can covert an Epson EcoTank printer to an eco-solvent printer just by filling the tanks with eco-solvent inks. And voila! You now have an eco-solvent printer! You can use basically any Epson EcoTank printers, but the best one you could get is the Epson ET15000.

There’s already a huge community of users that have been using eco-solvent inks in this printer for years, so whenever you face any problem, you’re always going to find someone that might be able to assist you. You can also easily find the custom ICC profile specifically made for this printer!
If you bought a new Epson EcoTank printer, you can fill the eco-solvent inks in the tank right away. If you’re using a used one, make sure to flush it first! Since this printer is so popular, you can find so many tutorials on how to do it online.
Recommended Eco-Solvent Inks:
- If you’re in the US: Eco-Rush Ink
- If you’re in Germany: Eco-Bright Ink
So to sum it up:
Unicolor HTV
| HTV | Poli-flex Turbo | Siser Easy Weed |
| Thickness | 95 microns | 90 microns |
| Heat press | 3 s | 10-15 s |
| Peel | Warm peel | Warm or cold peel |
| Temperature | 130°C-160°C | 150°C |
| Pressure | 2.5-3.0 bar | 2.5-3.5 bar |
Printable HTV
| Printer type | Sublimation | Eco-Solvent | Eco-Solvent |
| HTV | Siser Easy Subli | Siser S-Print | Poliflex 4038 H2O |
| Transfer film | Siser T.T.D Special | Siser T.T.D Easy | Politack 850 |
| Thickness | 220 microns | 85 microns | 90 microns |
| Heat press | 15 s | 5-10 s | 3-5 s |
| Peel | Warm peel | Warm peel | Warm peel |
| Temperature | 155°C | 120°C-150°C | 130°C-160°C |
| Pressure | 2.5-3.5 bar | 2.5-3.5 bar | 3 bar |
Sublimation vs Eco-Solvent
Personally, I would use an eco-solvent printer if I were to make my own t-shirts. Eco solvent inks are very versatile. If you converted your printer to an eco-solvent printer, you can still use it to print documents like you would normally do with your desktop printer.
A sublimation inks however, look faded and dull when they’re first printed. They only show their true color once activated with heat. That means that a sublimation printer can only used for sublimation projects.
HTV vs Other Printing Methods
Aside from this method, there are other ways to print your t-shirts, like screen printing, DTF (direct to film) or the DTG (direct to garment) to name a few.
Most people tend to opt for HTV printing to create t-shirts because it’s way easier and considerably cheap.
For home use and maybe for small businesses, HTV printing is your best bet.