This post contains affiliate links. When you purchase through links on our site, we may earn an affiliate commission. Learn more about it here.
In this tutorial, I’m going to show you how to make stickers at home. Making stickers at home have becoming so popular these days since it’s super easy to make them if you have a cutting machine.
If you don’t have one, don’t worry, you could just use a pair of scissors to cut the stickers.
If your stickers are only for personal use and you’re not planning to sell them, you don’t need to spend a lot of money on the materials. You can get something like cheap glossy sticker paper and print your designs on it.
If you plan to sell your stickers and start your own sticker business, investing in a cutting machine might not be a bad idea. You could get something like the Silhouette Cameo or the Cricut cutting machine. You also want to use high-quality materials to make your stickers and you definitely want to laminate them.
In this tutorial, I will be using the Silhouette Studio Basic Edition software to make the stickers. So let’s get started!
Table of Contents
Before we start, these are the things that you will need to make your own stickers at home:
- a cutting machine e.g. Cameo 5
- Silhouette Studio or Cricut Design Space software
- an injket printer
- printable matte vinyl sticker
- clear vinyl sticker
- a squeegee
Step 1: Page Setup
On the Design tab, click the first icon in the toolbar on the right to open the page setup window. Select the Registration Marks icon and turn it on. Here, you can also set the length, thickness and the position of the registration marks. I like to set the length to 10 mm, the thickness to 0.5 mm and the inset to 10 mm but it’s entirely up to you.
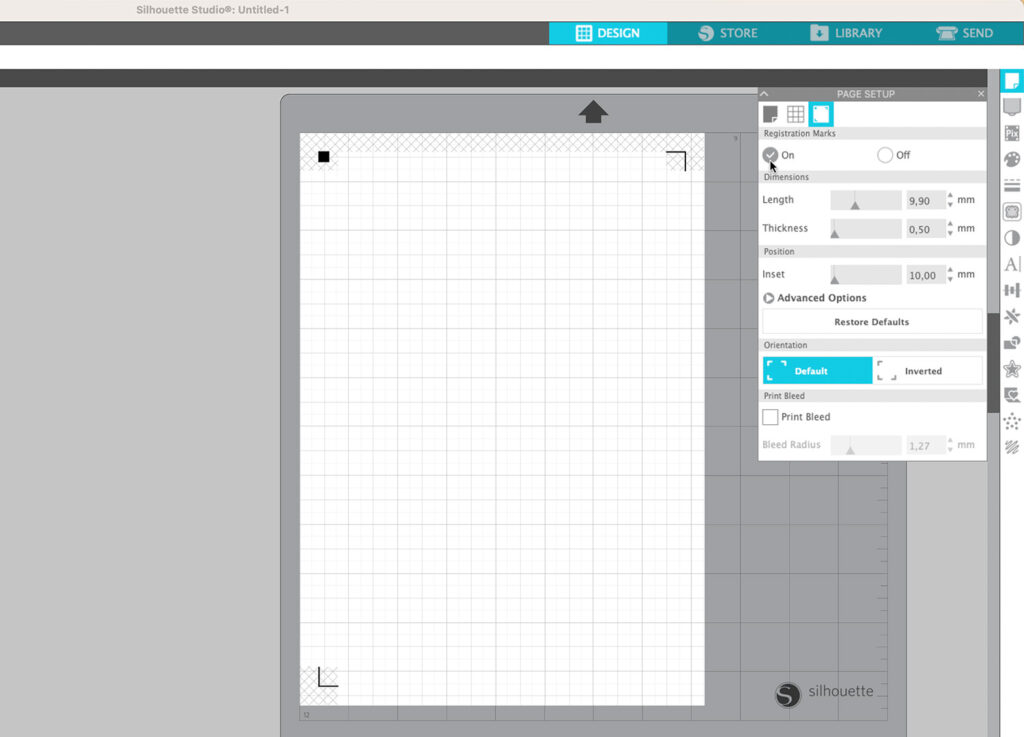
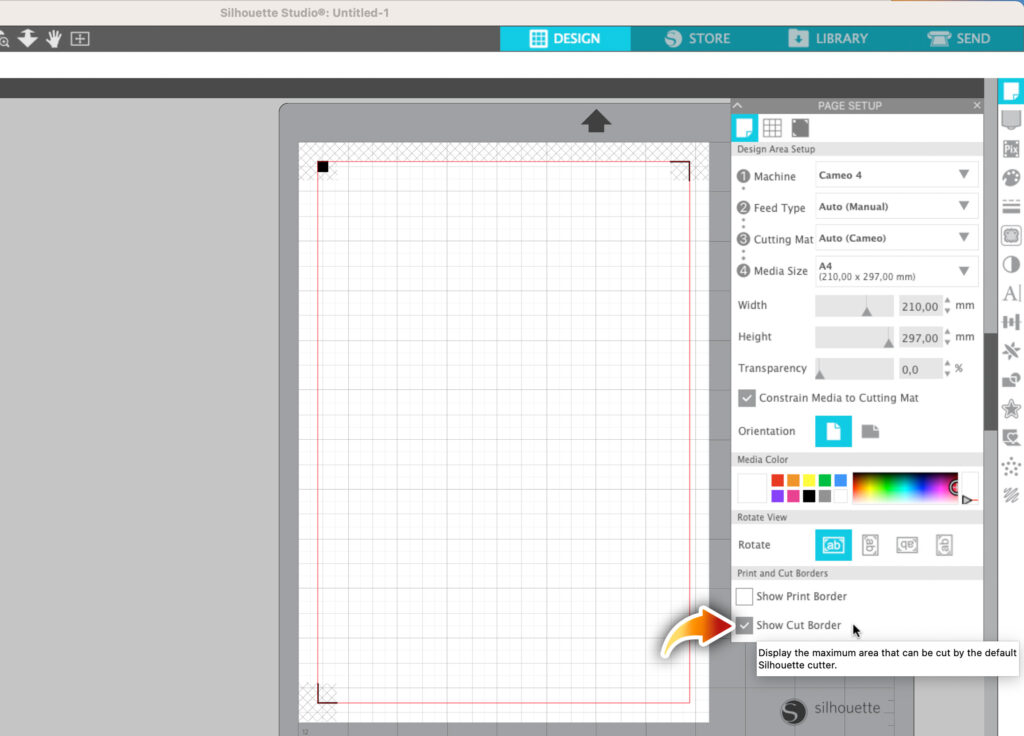
Now click the most-left icon in the same Page Setup window to display the Design Area Setup menu and check the option “Show Cut Border”. A red border will then be displayed.
Step 2: Importing Your Sticker Designs
To import several different files into our active workspace, I use the Merge option which can be found in the File menu. Position your designs anywhere inside the red border and make sure they don’t touch any areas that are cross-hatched.
Step 3: Adding an Offset
Whenever I import a design in PNG format into Silhouette Studio, the software automatically creates a cut line around it. If that happens to you, you may want to remove it first before adding an offset to your design.
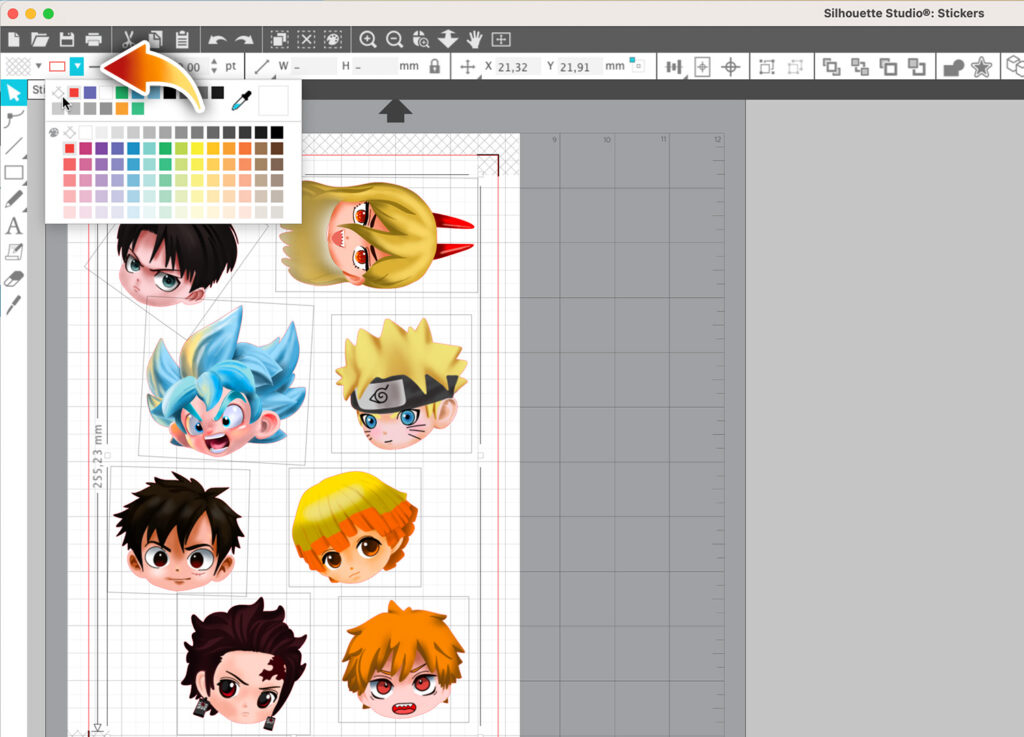
There are many ways to do it, like manually deleting the lines and do some clean-up afterwards, but i find it easier if you just hide it. To do that, select your design(s), hover to the top bar and select no color (the diamond-shape icon). If you want, you can even choose other colors other than red, but lets just keep it simple.
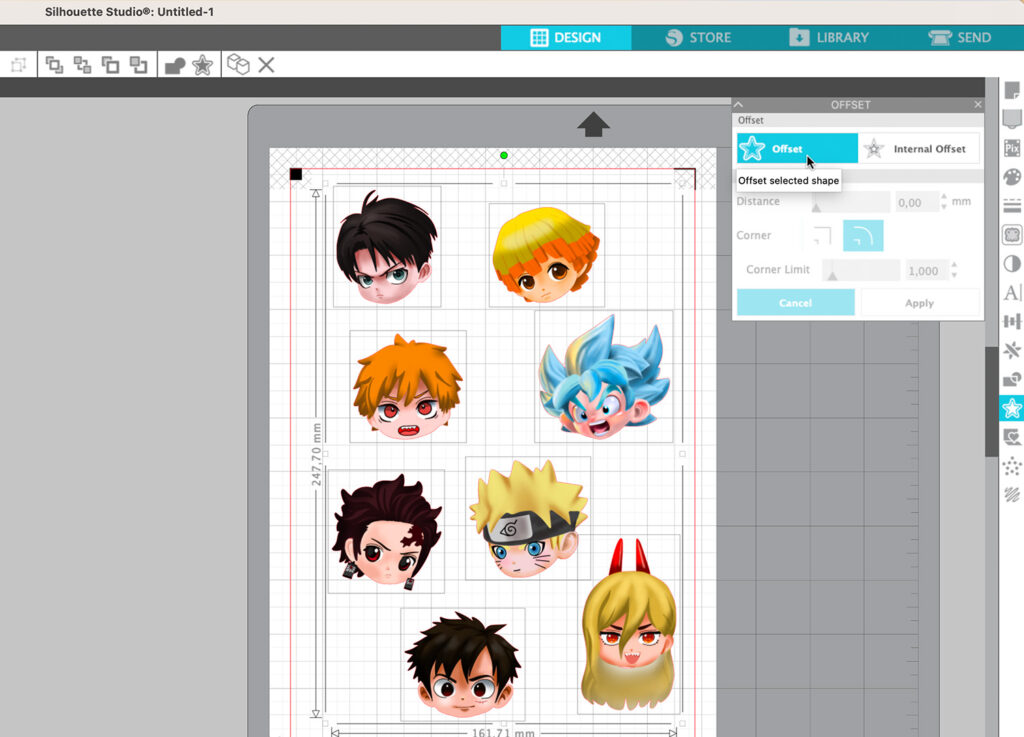
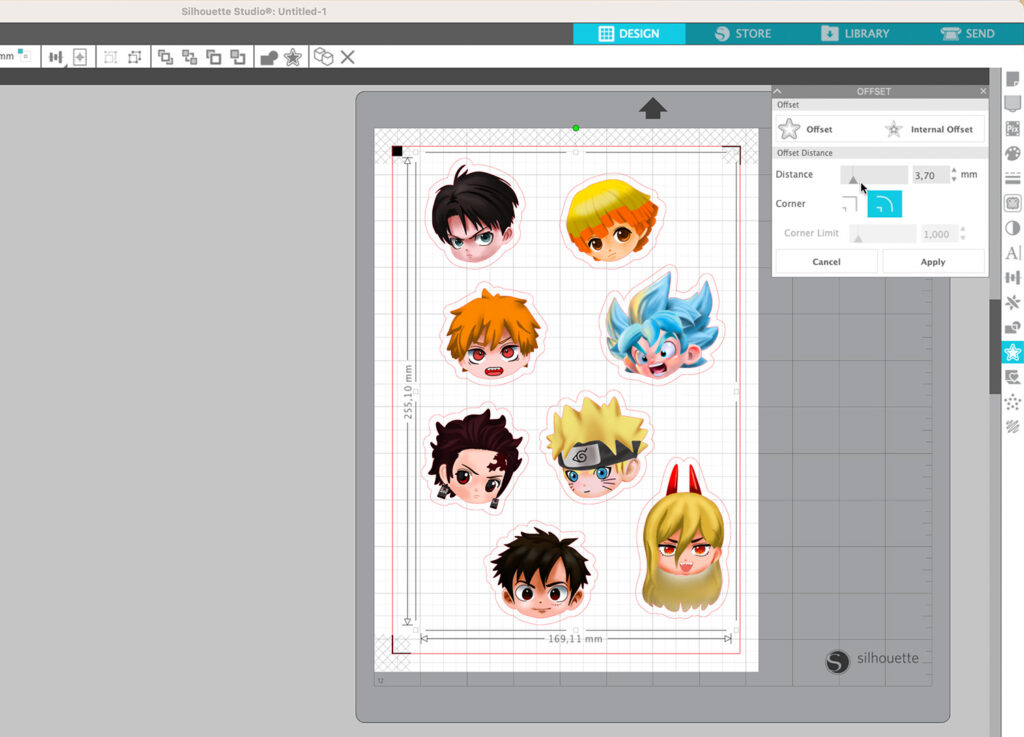
Now, hover to the right toolbar where you can find the star icon. Click it to open the Offset panel.
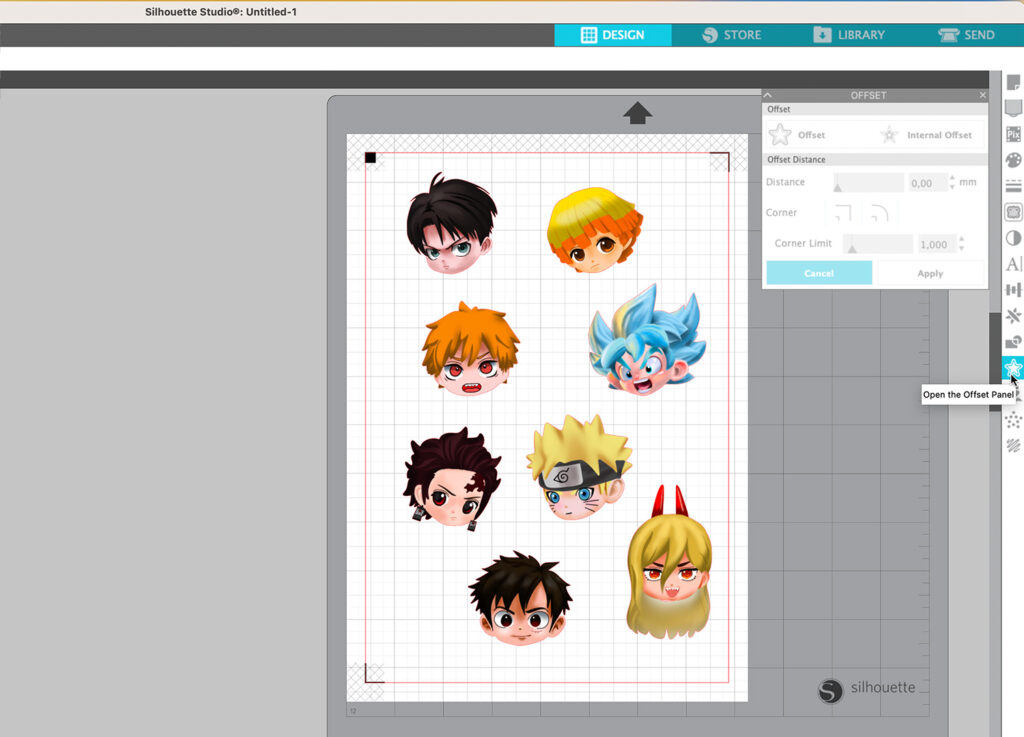
Next, click Offset. You can then change the thickness of the white border.
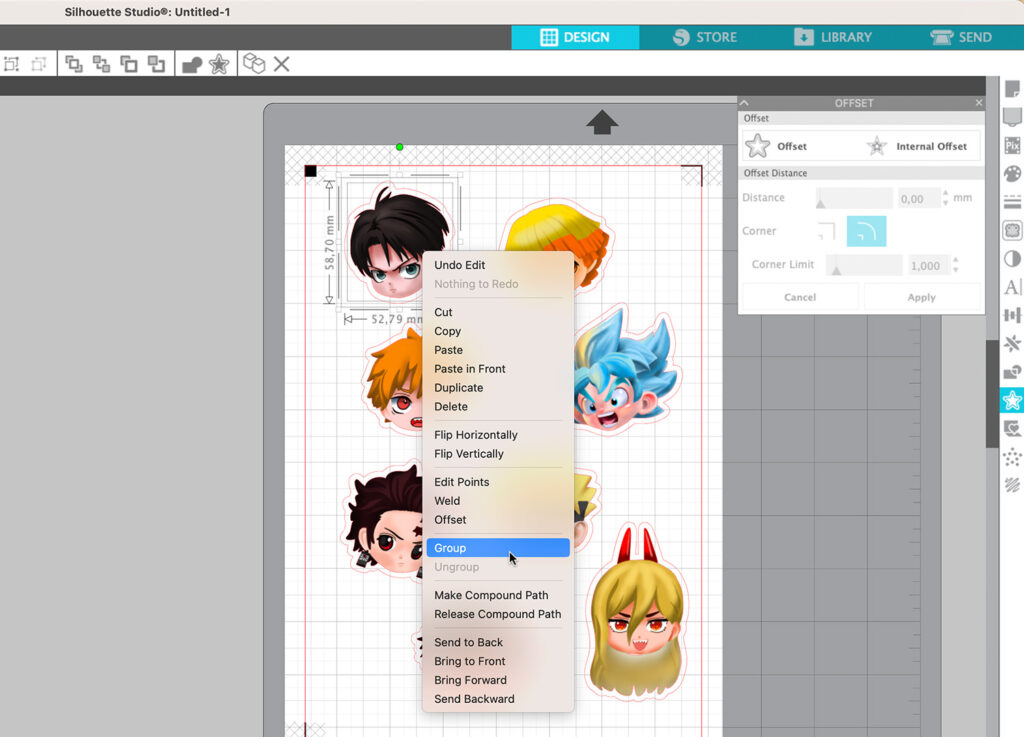
The next step is important if you wish you move your designs around after adding the offset. Since your designs and the offset borders are basically individual, seperate elements, you want to group them together.
Avoid grouping everything into one big group. Instead, group each design seperately. Just hightlight both the design and its offset border, right click and choose Group. You can then move, rotate and resize each of design seperately. Try to maximize the space as much as you can.
Step 4: Printing the Stickers
Now let’s print the stickers! An Injket printer, which is the common home desktop printer, is the most used type of printers used to print stickers. You can definitely use a cheap inkjet printer to print your stickers, but if you want the best results, try to invest in a high-quality inkjet printer.
I use my Canon Pixma ix6850 printer (or ix6820 in the US) to make stickers since the print quality of this printer is amazing!
Load your sticker paper into the printer paper tray. Whichever sticker paper you use, you want to make sure that it is printable vinyl matte sticker paper. You could get something like these:
- Cricut printable vinyl
- Koala matte vinyl sticker paper
- PPD vinyl self-adhesive sticker matte
- HTVRont Printable vinyl sticker paper
You can read more about different types of printable vinyl here.
To print, select Print from the File menu in your Silhouette Studio software. In the preview window, select Print again.
You now have the option to change your printer settings. If you use a Canon printer like me, scroll down to Printer Options, choose Quality & Media and change the media type to Matte Photo Paper. Set the print quality to High.
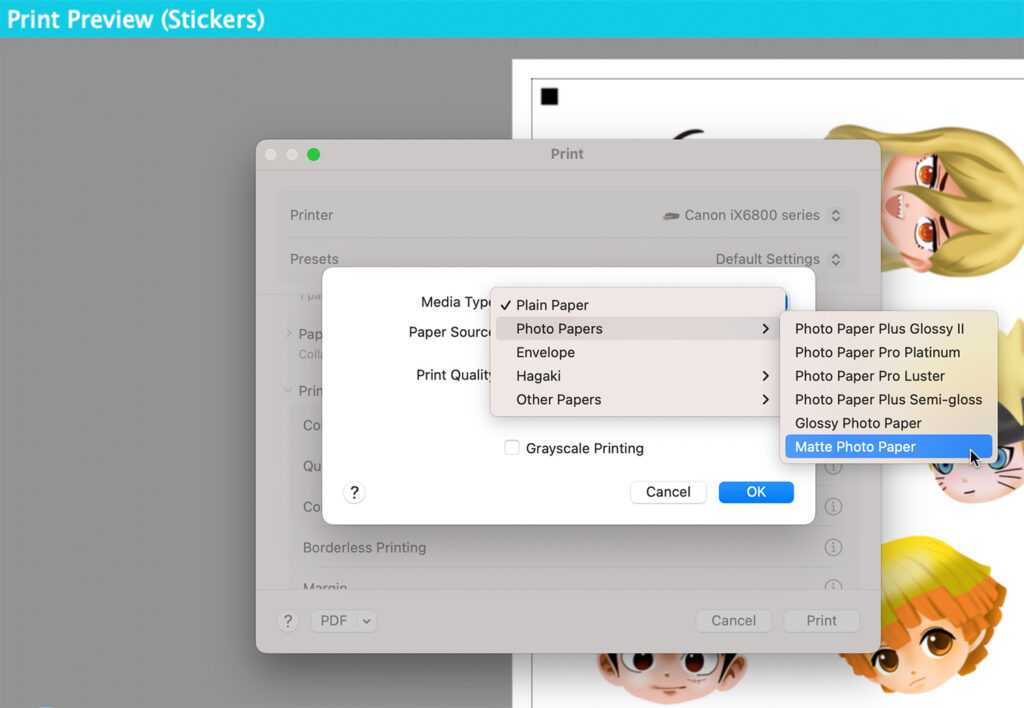
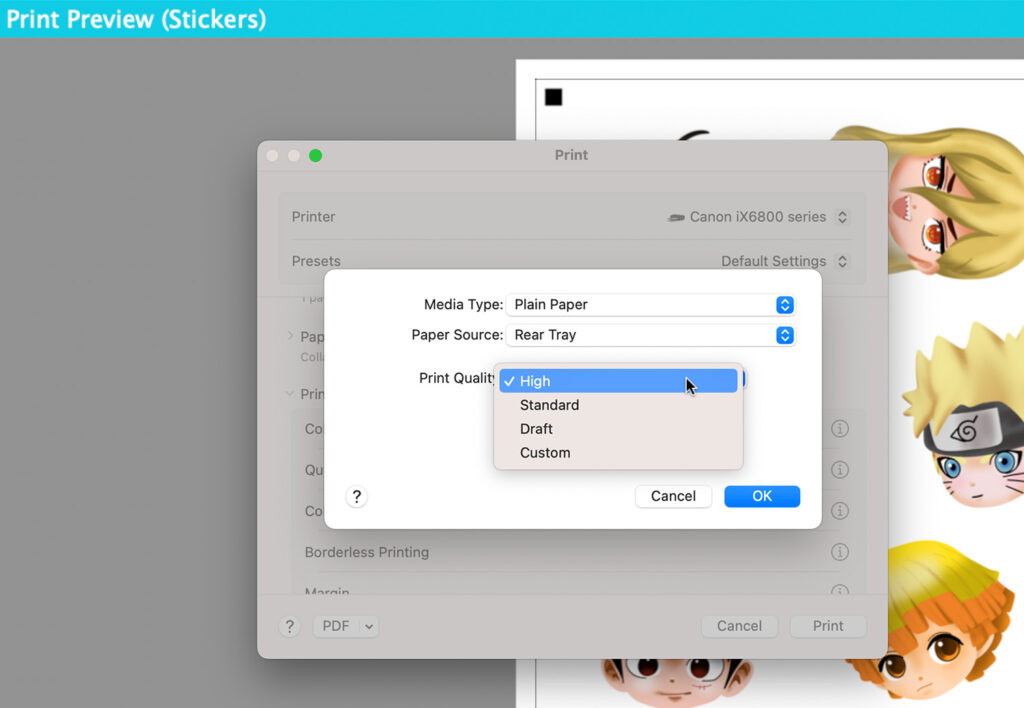
Then hit Print. Keep in mind that the registration marks will be printed as well. These marks are necessary so that your cutting machine can scan the paper and cut the designs properly and accurately.
Step 5: (Optional) Laminating your stickers
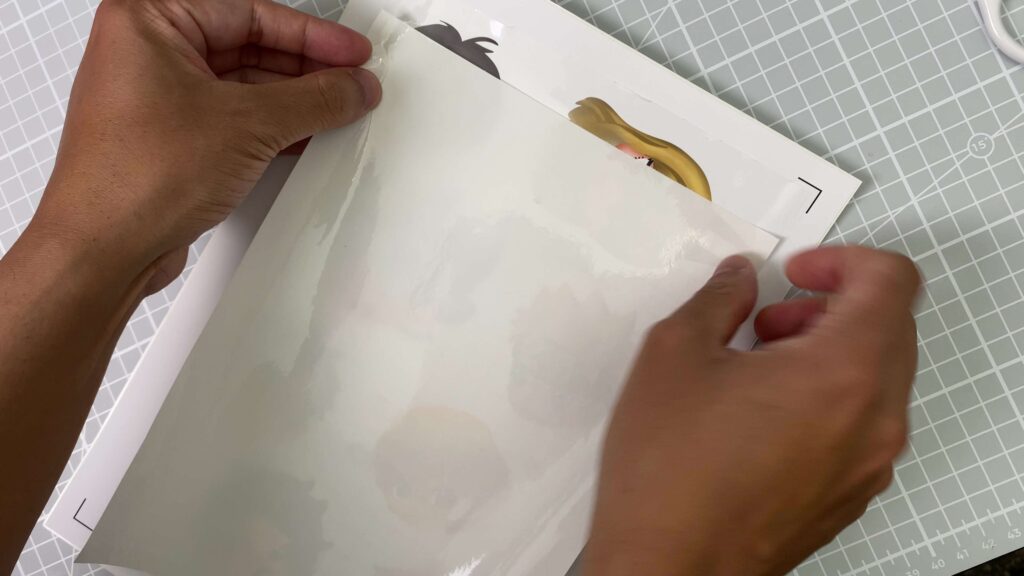
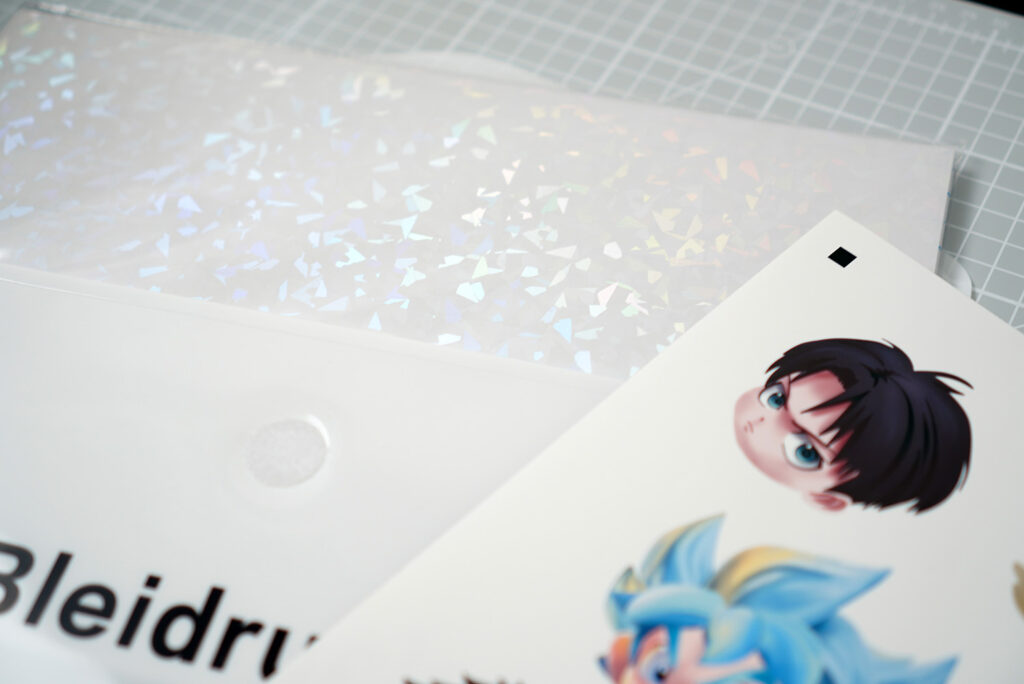
This step is rather optional, but you might want to consider laminating your stickers before cutting them. The laminate will not just help protect your stickers from scratching, but if you use a UV resistant transparent vinyl sticker like the Oraguard 236 or the Oraguard 210/215, you can prevent them from fading, so you can even use them outdoors!
I’m not a fan of laminating stickers with a laminator. I found that cold laminating the stickers is the easiest and the fastest way to do it. Like i previously mentioned, just apply a transparent vinyl sticker to your printed stickers and that’s it!
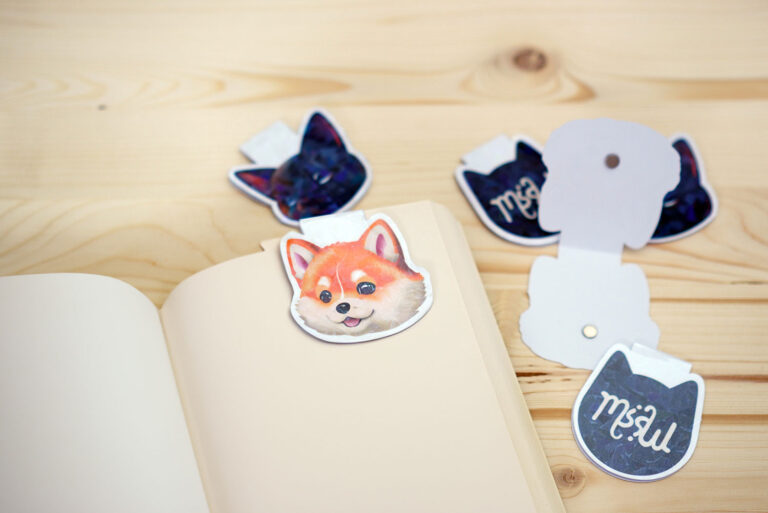
If you’re not convinced, here’s how my sticker looks like after 3 months of being outside:
I’m planning to continue the test and leave it outside for the next 9 months so if you’re interested to see the result, make sure to revisit this post around August next year.
Bonus tips:
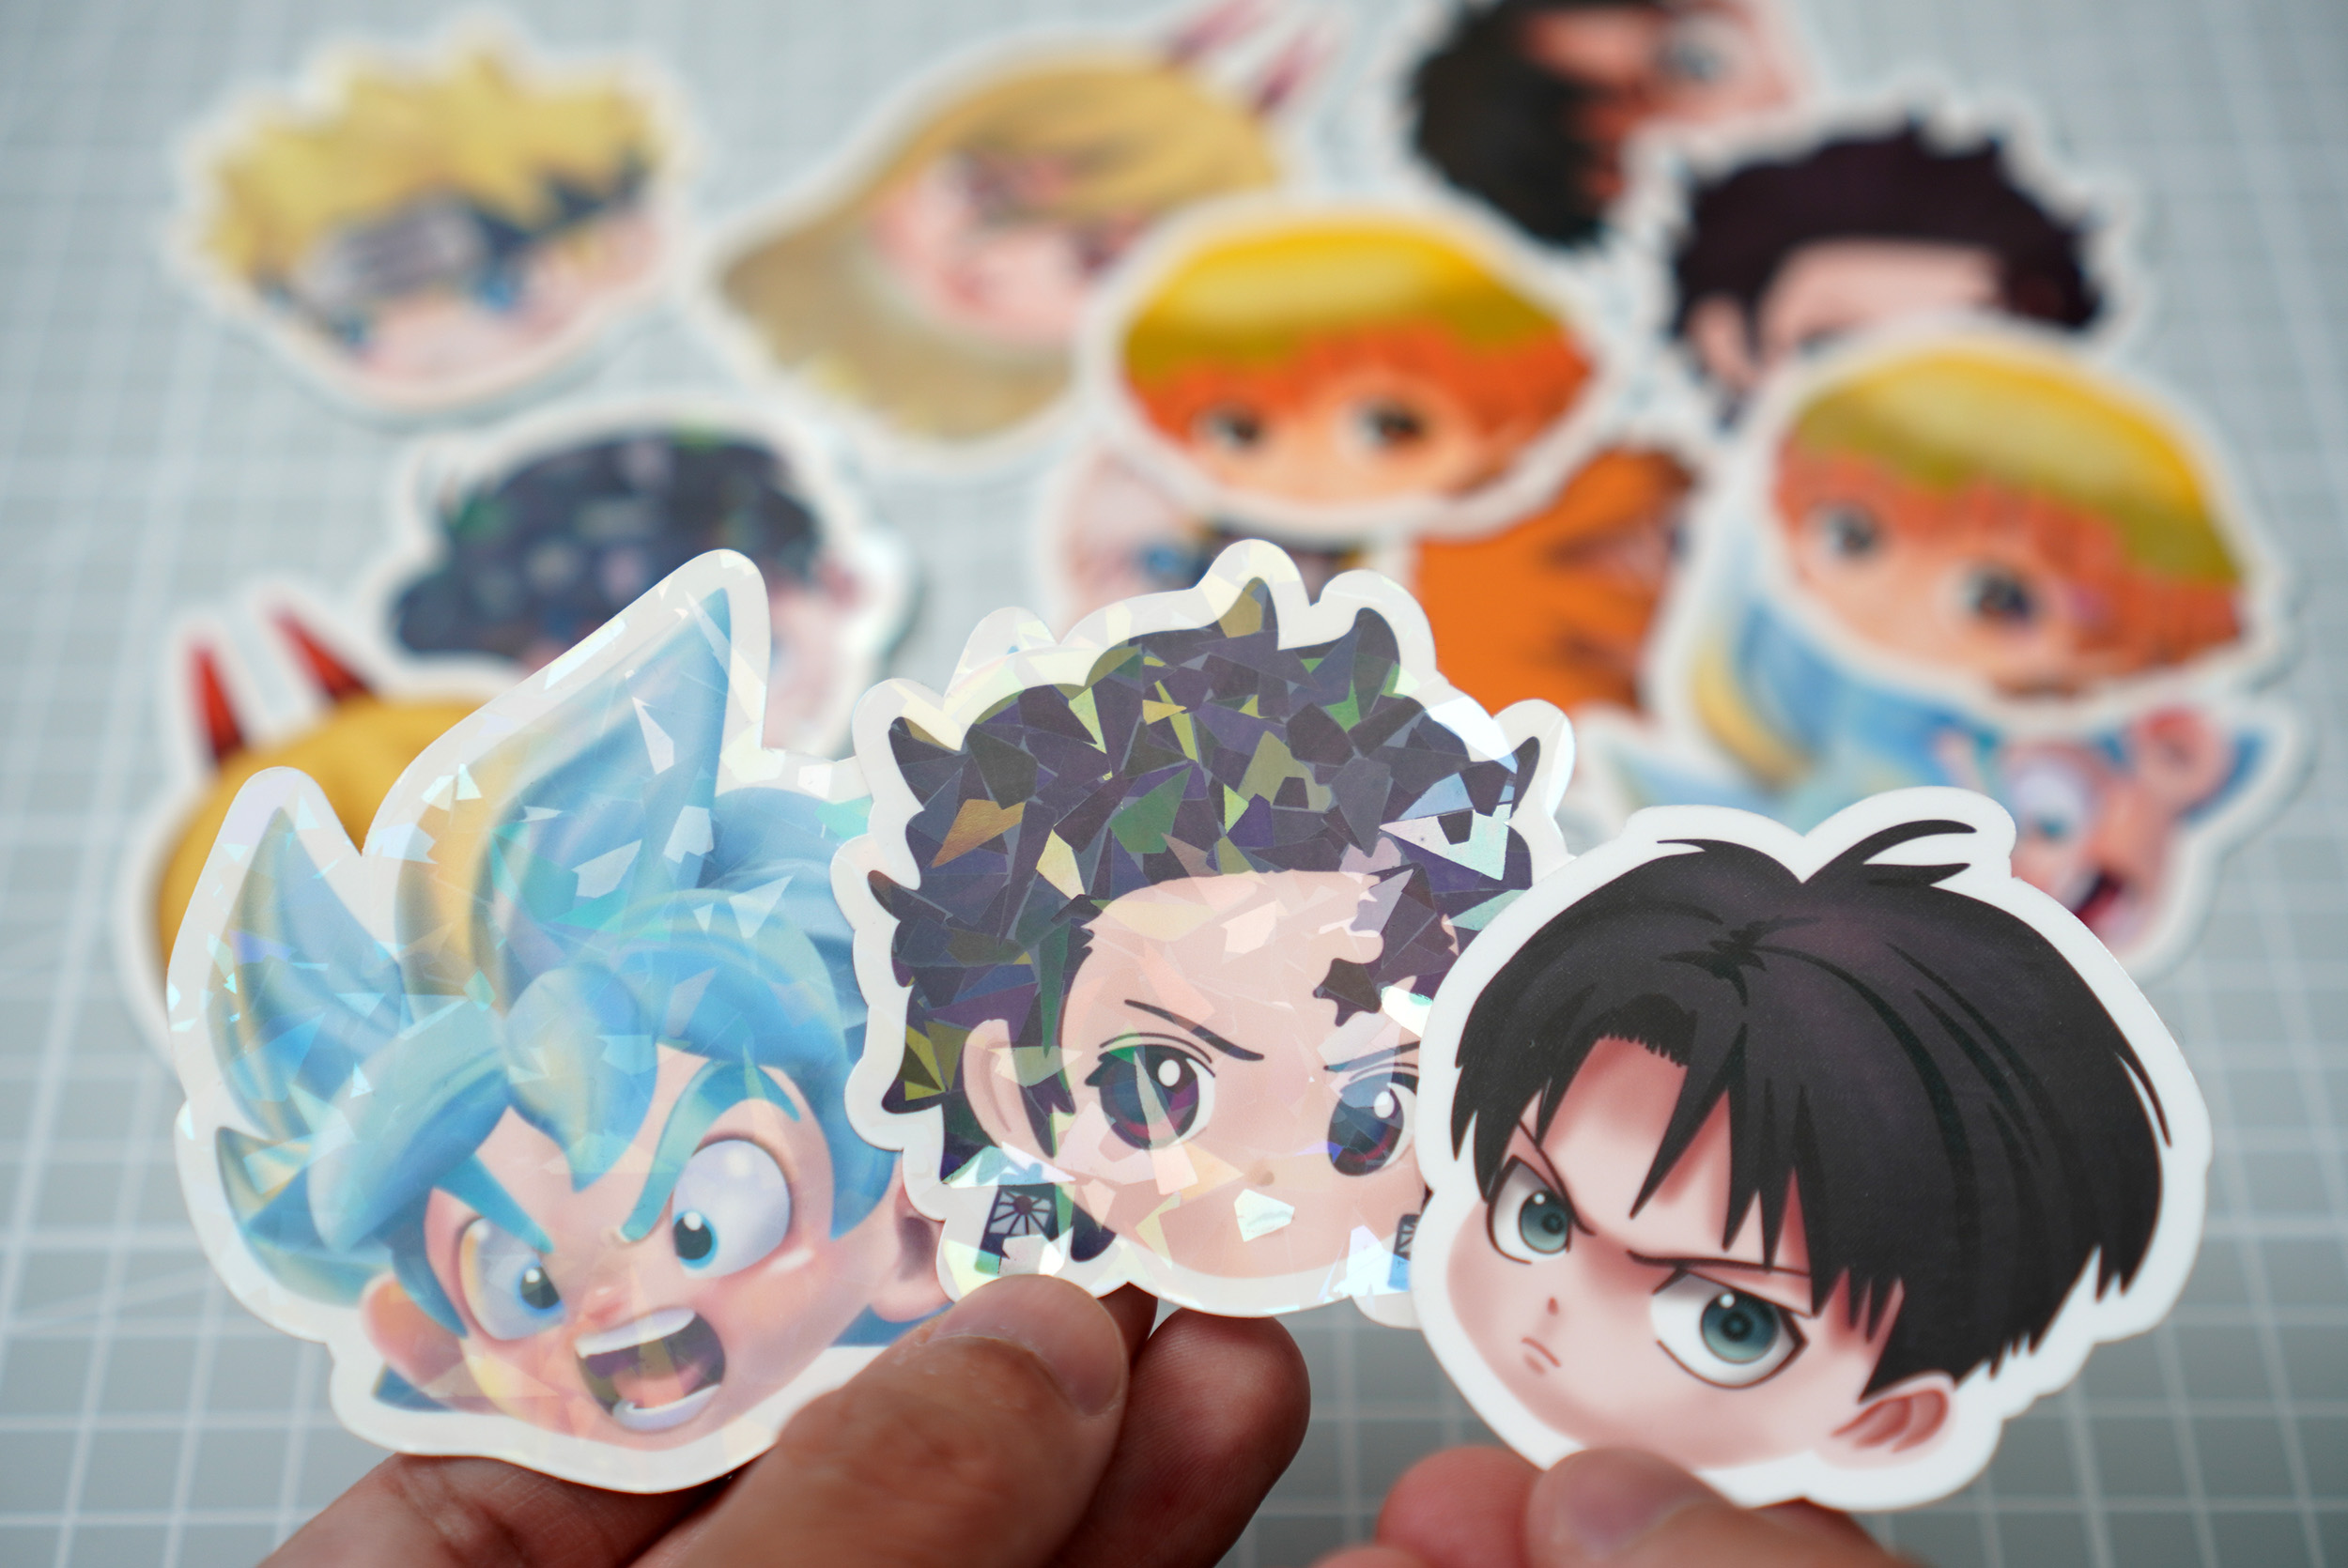
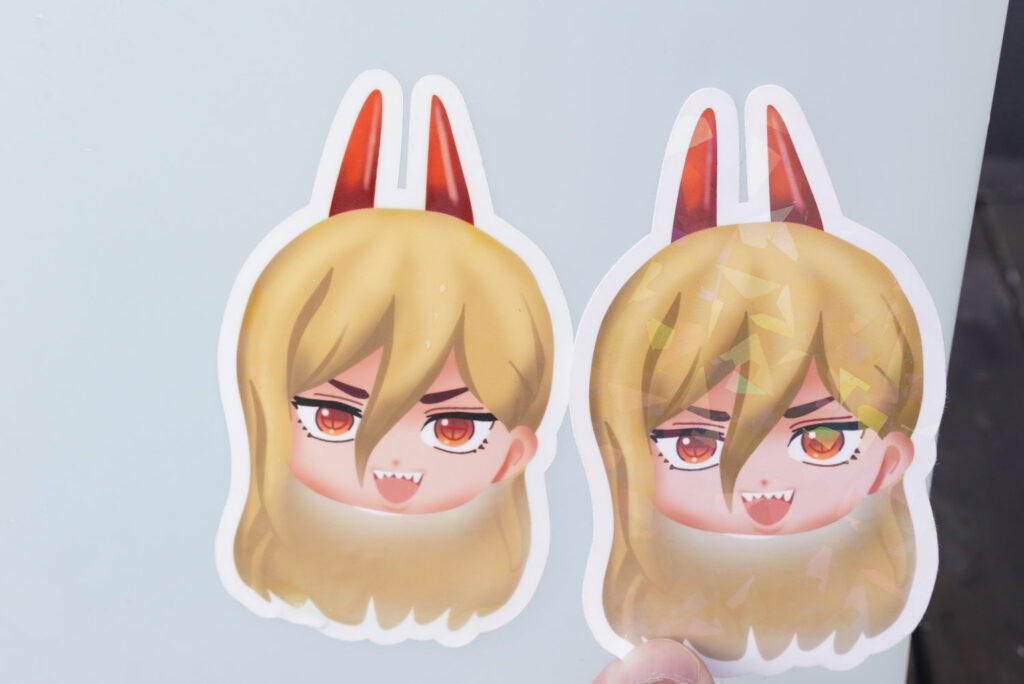
If you don’t really care about UV protection, but still want to laminate your stickers, why not use something like the clear holographic vinyl sticker? This holographic broken-glass clear vinyl for example, is the fantastic way to give your stickers that cool hologprahic effect.
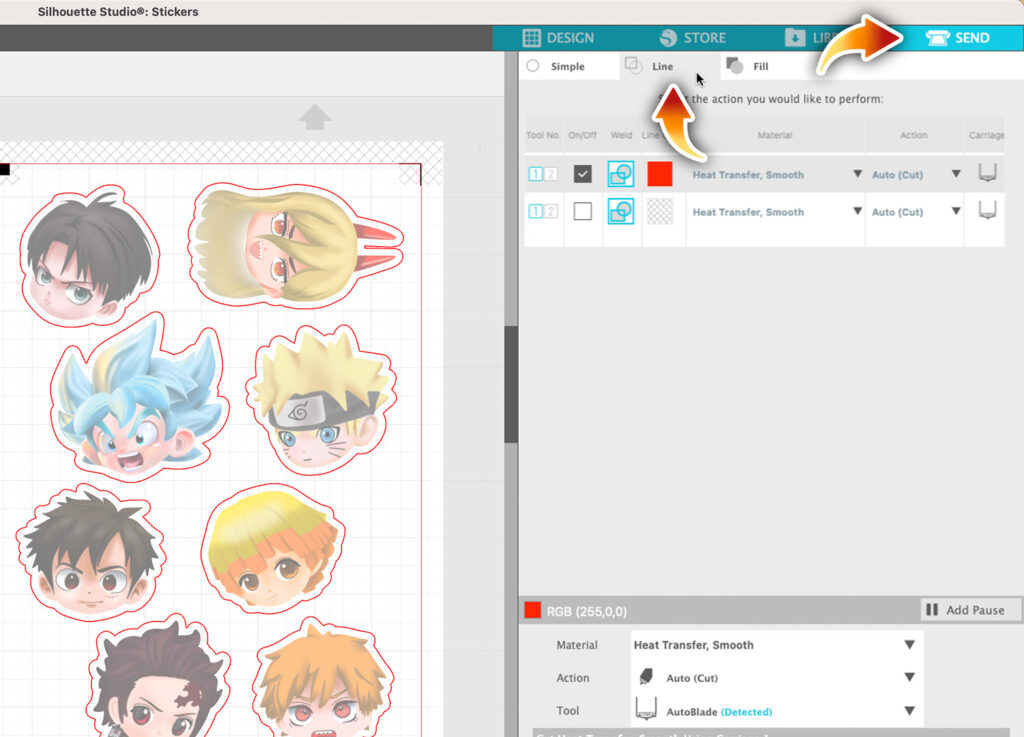
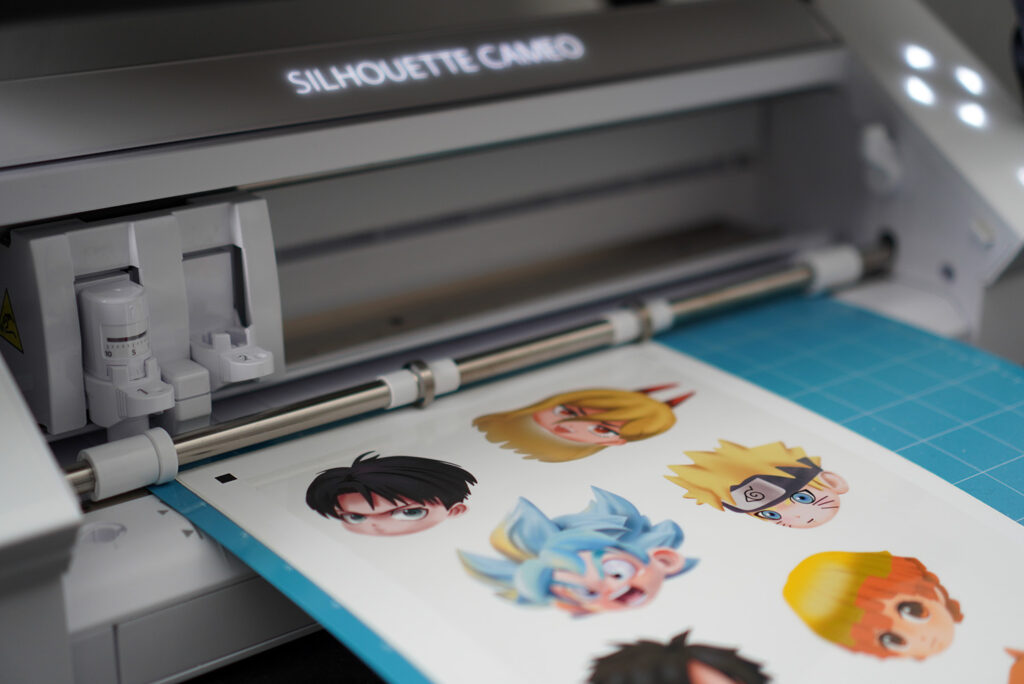
Step 6: Cutting the Stickers
Now hover to Send. Make sure to choose the option Line which you can find directly below it.
Next, place your sticker paper onto the cutting mat and load it into your cutting machine. If you want to know how to load the mat into your machine properly, you can read the tutorial here.
Let’s head back to the software. Now you can change the Material type if you want, but i don’t find it rather helpful. Usually, I just change the Blade Depth, Passes, Force and Speed settings manually.
Unfortunately, there’s no universal setting. It entirely depends on the thickness of your sticker paper, the thickness of your laminate and how worn out your blade is. So you might need to experiment with your settings and do a lot of trials and erros to get that perfect cut.
Just to give you an idea, my settings to die-cut the stickers are as follow:
- Blade Depth: 3-4
- Passes: 4
- Force: 20
- Speed: 6
You can use it as a rough guide, but keep in mind that the settings might not work for you.
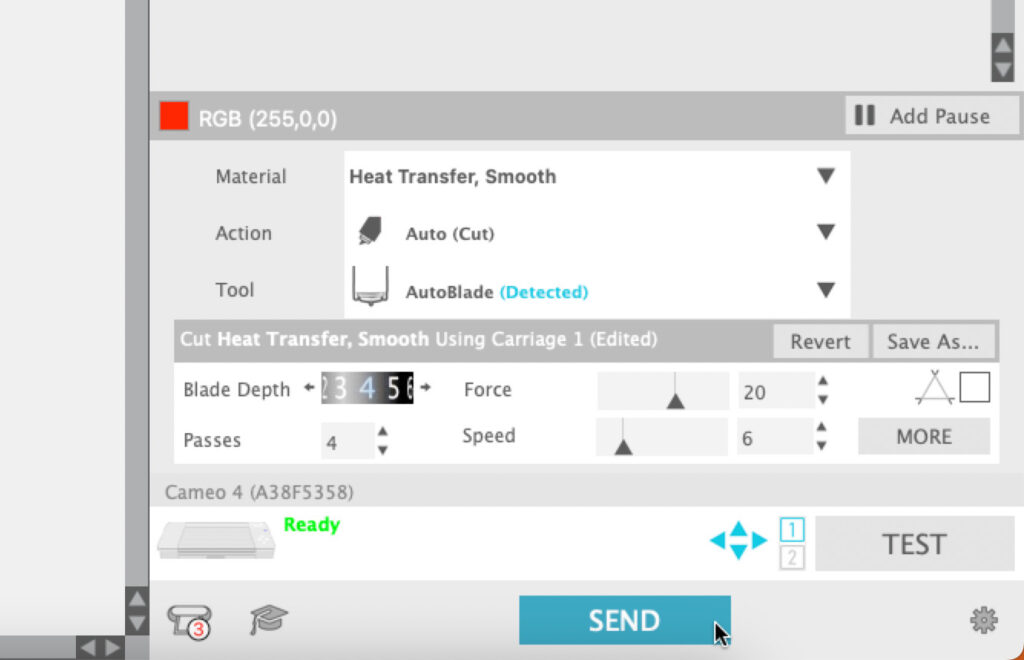
Then hit Send and let your cutting machine do its job.
Step 7: Take the Stickers off of the Mat
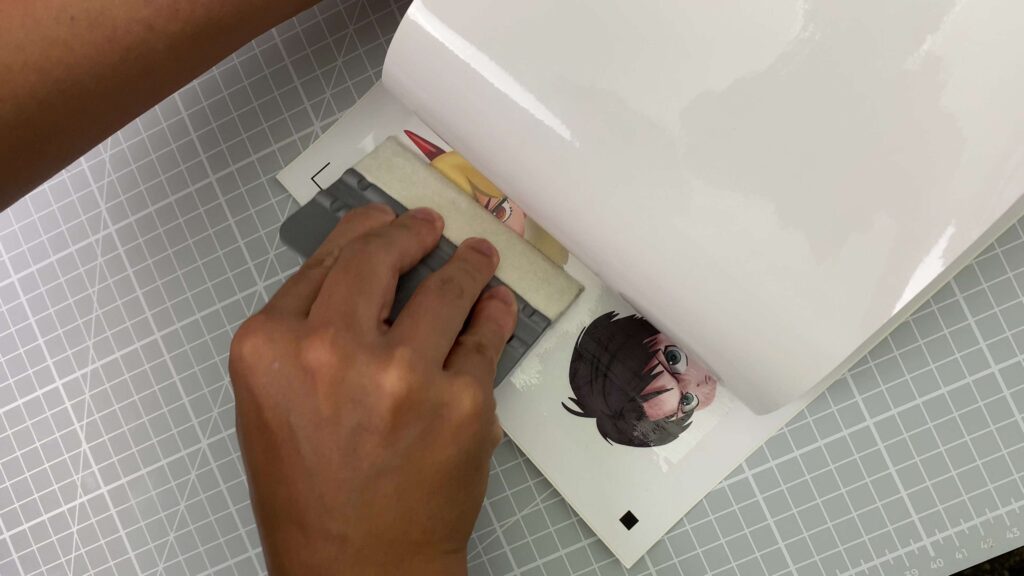
The final step is to take the stickers off of the mat carefully.
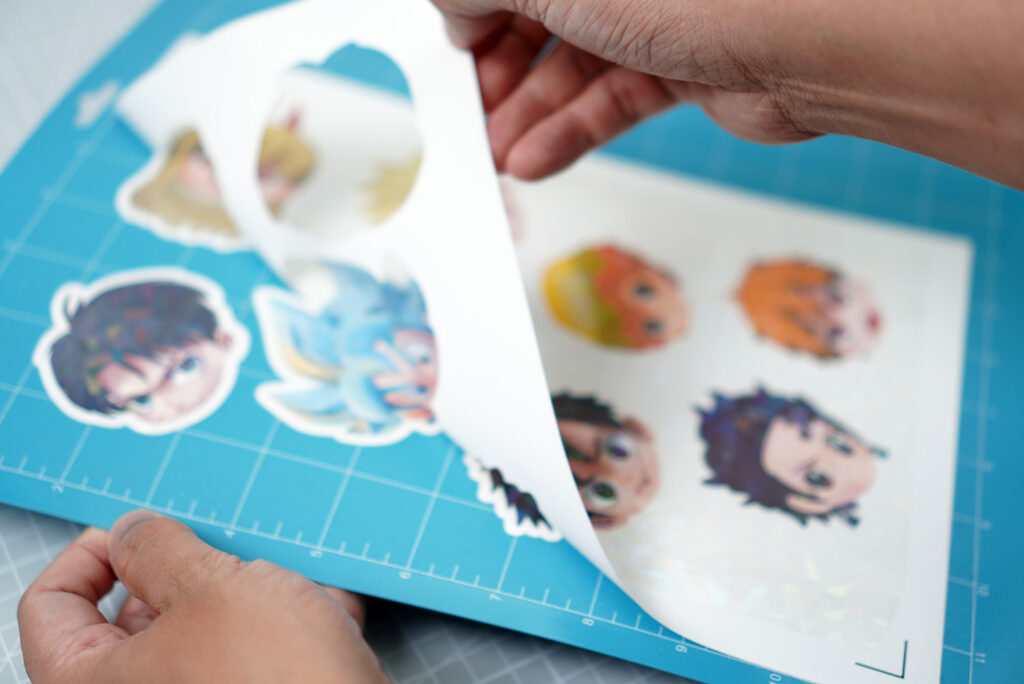
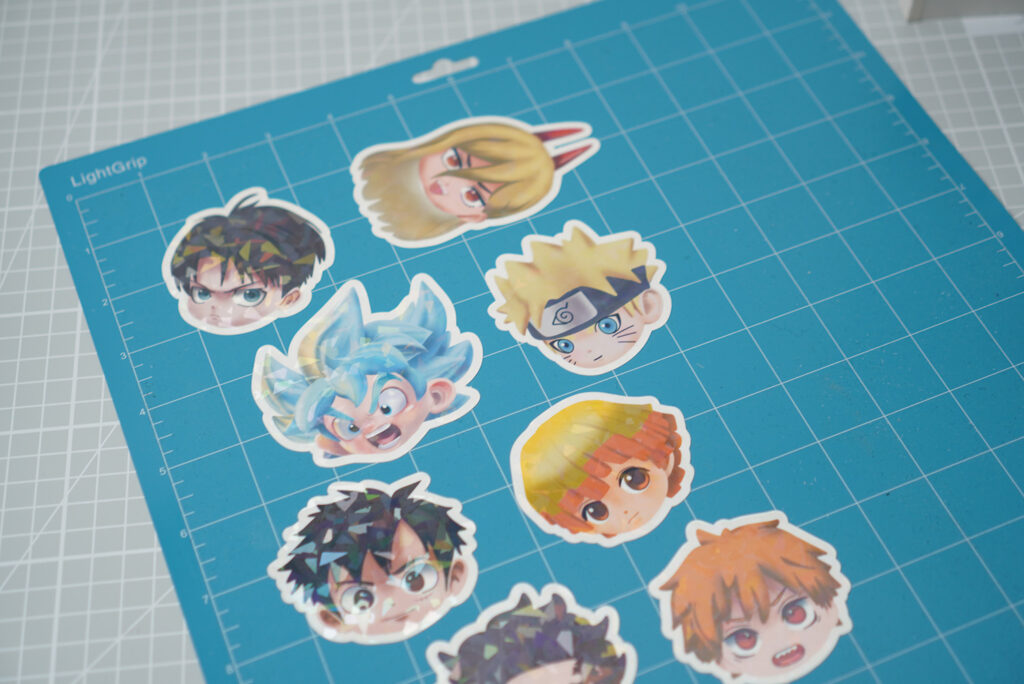
If you die-cut your stickers, you would have to take the stickers off of the mat individually. You can use a tool like the spatula to remove them one by one.
And that’s it! If you’re using high quality materials to make the stickers, you can even sell them and start your own small sticker business!
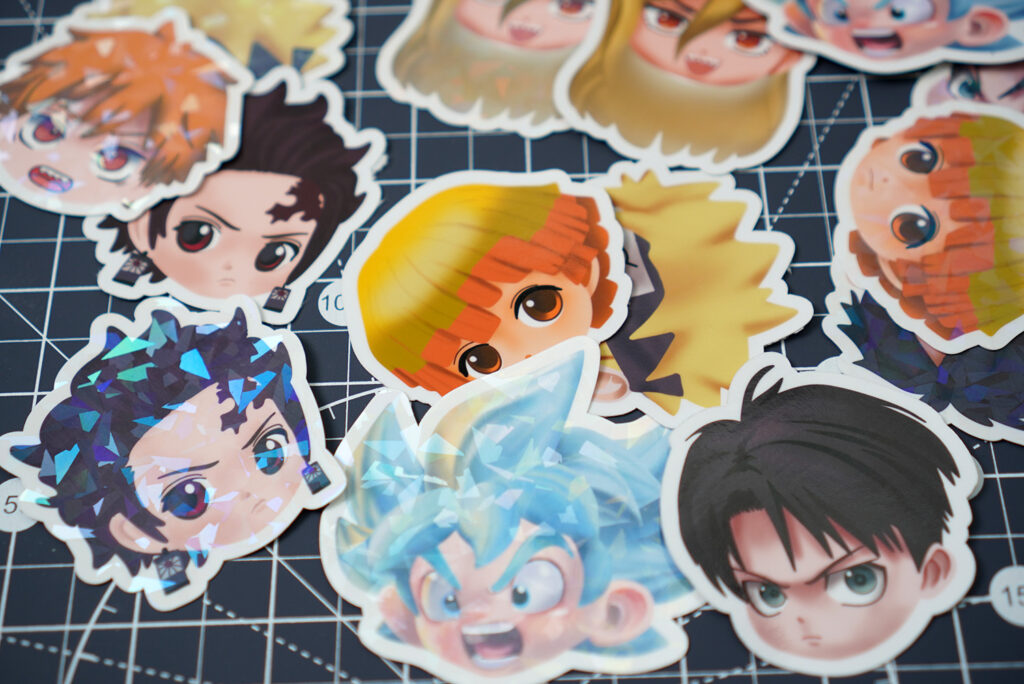
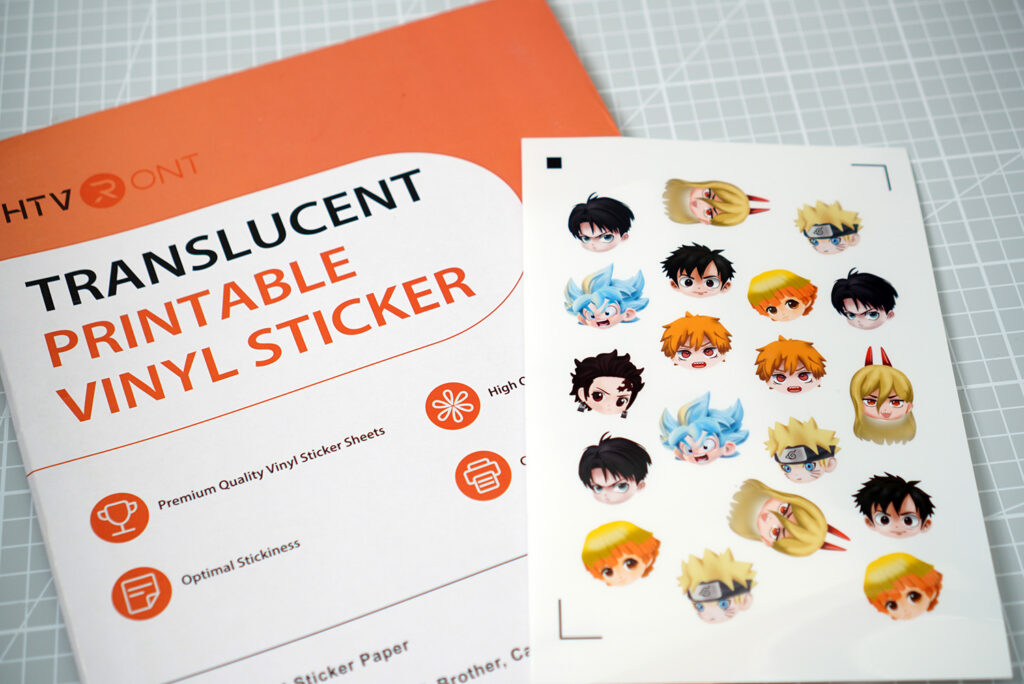
Bonus Project: Translucent Stickers
If you’re looking for something out of the ordinary, why not try making stickers using translucent printable vinyl sticker like the one from HTVRont. For the print settings, i set the media type to glossy photo paper and print quality to high.
Here are the settings that i use to cut them:
Kiss-Cut settings
- Blade Depth: 2
- Passes: 1
- Force: 20
- Speed: 2-6
Die-Cut settings
- Blade Depth: 4
- Passes: 4
- Force: 20
- Speed: 6
You can put the stickers on glasses or tumblers which is what i did here. Don’t they just look amazing?

However, they aren’t dishwasher safe! If i were you, i would use a laminate to protect the surface.