This post contains affiliate links. When you purchase through links on our site, we may earn an affiliate commission. Learn more about it here.
In this tutorial, I’m going to show you how to make vinyl T-shirts without a heat press. To apply vinyl to a T-shirt, we are going to need a common household iron.
For intricate designs, you will need a cutting machine like the Cameo or the Cricut. If you don’t have a cutting machine, you could go for simpler designs which can be cut either with an X-acto knife or a pair of scissors.
You can get the Silhouette Cameo and Cricut cutting machines here:

For this project, heat-transfer vinyl is the type of vinyl you want to get. So what’s a heat transfer vinyl?
Heat transfer vinyl or HTV, is a polyester-based adhesive foil that can be heat applied directly onto textiles. You can easily get it on Amazon and it’s available in so many colors. You can even get the metallic or glitter ones! Learn more about different types of vinyl here.
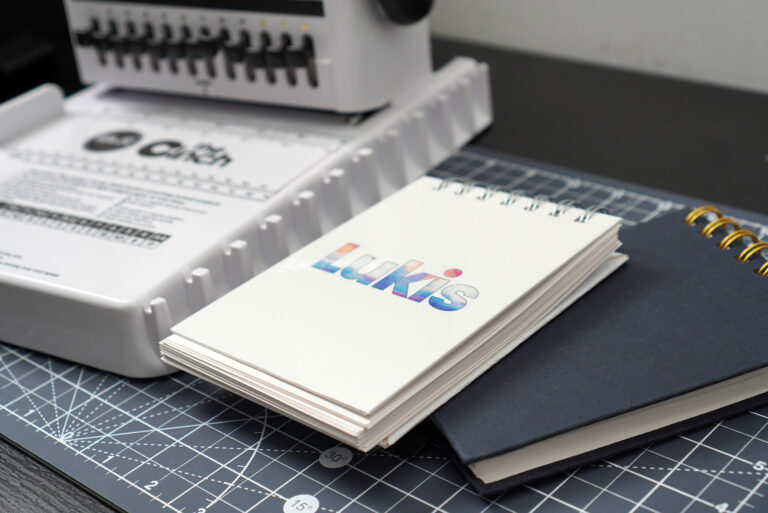
The most famous HTV brands are Cricut, Sisser and HTVRont. But if you’re in Europe, I strongly recommend getting the Poli-flex Turbo or Poli-flex Premium. They are made from the German manufacturer Poli-Tape and are sworn to be the best HTVs you can get here.
The differences between Poli-flex Turbo and Poli-Flex Premium
The Poli-flex Turbo HTV is thinner than the Poliflex Premium, and it adheres to the fabric really fast. On the other hand, if you like the feel of thicker vinyl on your shirt, Poliflex Premium might be the right choice for you. However, it takes slightly longer to adhere to fabric compared to Poli-flex Turbo.
According to Poli-Tape, you only need to press for 3 seconds if you’re using the Turbo, and 15 seconds if you’re using the premium. I’ve pressed these vinyl foils slightly longer than 3 seconds/than 15 seconds will no ill effect though. But then again, sticking to manufacturer’s recommendation is probably your best bet.
So there are 2 ways to apply vinyl to t-shirts. If you have unicolored design, you only need to transfer one layer of vinyl to your shirt. If you have multi-colored designs, you could apply multiple layers of vinyl on top of each other, applying one layer at a time.
Make sure to keep it moderate though, because you don’t want to end up with a super-thick vinyl clump on your t-shirt!
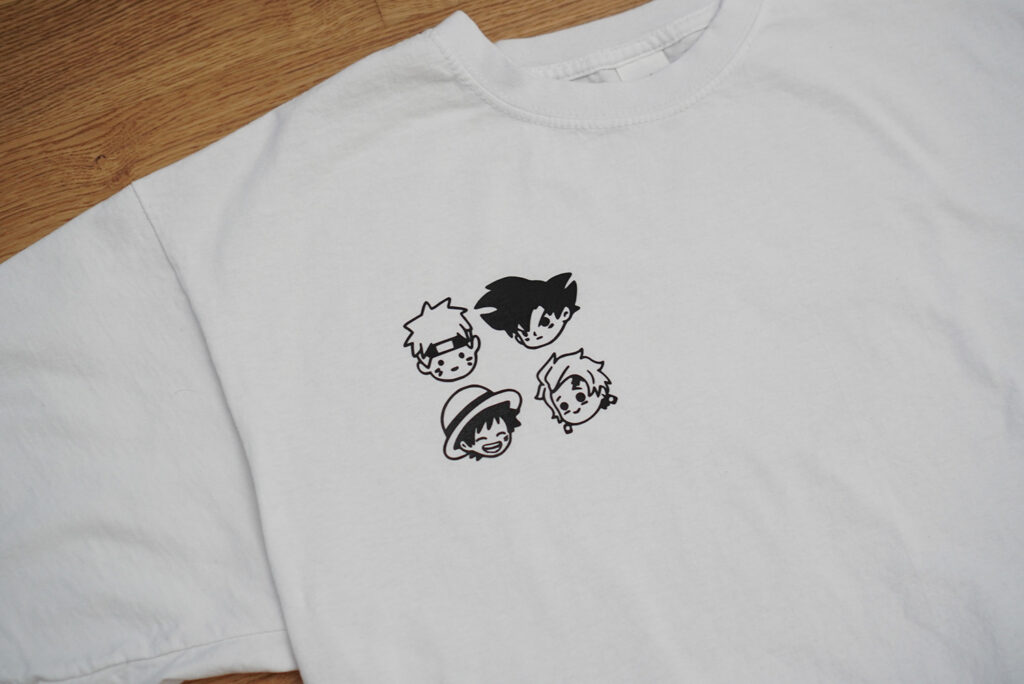
For the first part of the tutorial, let’s make a minimalistic anime t-shirt by applying one layer of black HTV to a white t-shirt. So let’s get started!
Table of Contents
Applying one layer of HTV to a T-shirt
Step 1: Creating / choosing your design
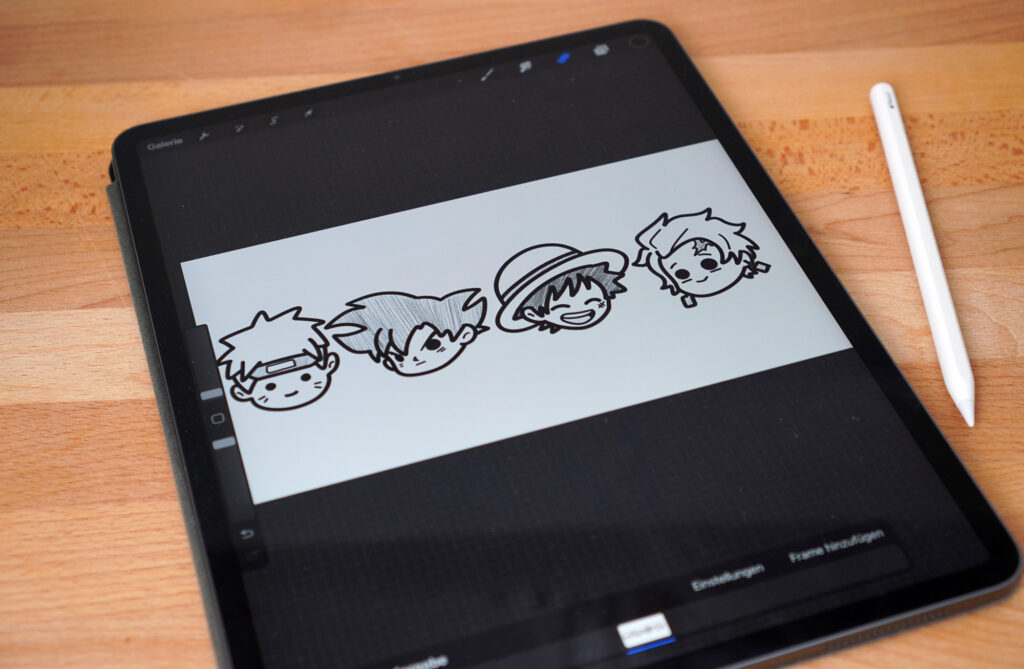
If you have a drawing tablet, you could use it to draw your own design. If you don’t have one, it’s not the end of the world. You could use your computer and a graphic design software like e.g., the Adobe Illustrator.
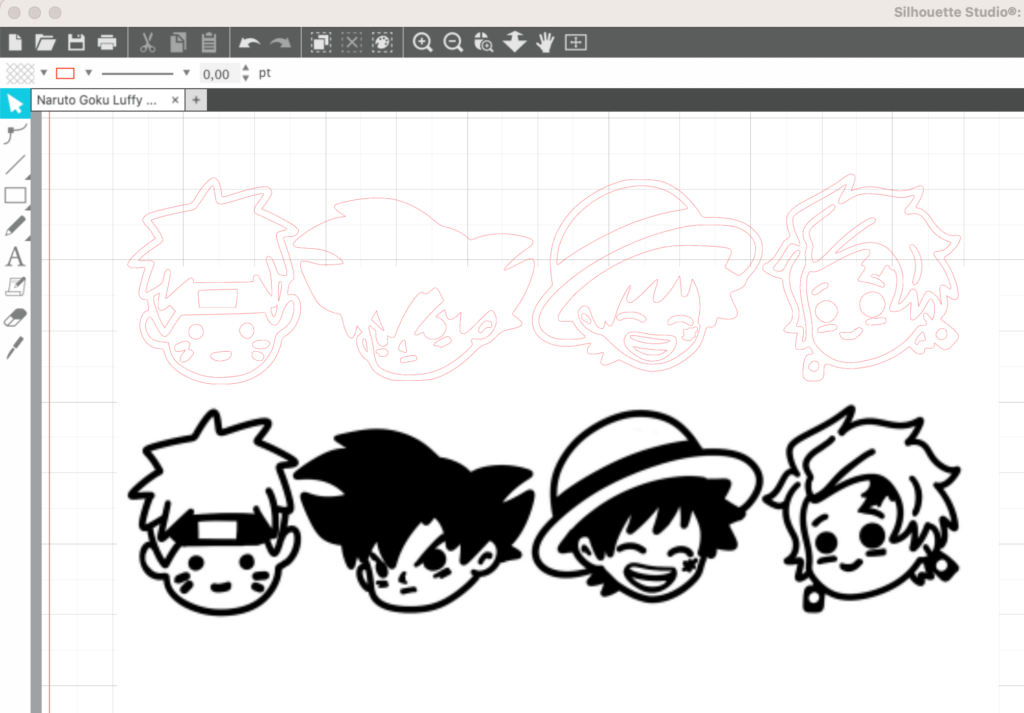
I drew a simple design of Naruto, Goku, Tanjiro and Luffy using 1 color, making sure that the lines are thick enough. You don’t want the lines of your design to be too thin, else it would peel off easily.
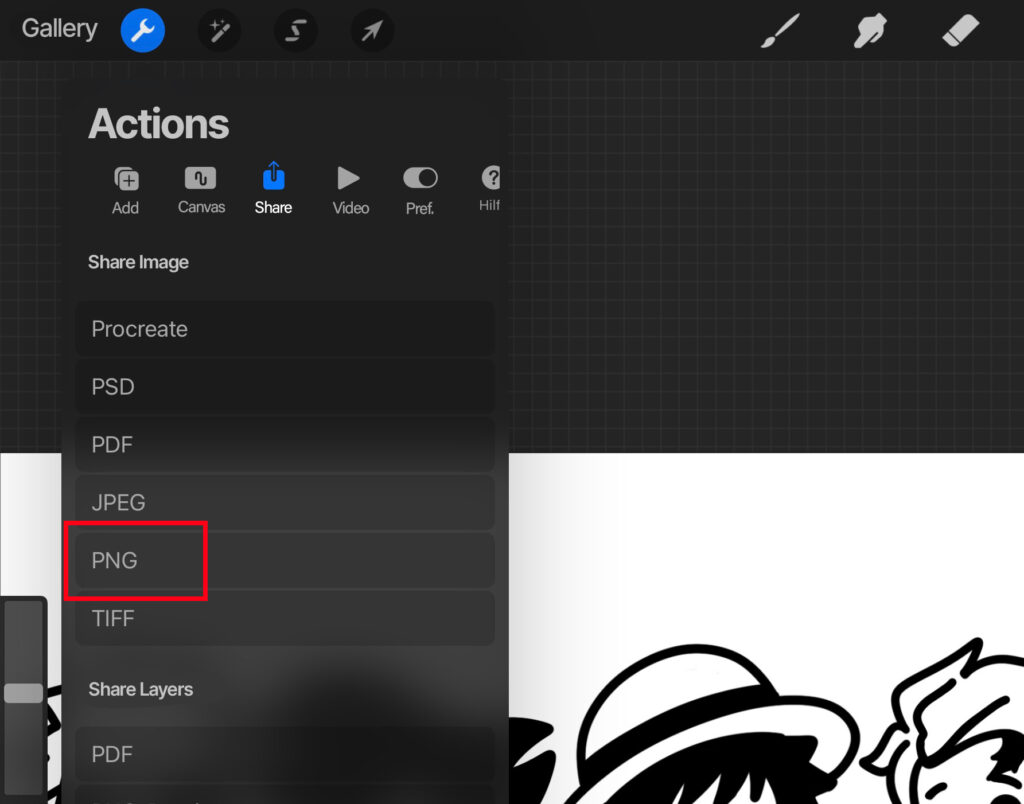
When you’re done, tap on the background layer and uncheck the small box on the right side. Open the Actions menu by tapping the icon in the menu bar.
Under Share Image, choose PNG. You can then send the image to your computer.
You now have an image ready to be imported to your cutting machine software!
If you don’t want to create your own design, you could easily search for the design you like online. Most are available for free, but you can also get designs on Etsy, Designer studio etc.
If those designs are either in PNG or SVG format, they’re going to be perfect for our project!
You could even create your design directly on Silhouette Studio using shape and text tools.
Step 2: Arranging, resizing and mirroring your design
First, import the image into your cutting machine software. If you’re using Silhouette Studio, click File in the menu bar and select Open. Choose your file and click OK to import it.
If you’re working with PNG files, you can skip the tracing step. The software will automatically trace the image and create cut lines for you.
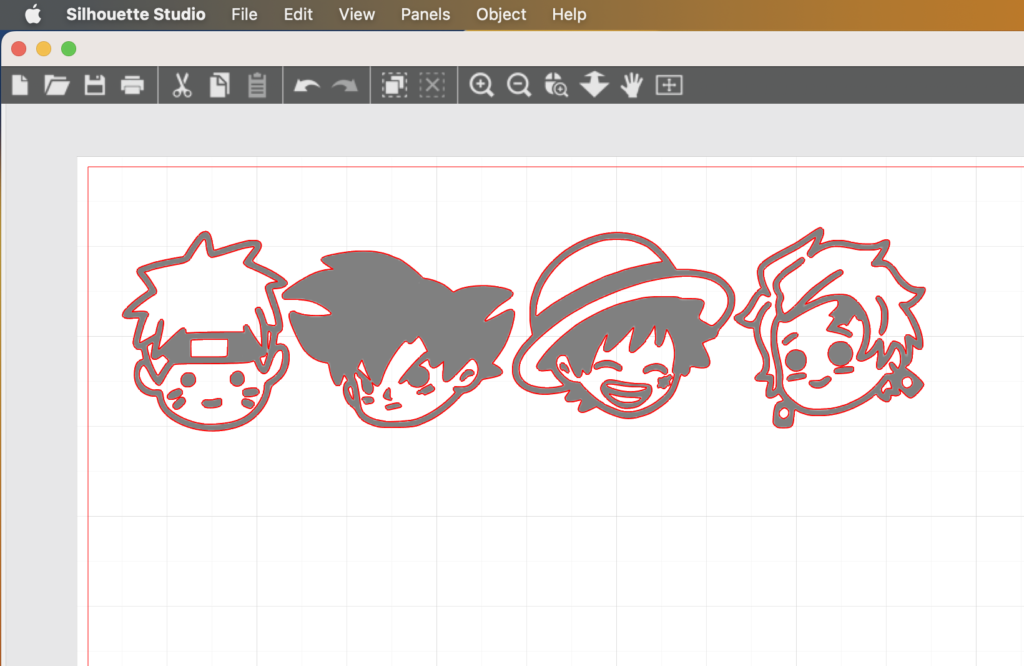
The red lines are the cut lines where the machine is going to cut.
If you have a JPG or JPEG file, it’s not that big of a deal. We just need to trace the image. Here’s how you can do it:
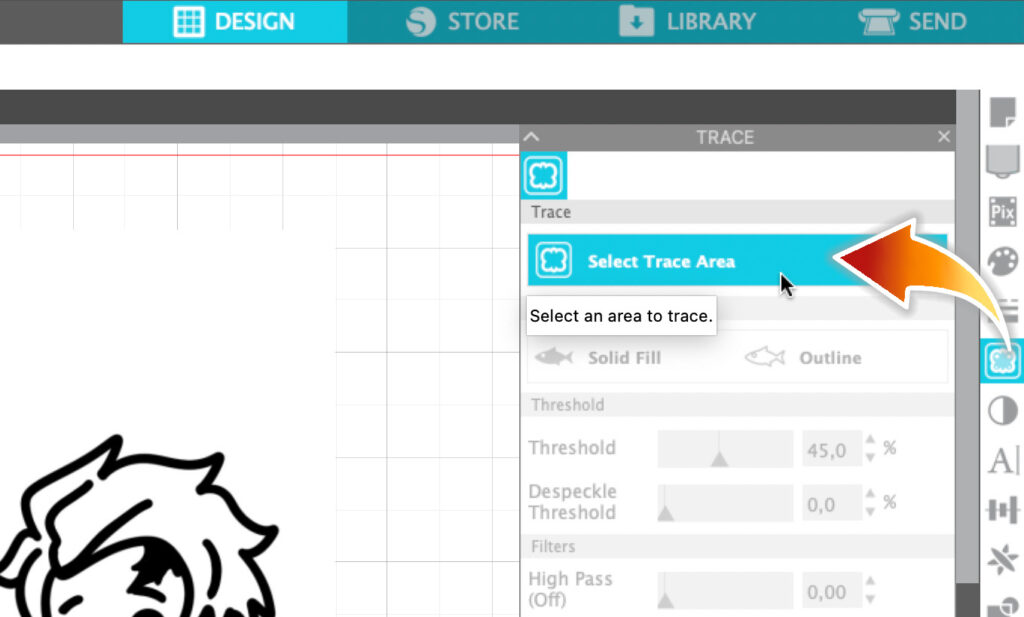
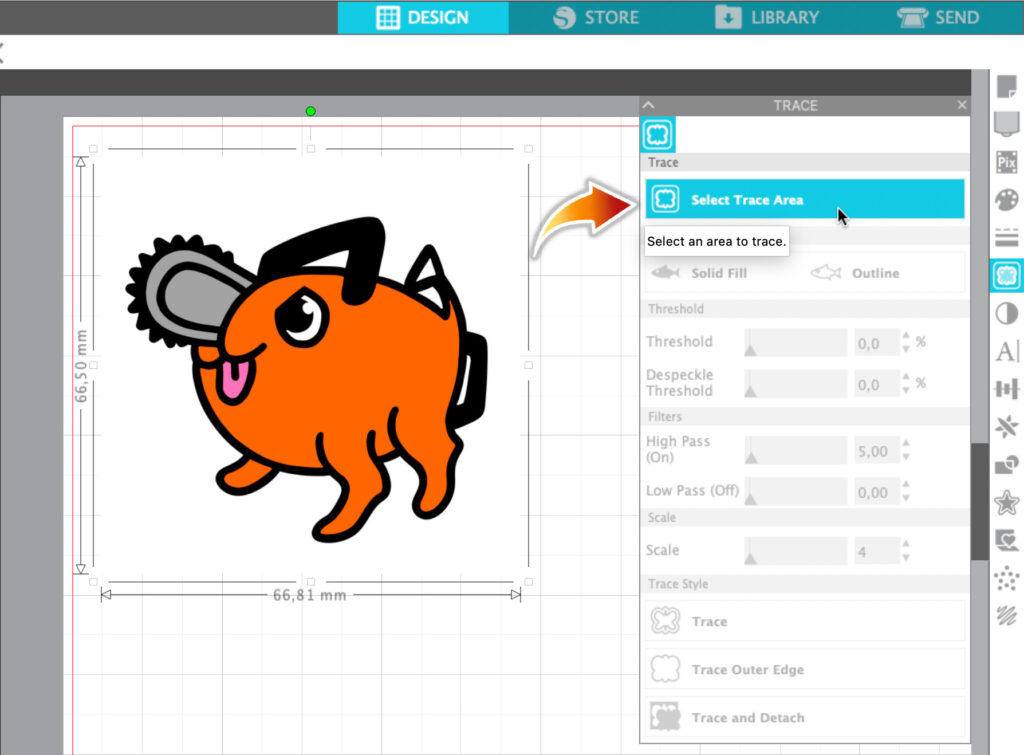
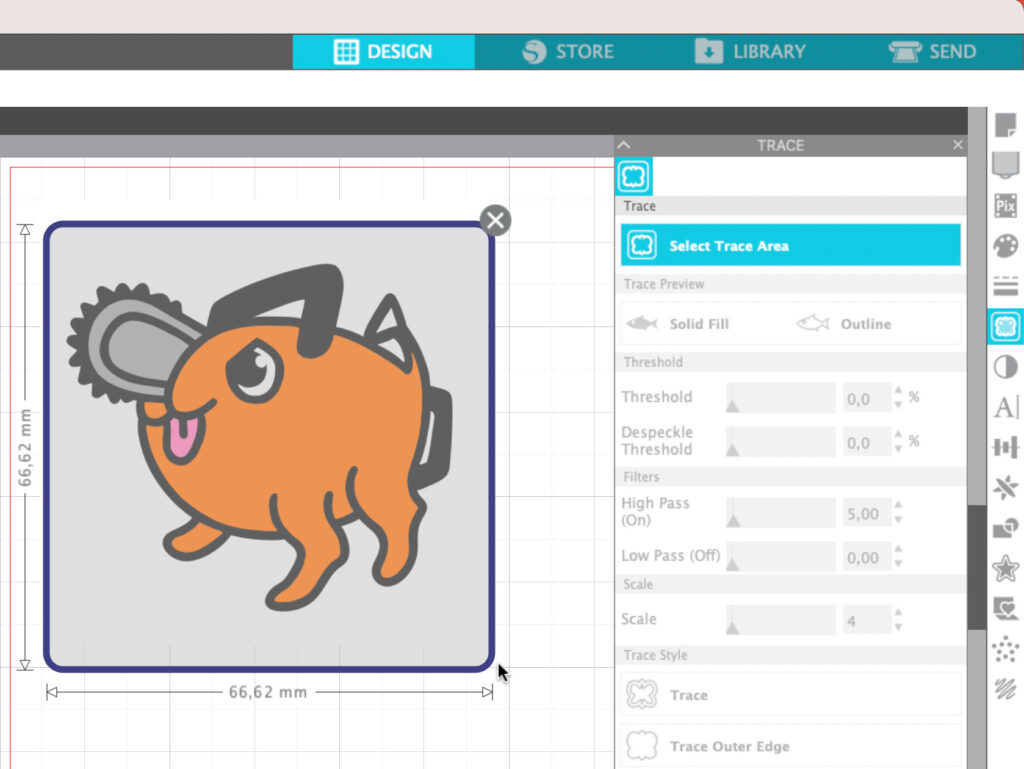
- Import your JPG file into Silhoutte Studio. Click on the trace icon that kinda looks like a toast. Then click Select Trace Area, highlighting your entire image.
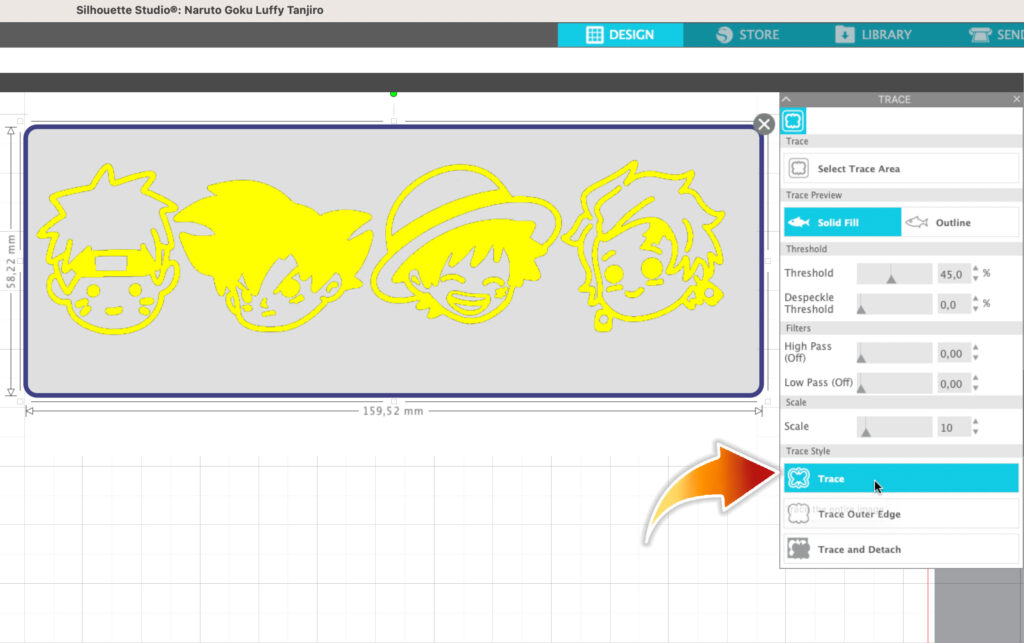
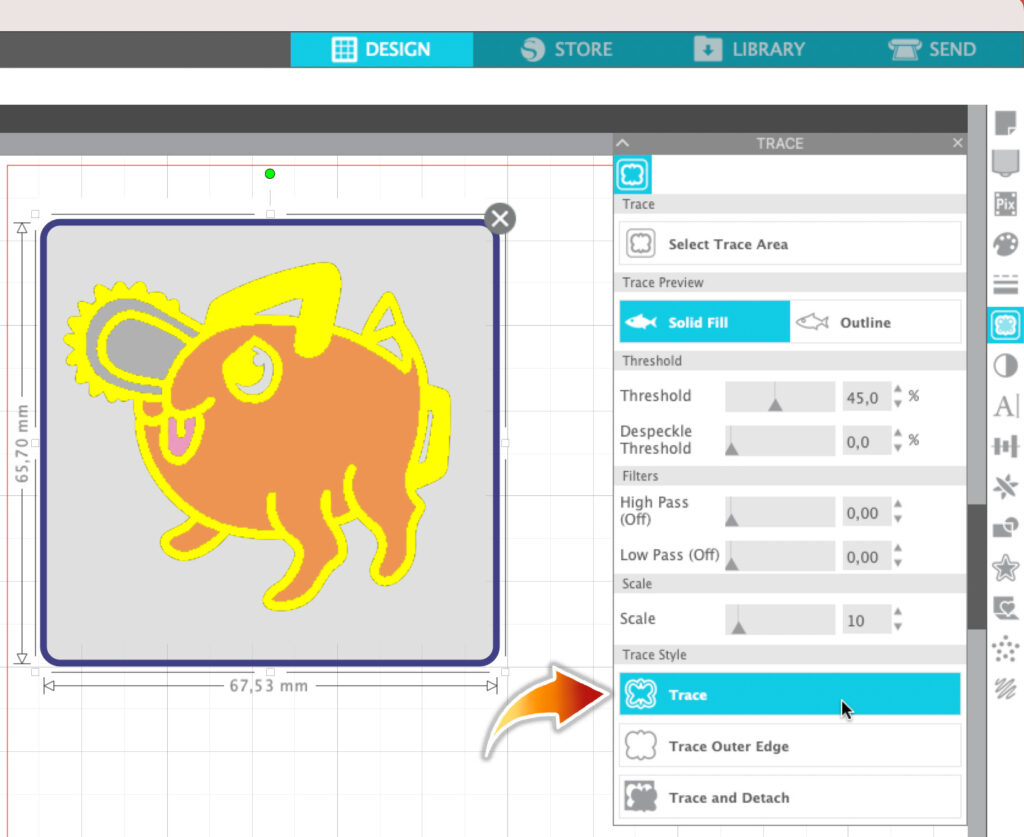
- Select Trace. The red cut lines will be automatically generated. At this point, you won’t be needing your image anymore so you can delete your image if you want or just drag it to the side
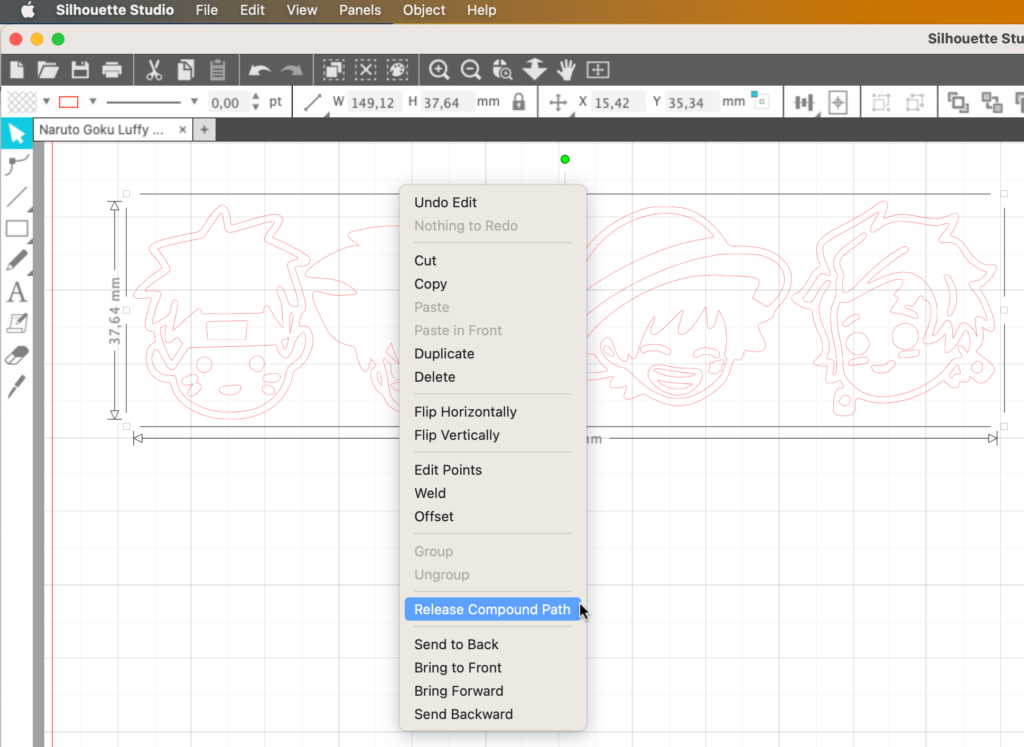
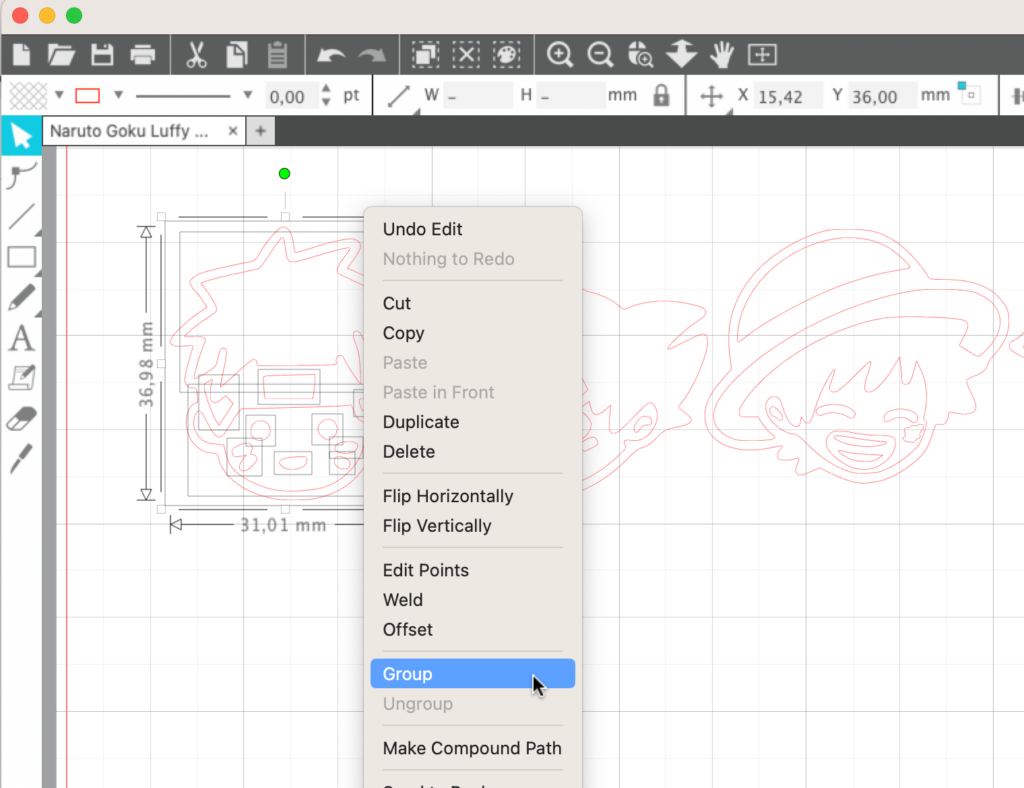
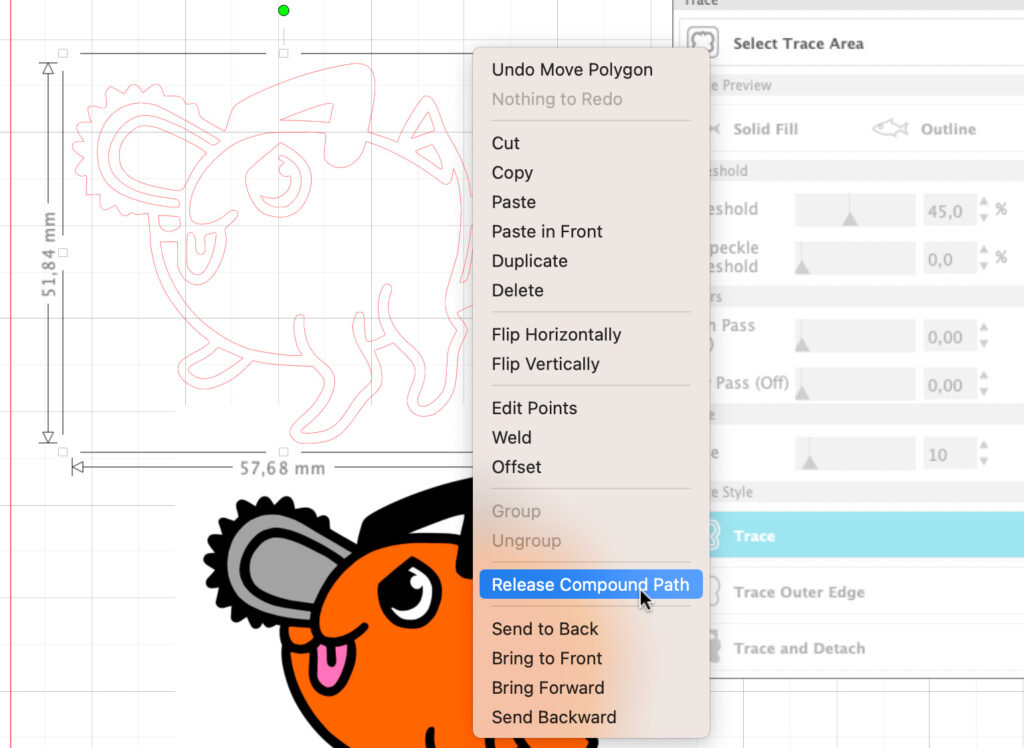
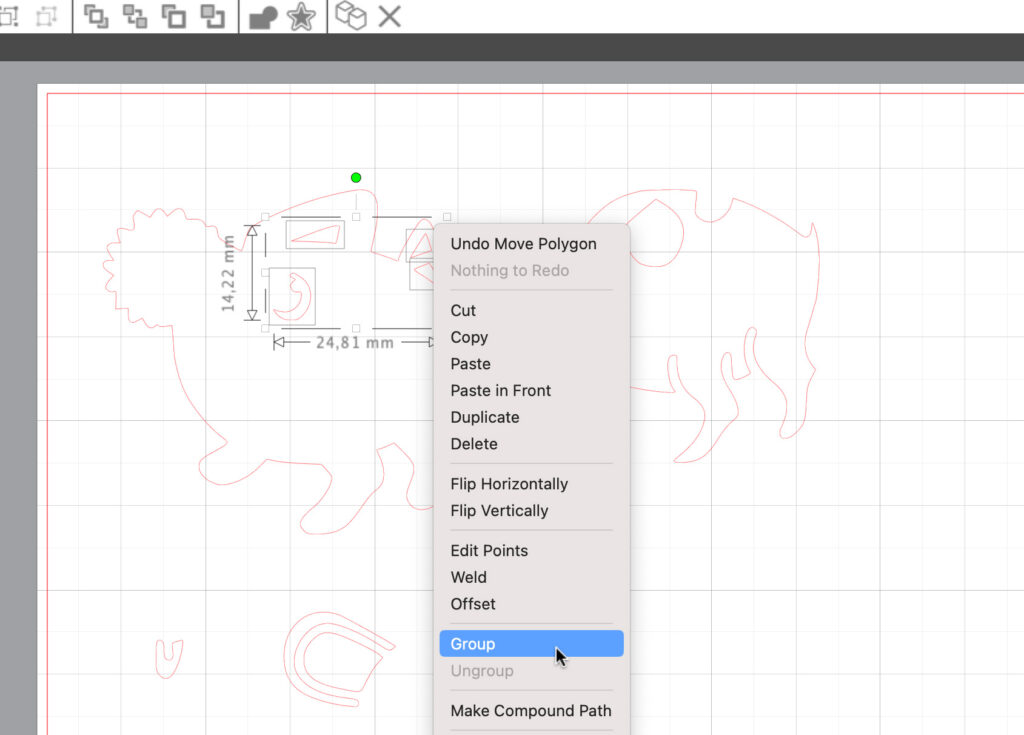
- Select the entire design, right click and choose Release Compund Path. This will make each individual piece movable. You can regroup individual pieces by selecting them, right click and choose Group.
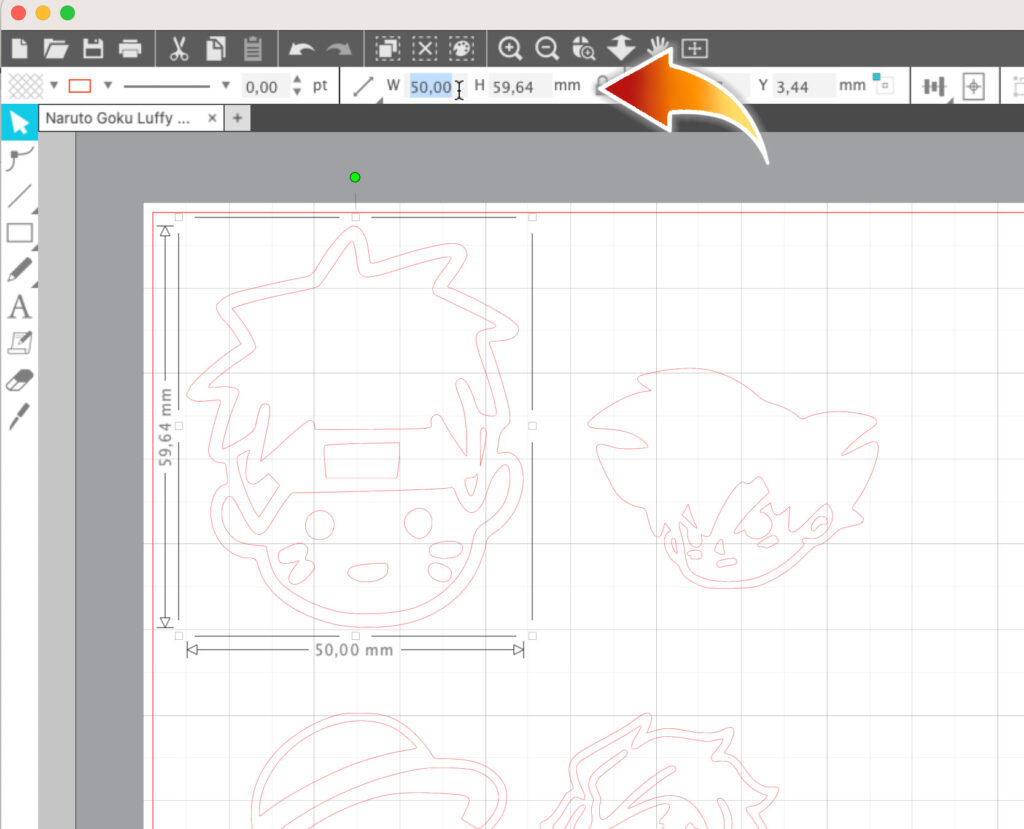
Arrange the designs the way you want it on the t-shirt. You can move your designs around and resize them as you see fit.
You can see the actual dimensions of the design as you enlarge it or reduce its size. I want my design to be no larger than 10 cm x 10 cm (4”x4”).
You can specifiy the width and the height of your image directly in the quick access toolbar. This only shows after you selected your image. If you click the lock icon , you have the flexibility to change the width and the height independantly.
When you’re happy with how your design looks, we can now start the cutting process.
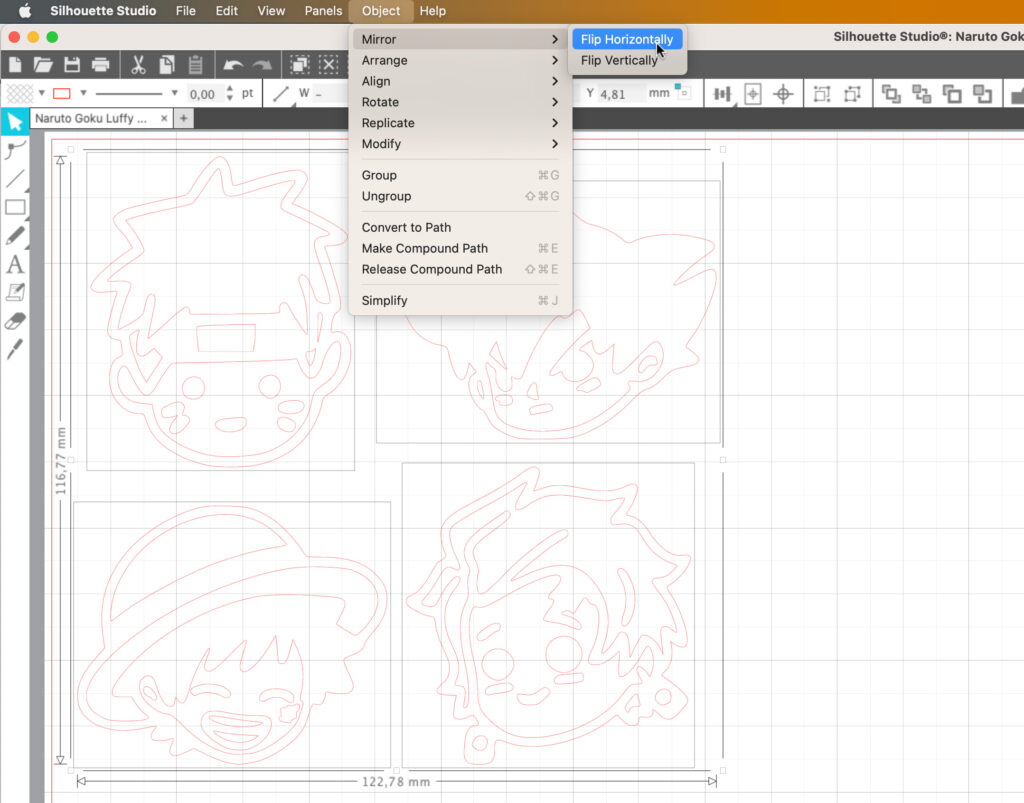
Before sending your design to your cutting machine, make sure that your design is mirrored! Since my design has no text in it, it’s not that big of a deal. But if you do have text in your design, you definitely want to mirror it.
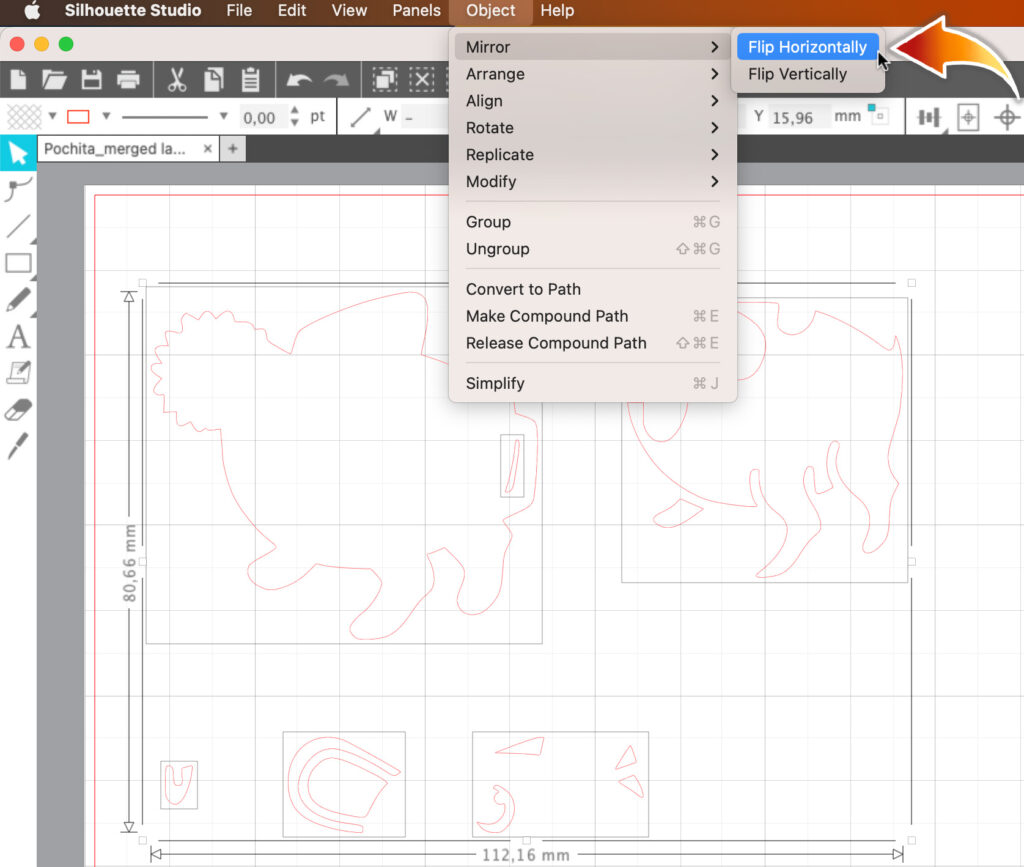
To mirror your image, you need to select it first. Then click Object in the menu bar, hover to Mirror and select Flip Horizontally.
For the HTV, I’ll be using the black Poli-flex Turbo HTV. You can use these cutting settings below:
If you’re using Cameo
- Material: Vinyl, glossy
- Blade depth: 2
- Force: 8-10
- Speed: 8
If you’re using Cricut
- Material: Everyday Iron-On
- Blade: Premium Fine Point Blade
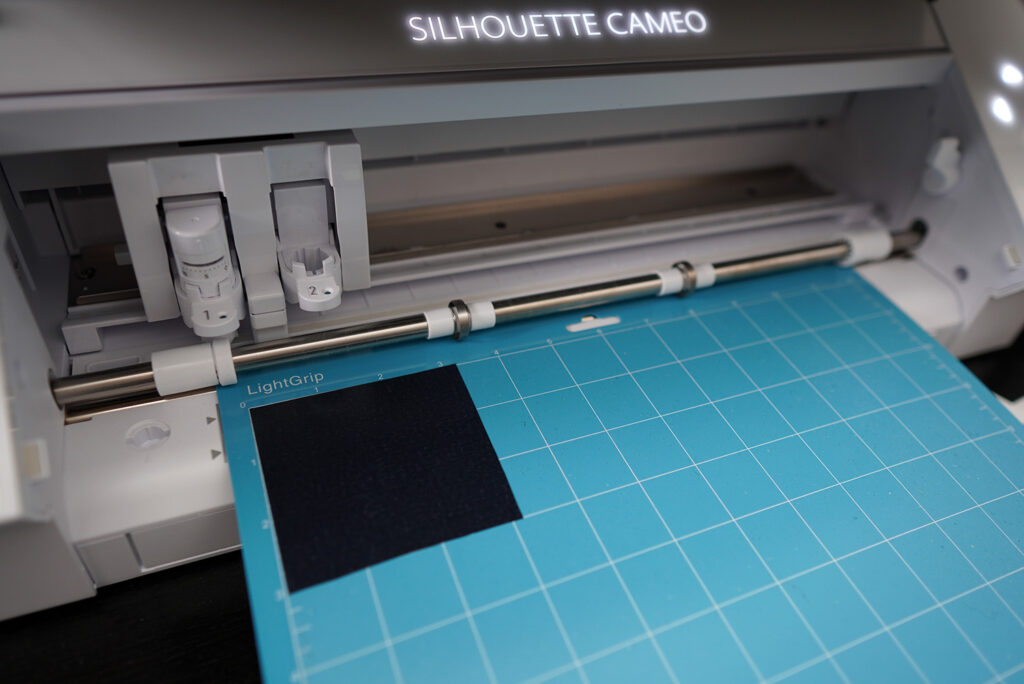
Step 3: Loading the mat into the cutting machine
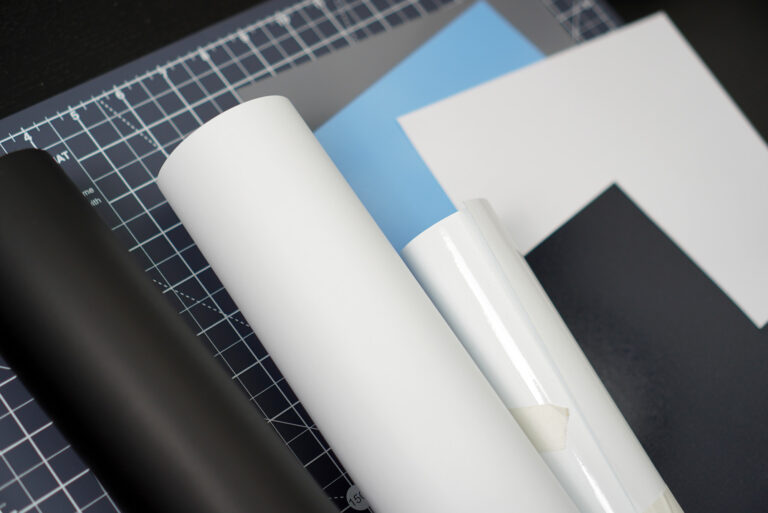
You might have noticed that the HTV has a matte side and a shiny side. The shiny side is the plastic backing, while the matte side is the vinyl itself. This is the part that adheres to your t-shirt.
You want to place the vinyl onto the cutting mat where the matte side is facing up. What you want to cut is the vinyl, not the plastic backing.
Load the mat into the cutting machine and start cutting by clicking “Send”.
Step 4: Weeding the excess vinyl
After your machine finished cutting, take the vinyl off of the mat and start weeding. A weeding tool is perfect for this job, but if you don’t have one, just take anything that’s sharp and pointy like an X-acto knife or a needle.
Pull up the excess vinyl.
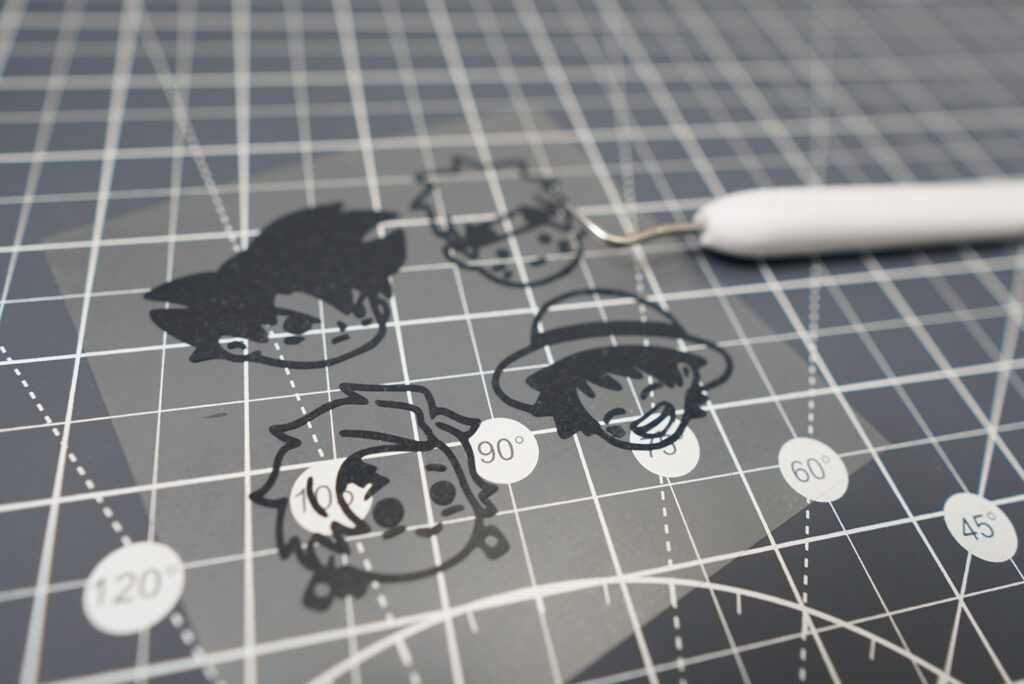
Make sure you’re not pulling the vinyl part that’s supposed to be transferred onto your t-shirt. Pay extra attention as you weed.
If you have a cameo 4, you can use the punching tool to puncture weeding points. These points tell you exactly where you should weed. What a life-saver!

Step 5: Transfer the design onto your T-shirt
Now you are ready to apply your design to your t-shirt using the heat-press method.
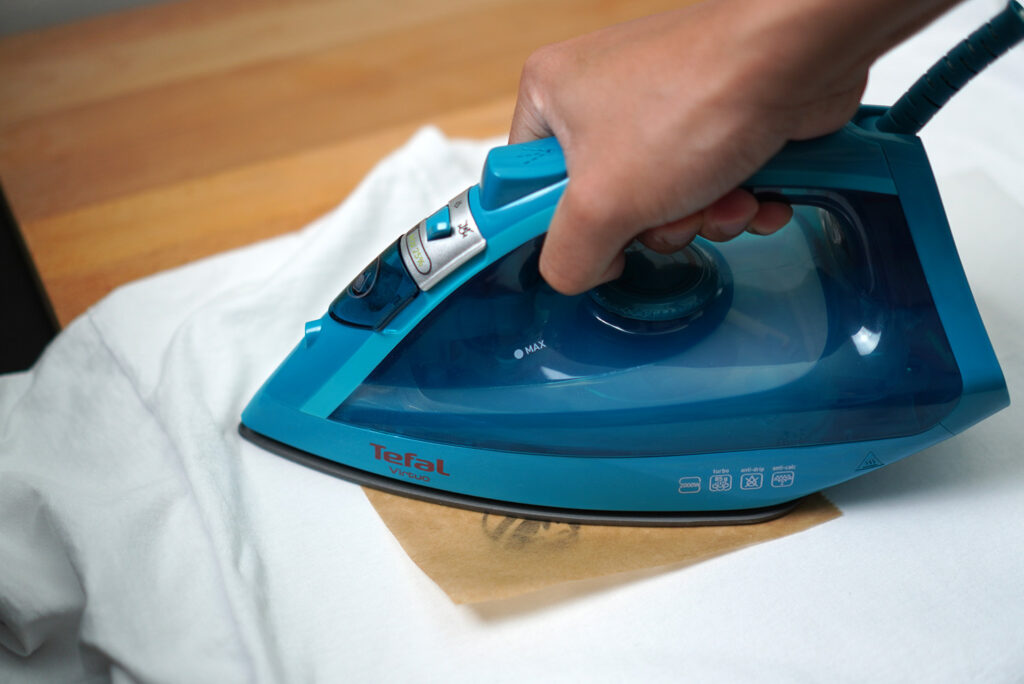
You can find the application instruction for Poli-Flex Turbo down below. If you’re using a household iron like I do, use the third highest setting on the iron. Make sure to turn off the steam setting.
You can also check the temperature ranges of each setting from the product information of your iron’s manufacturer, if that’s available.
Application Instruction
- Temperature: 135°C-165°C, no steam
- Time: 5 s
- Pressure: moderate to high
- Warm/Lukewarm peel
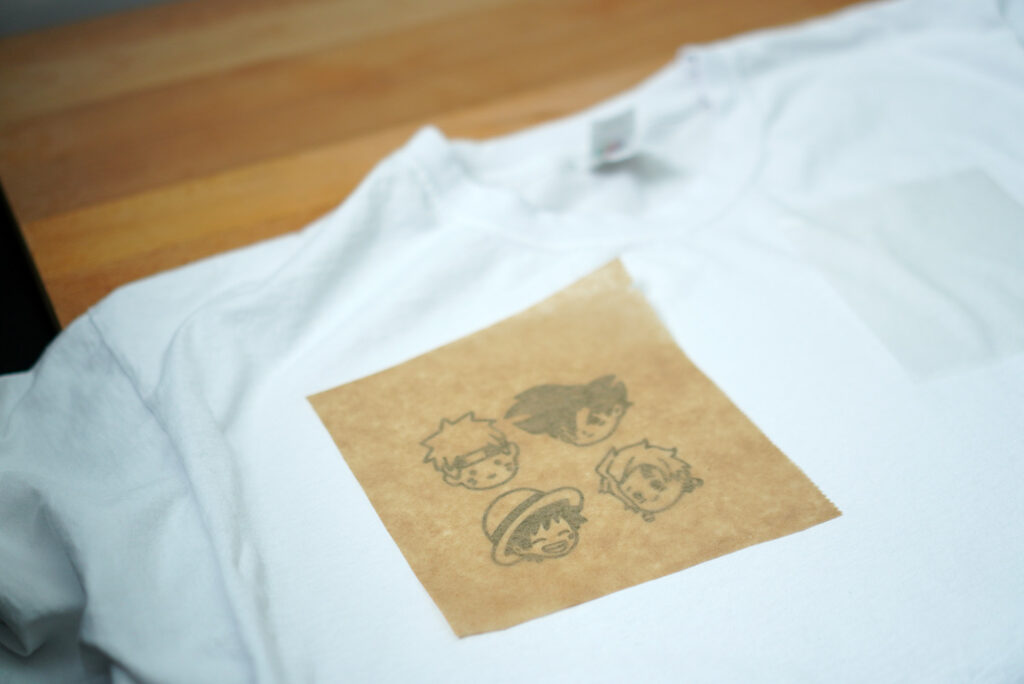
Lay your t-shirt on a flat, sturdy surface. Pre-heat the area of the t-shirt where you want the design to go by ironing it for a few seconds. Place the vinyl on your shirt.
Make sure you place it so that the shiny side is facing up. Remember, the shiny side is the plastic backing. The matte side needs to be touching the fabric, since this is the vinyl part that gets transferred.
Place a parchment paper on top of it and press down the iron, applying as much pressure as you can. You want to make sure to move the iron around as you press so that the whole design gets the same amount of heat and pressure.
If you don’t have a parchment paper, you can use a thin piece of fabric like a pillowcase.
For the best result, make sure you use a pre-washed t-shirt. This ensures that any residue, coating, and dusts from manufacturing process are completely washed off.
Step 6: Peeling off the plastic backing
Wait for a few seconds until it cools down slightly, then peel off the clear plastic backing carefully.
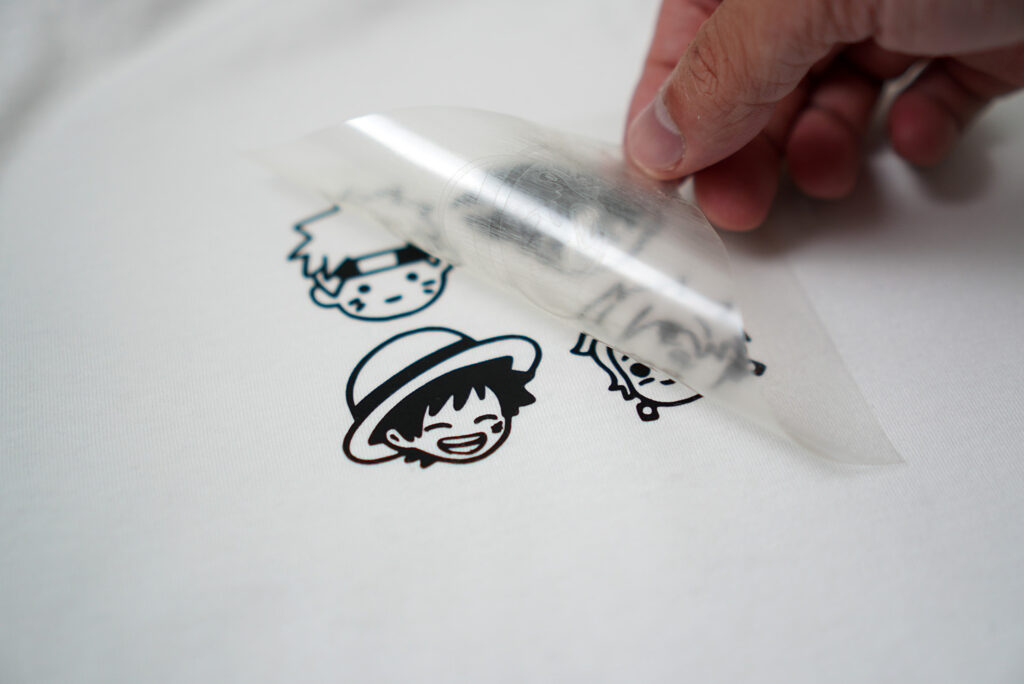
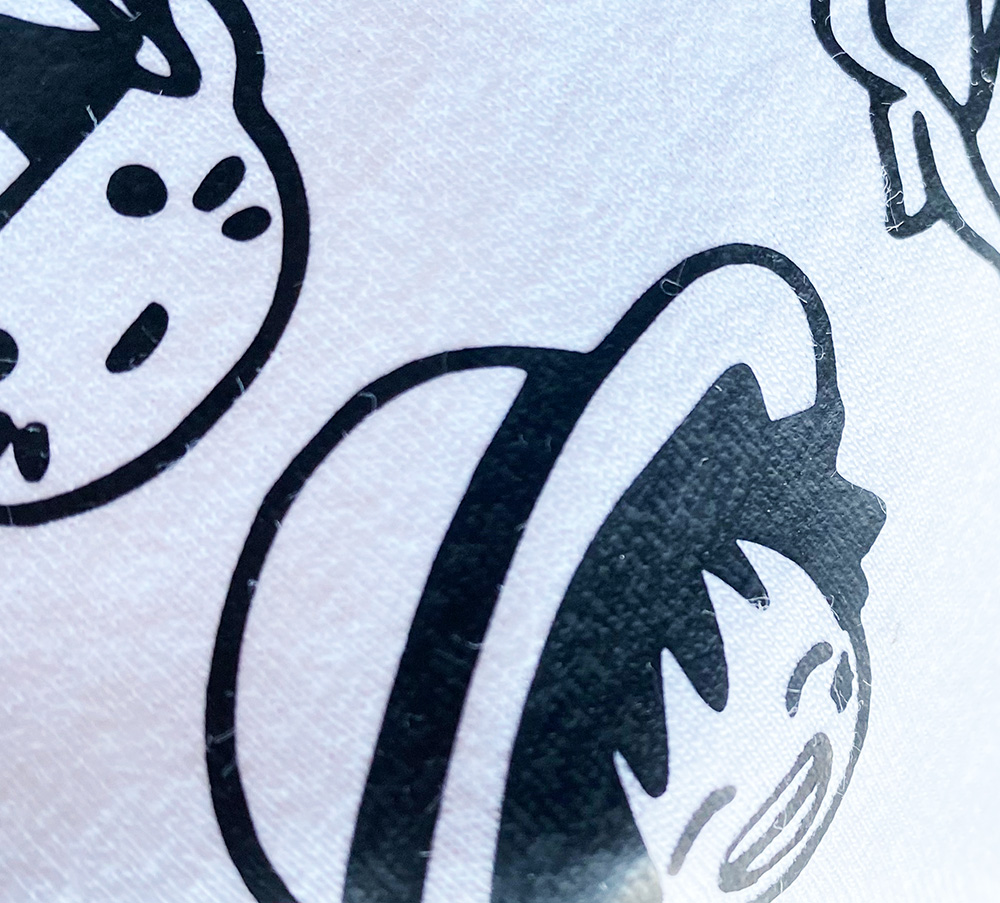
The good indicator that the vinyl adhered to the shirt properly is when you see the texture of the fabric through the vinyl.
If the vinyl part lifts while you peel off the backing, chances are, you didn’t apply enough heat or pressure. At this point, you might have ruined your shirt. You can try to re-apply more heat and pressure and if you’re lucky, you might still be able to save it.
Make sure to read the manufacturer’s instruction properly. If the vinyl is Cold Peel, it means that you need to let it cool down properly before peeling off the plastic backing. Poli-flex Turbo needs to be peeled off while it’s still warm or lukewarm.
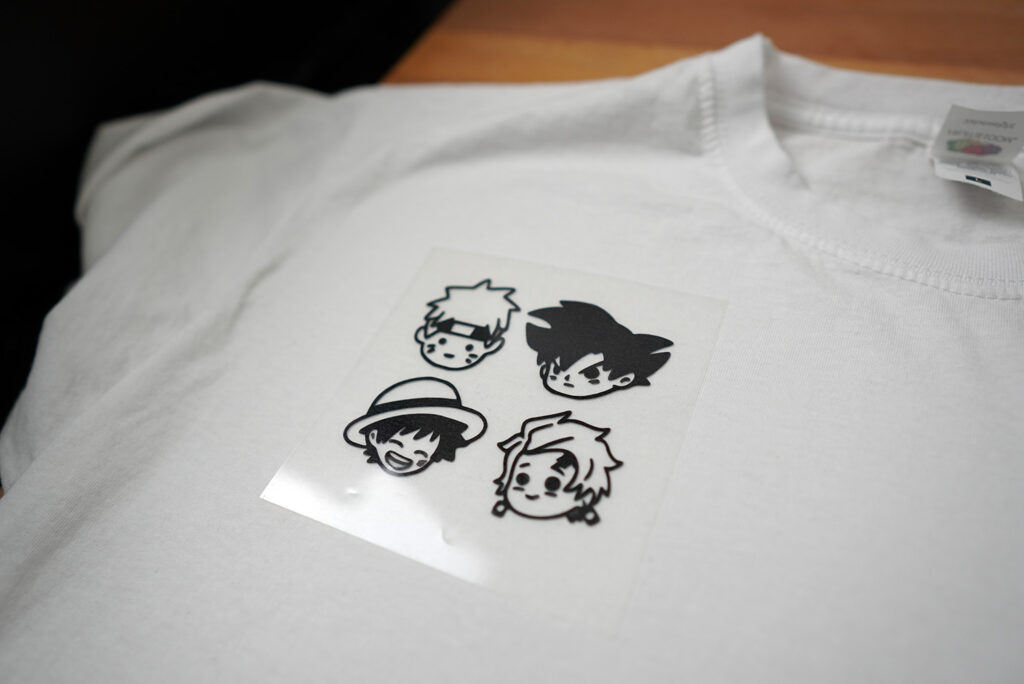
And there we go! Doesn’t that look awesome?
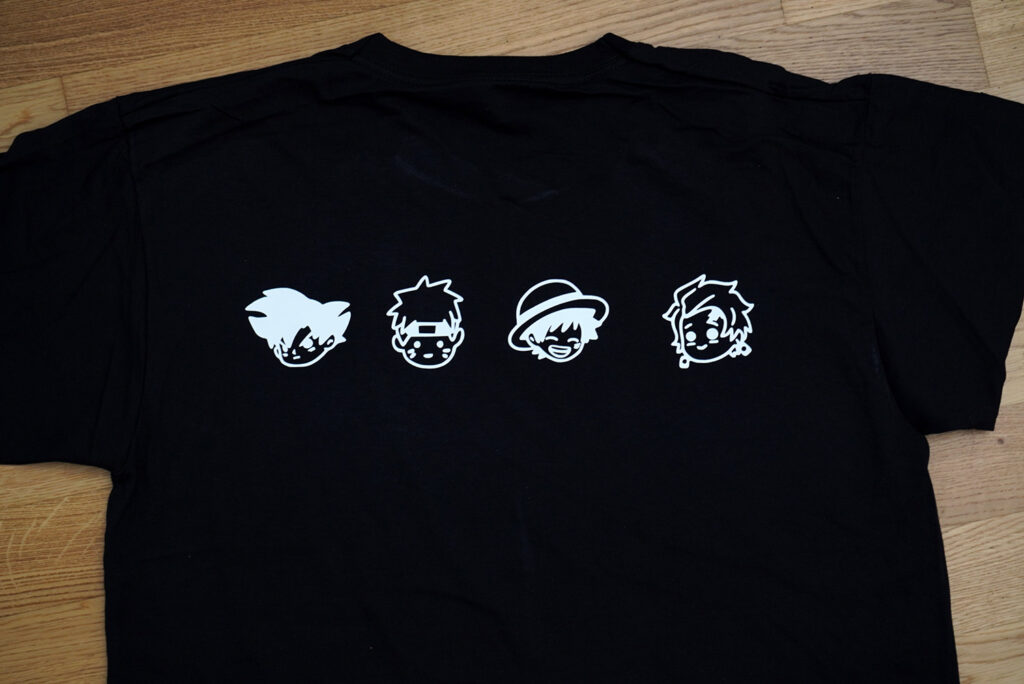
I loved it so much, i even made another T-shirt using the white HTV:


That looks awesome! Should i add more anime characters? Which character would you like to see on the shirt?
Applying multiple layers of HTV to a T-shirt
Another way to make your own t-shirt is to layer multiple colors of vinyl on your shirt. This only makes sense if your design has more than just one color.
If you’re keen to create multicolored designs, just don’t go too crazy with it. Try to limit the number of colors you use in your design.
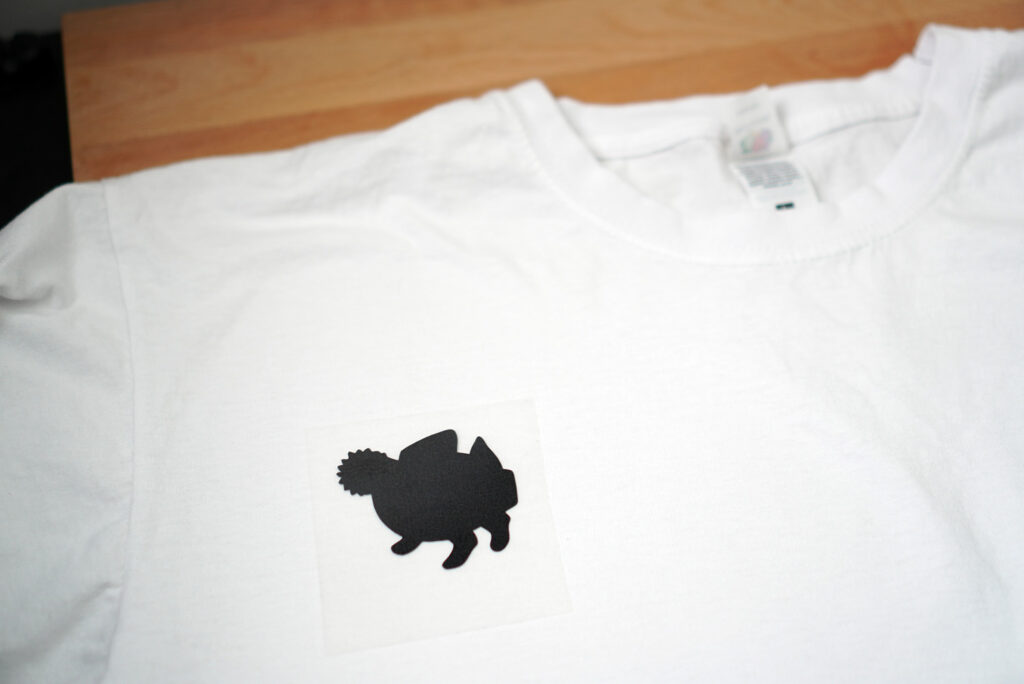
For this tutorial, I’m going to make a Pochita t-shirt. So let’s do just that!
Step 1: Creating / choosing your design
Making a layered HTV t-shirt isn’t that easy. It takes a bit of planning when creating the design. The more colors you have in your design, the more layers you would have to apply to your t-shirt.
For my Pochita T-shirt, I tried to design it so that I would only need 5 colors:

I tried to simplify my design by leaving out the fine details since I don’t want the lines to be too thin. My final design of Pochita:

Each layer of HTV that we need to cut will include all the individual pieces of the same color. So if we break the drawing down into 5 different layers, it will look something like this:

Step 2: Grouping each individual piece of the same color
All pieces of the same color need to be grouped separately. There are several ways to do it. Let’s look at all the possible options!
Option 1: Drawing one color on one layer
If you’re using a drawing software to draw like Procreate, draw everything that has the same color on one layer.
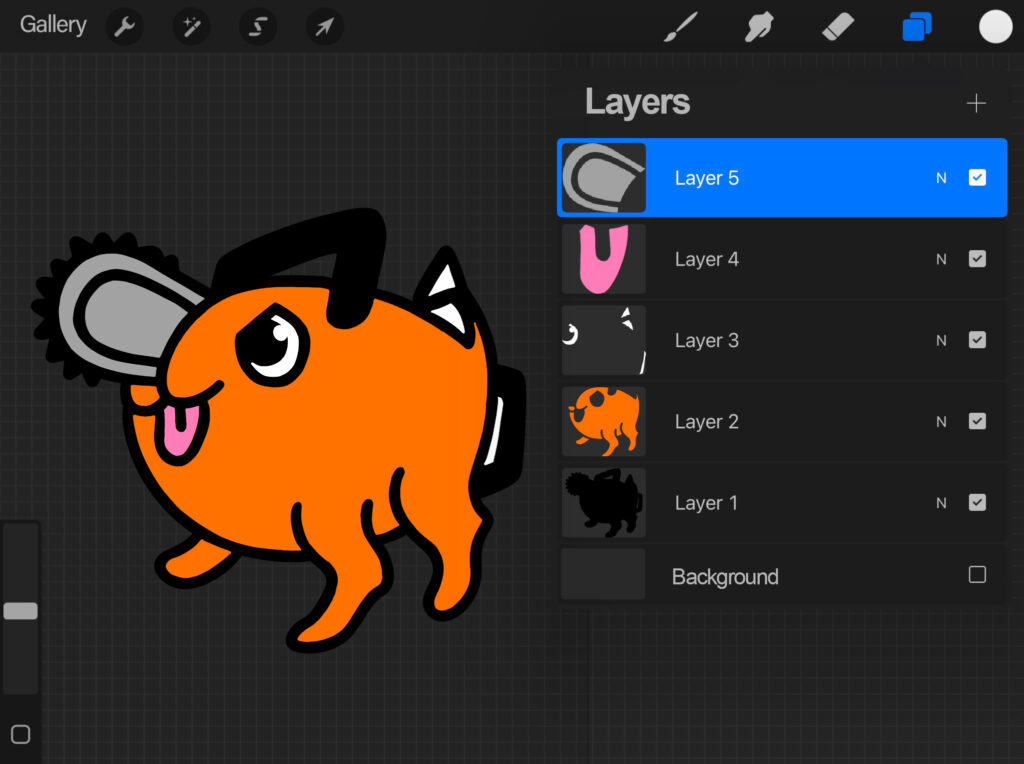
Uncheck all other boxes on the right except the box of Layer 1, then export as PNG to your computer, just like in Step 1. Except this time, we’re going to export all layers to PNG seperately, so repeat the same process for all the other remaining layers.
When you have all the layers transferred to your computer as separate PNG images, you are ready to import them to your software. You can either open them as separate project or merge them to one single project.
Although this is not the most efficient way to do it, it is an option to consider if the other options are not available to you.
Option 2: Working with SVG files
If the image is in SVG format, the pieces that make the image are like puzzle pieces and like puzzle pieces, you can move them around. You can select the pieces that have the same color and group them together. This way, you can cut one group at a time.
You can’t create SVG image on Procreate, so you need to somehow convert your PNG image to SVG.
To do this, you can use a free online png to svg converter, like the one on pngtosvg.com. Upload your PNG image and it will convert your image to SVG in seconds.
I can understand that some people are not comfortable using free online services that process your images. You don’t know what they might do with them. Well in that case, you still have Option 3!
Option 3: Silhouette Studio
If you’re using Silhouette Studio, import your image to your Silhouette Studio software. It doesn’t matter if your image is in PNG or JPG/JPEG format.
Next, we need to use the trace feature to create the outline of each individual piece. Click the Trace icon and select Select Trace Area.
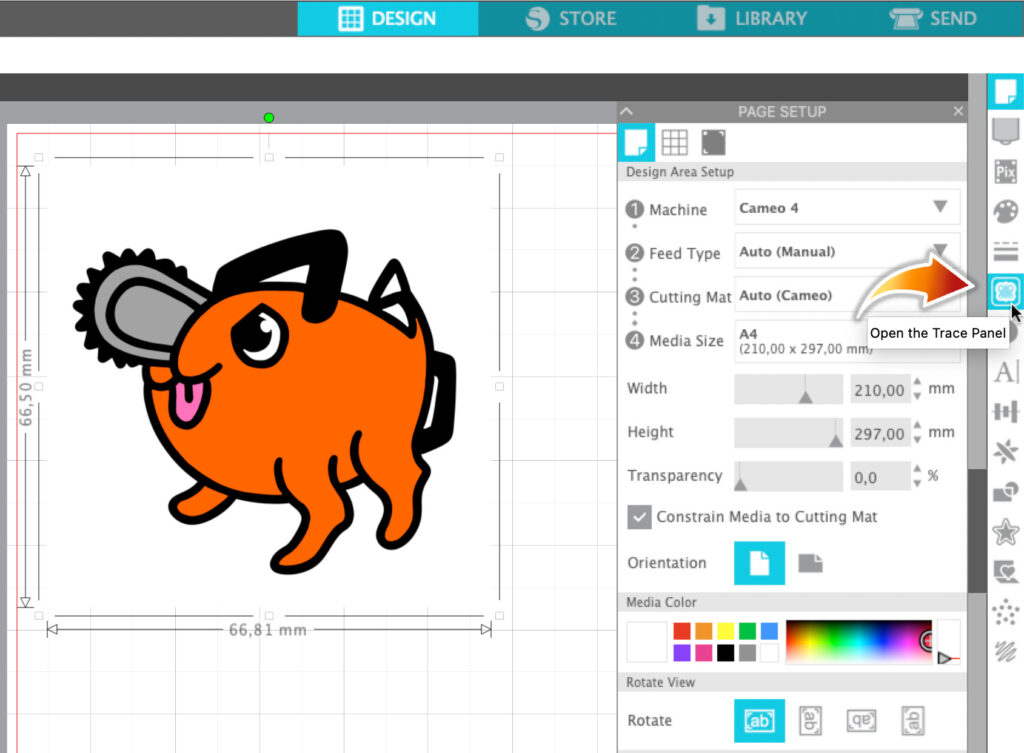
Highlight the image and click Trace. Silhouette Studio will automatically generate the cut lines for you. At this point, you can move your image to the side or delete it if you want. You can’t move the individual pieces separately yet.
Then you want to right click on your image and select Release compound path. While holding shift, select all the pieces that should have the same color, right click, and select Group.
Then you can arrange these groups and position them in any way you want. Just don’t forget to mirror your image!
To mirror your image, select it, hover to Object, click Mirror and select Flip Horizontally.
I like to cut all colors at once, so I will arrange them this way:
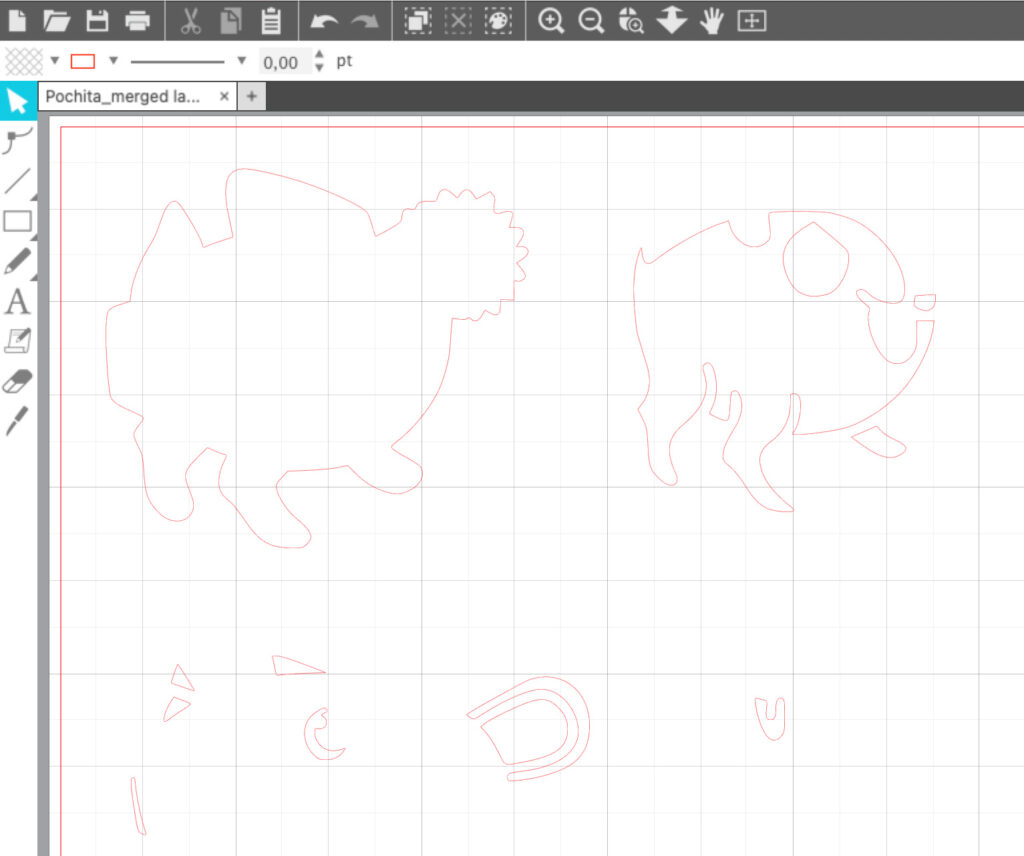
We are now ready for the next step.
For those who use Cricut Design Space, there is a similar feature you can use, but it’s not as intuitive. You also have an option to create SVG file of your image using Silhoutte Studio which you can then import to Cricut Design Space. You would need the Silhouette Studio Business Edition to do that, though.
Step 3: Loading the mat into the cutting machine
If you grouped your pieces like I did, you can cut all of them at once and save so much time.
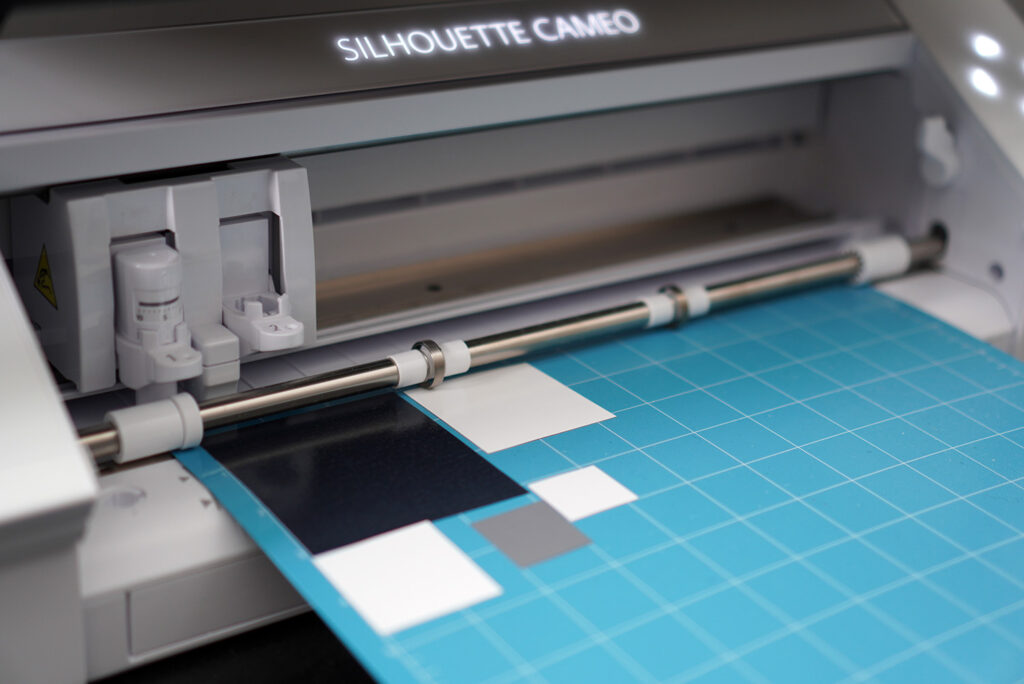
Cut your vinyl to smaller pieces and place them onto the cutting mat where the matte side is facing up. Use the ruler feature and grid lines as a guide so you know exactly where to place the vinyl.
Load the mat into the cutting machine and start cutting by clicking “Send”.

Step 4: Weeding the excess vinyl
After your machine finished cutting, take the vinyl off from the mat and start weeding.

Step 5: Transfer the design onto your T-shirt
Just like previously, preheat your t-shirt, use the third highest setting on the iron making sure that the steam setting is turned off.
Then begin applying the first layer of vinyl. In our case, this would be the black layer. After removing the plastic backing, we’re now ready for the second layer, which is our orange layer.
Place the vinyl on top of the black layer and try to line up the design by eyeballing it. The black vinyl might’ve shrunk a bit, but that’s totally normal.
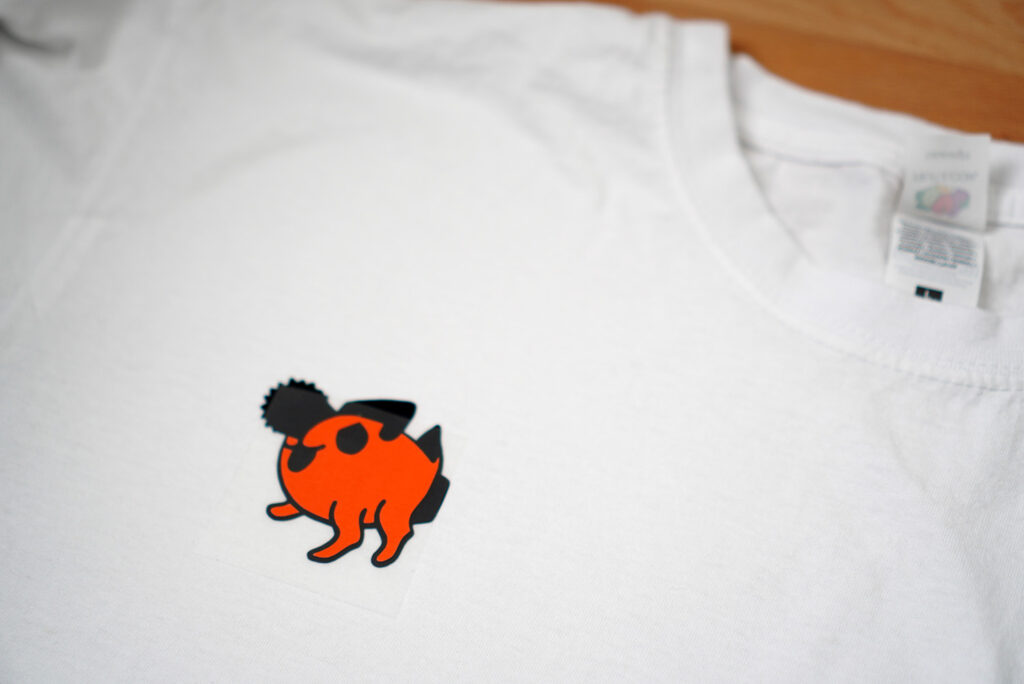
The next layer would be the white layer, but if I cut the vinyl smaller, I can then make space for the pink layer and grey layer. That means that I can apply three layers at once!
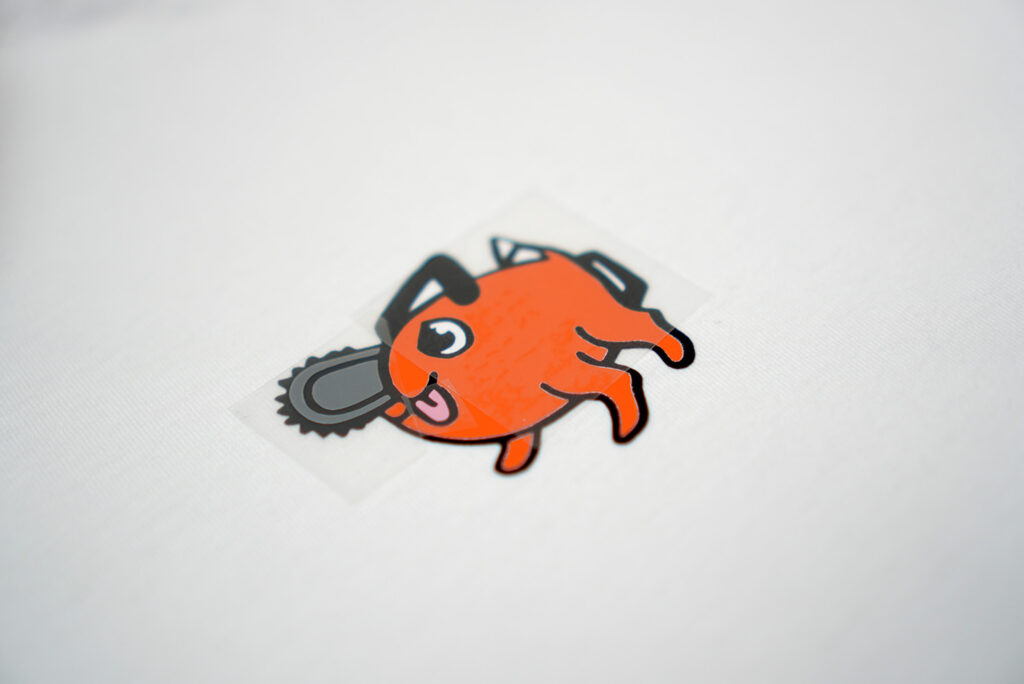
If you’re afraid that they might move while you press, you could use heat-resistant tape to keep them in place.
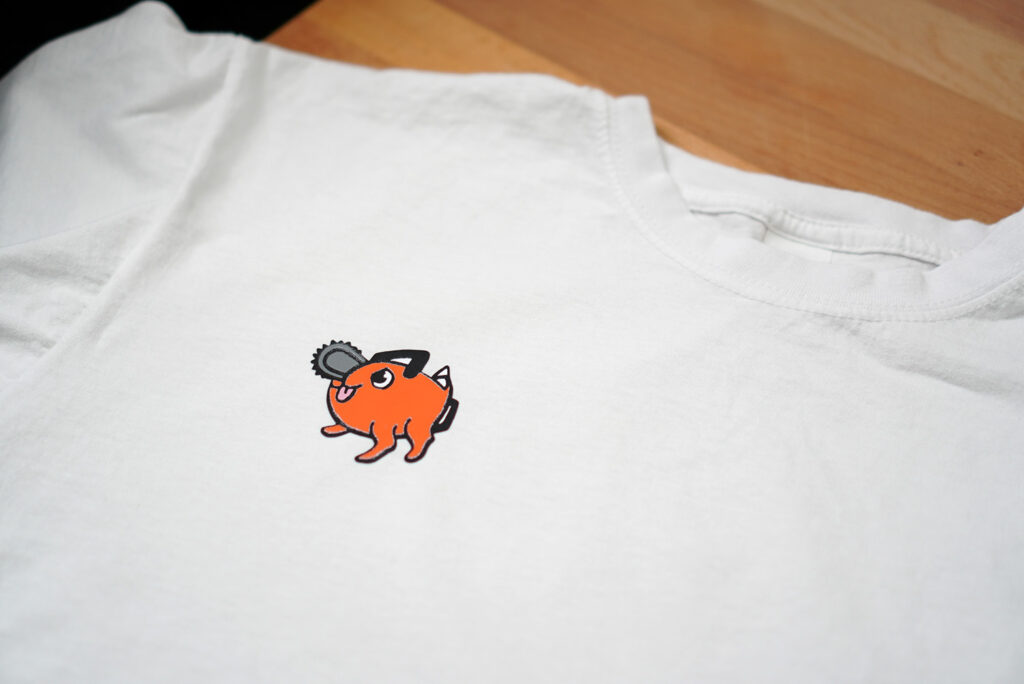
Tell me if you like how it turned out!
Washing and care instructions
In all cases, you want to wait 24 hours before washing your t-shirt. To prolong the vinyl’s life, turn the t-shirt inside out when you wash it.
Here are the care instructions and washing recommendation from each manufacturer: